——
#DonLucElectronics #DonLuc #Environment #Geiger #DFRobot #Project #IoT #Fritzing #Programming #Electronics #Microcontrollers #Consultant
——
——
——

——
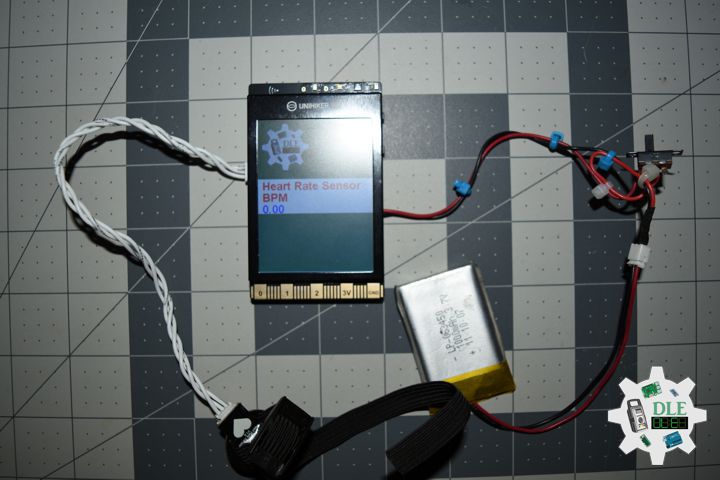
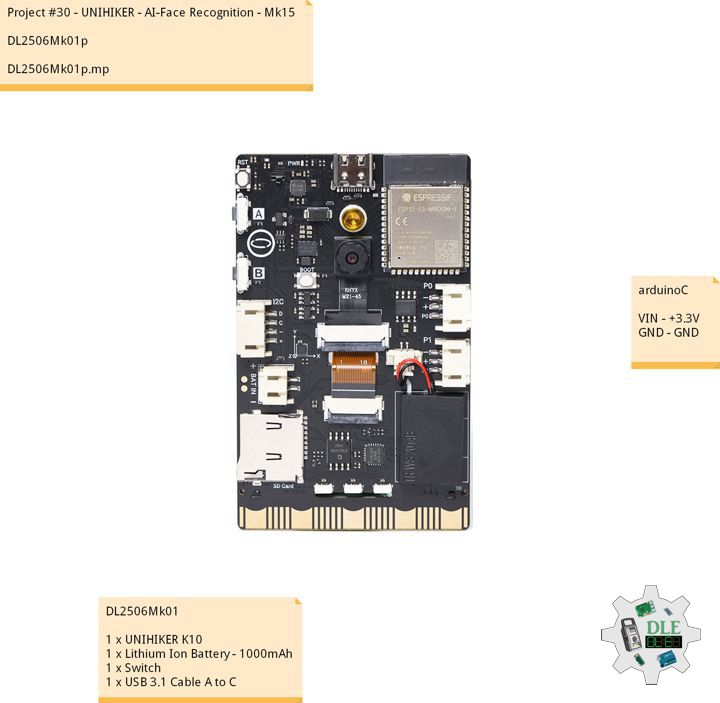
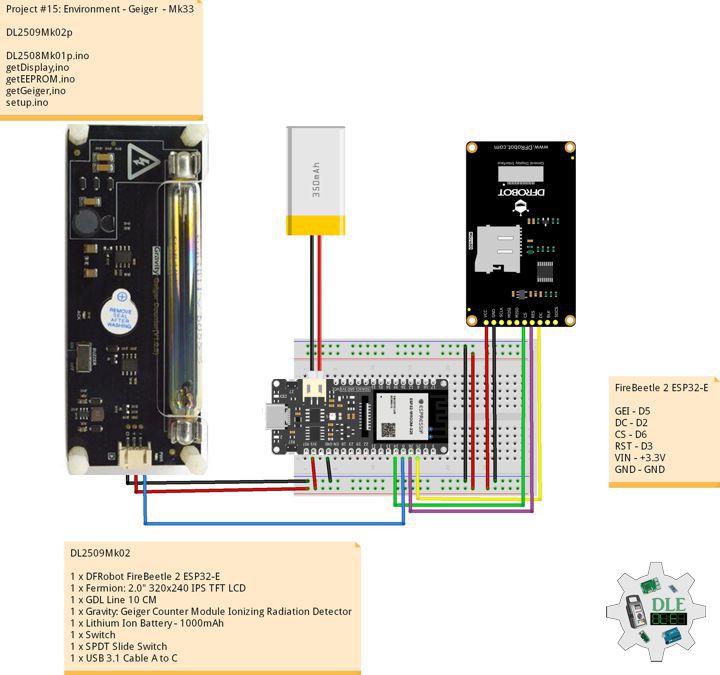
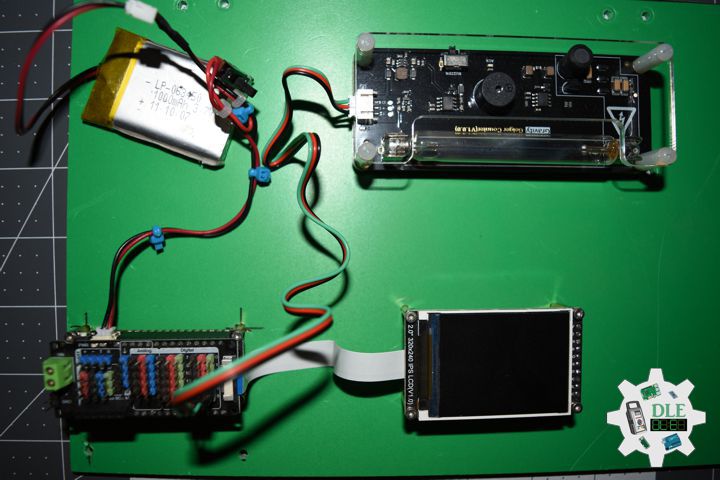
Gravity: Geiger Counter Module Ionizing Radiation Detector
Ionizing radiation, an invisible and intangible enemy, exists not only in nuclear power plant reactors. In fact, we are bombarded by radiation from the surrounding environment and outer space all the time, but fortunately our body is strong enough to resist the natural background radiation.
No active contact does not mean that high-energy ionizing radiation will not be encountered. Natural marble building materials, ore gems with different colors, and “negative ion powder” of unknown composition may contain different amounts of radioactive elements. With the use of a Geiger counter, these radioactive sources have nowhere to hide.
In addition, the Geiger counter is a good random number generator, and undetermined high-energy particle ionization events can provide enough random entropy to get you a truly random number, rather than a fixed random sequence based on a random algorithm.
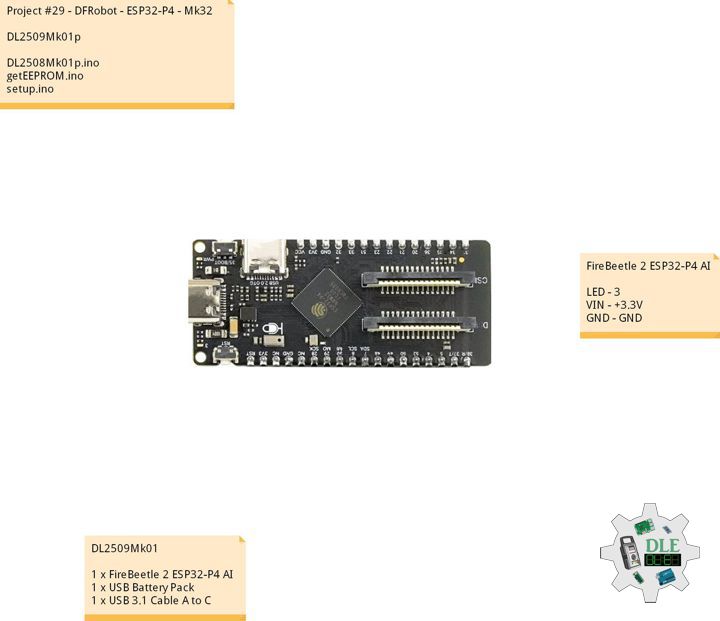
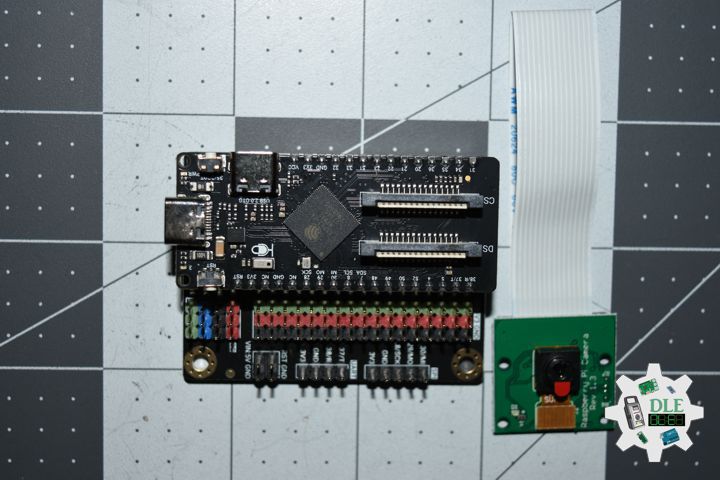
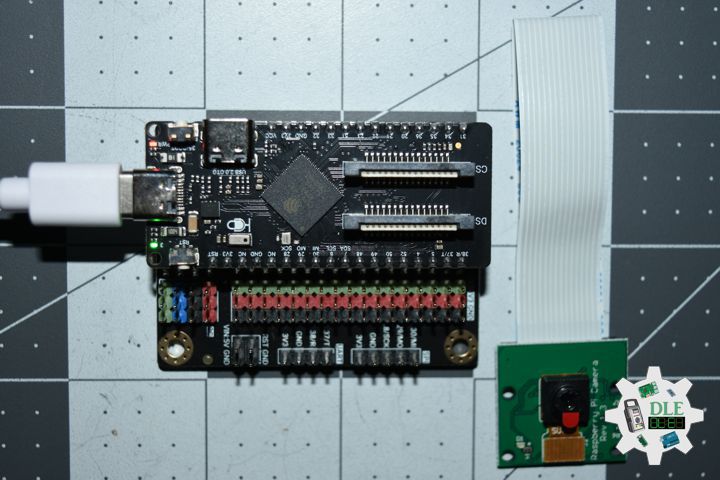
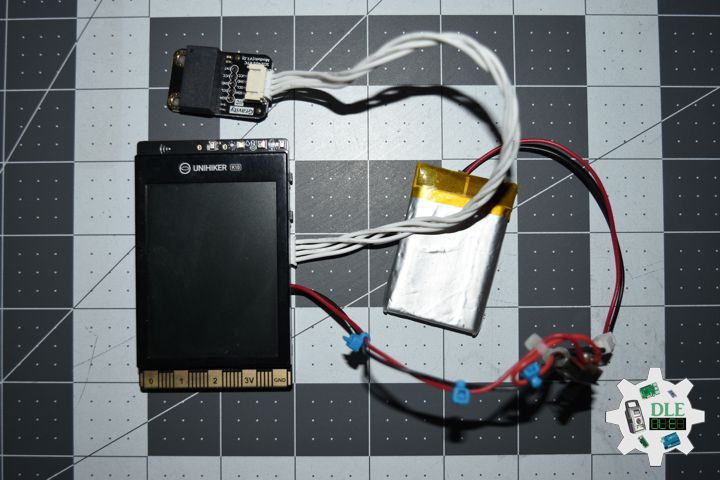
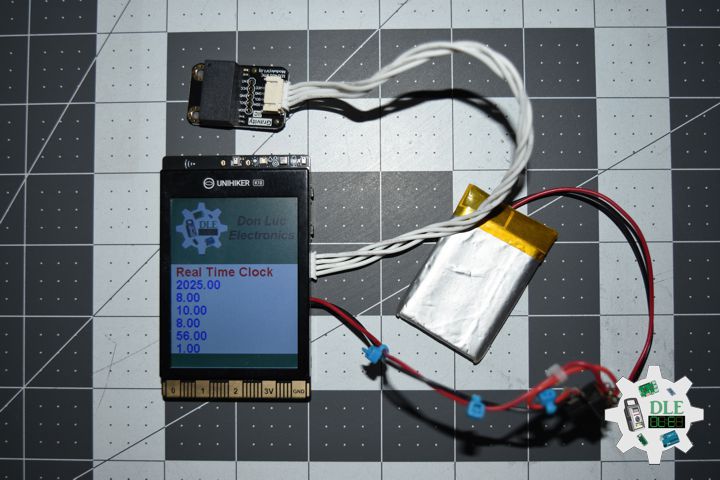
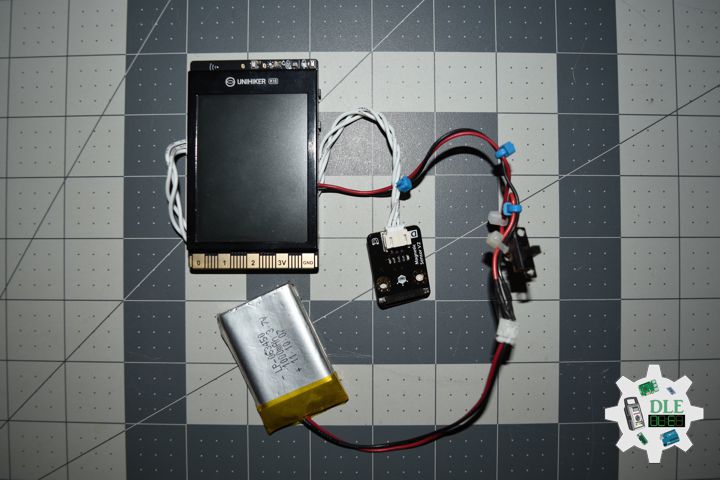
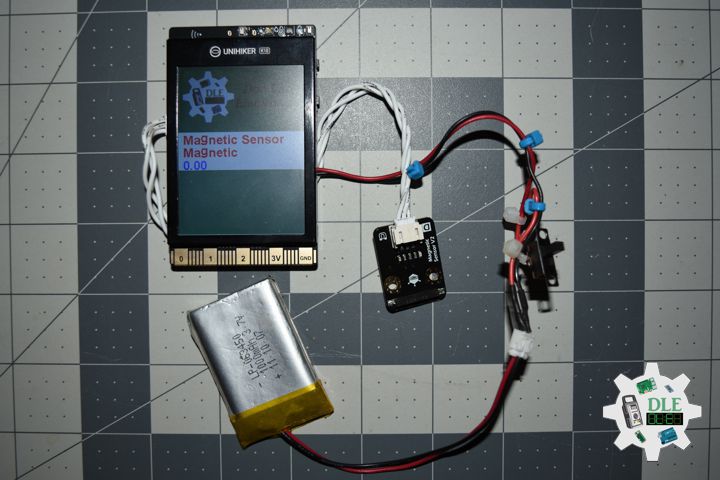
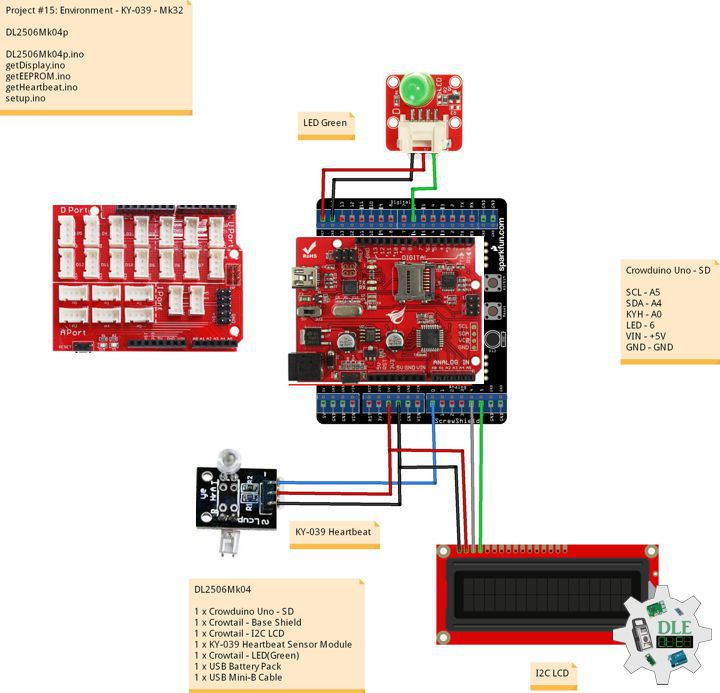
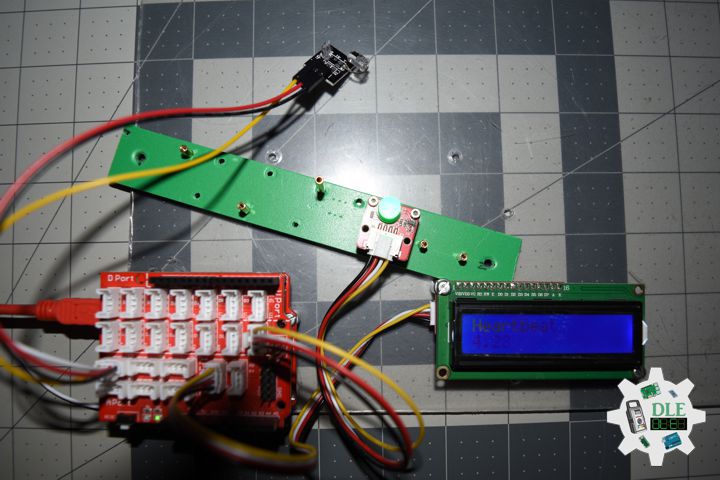
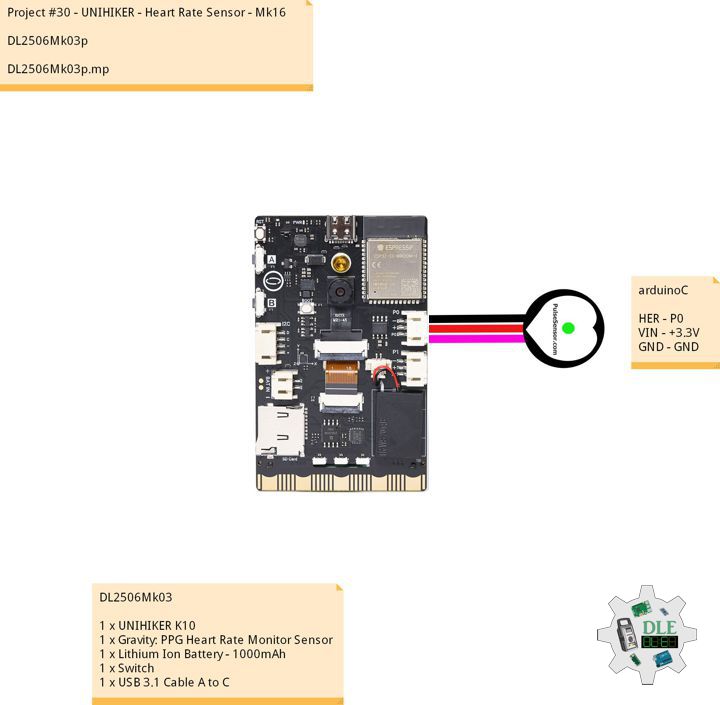
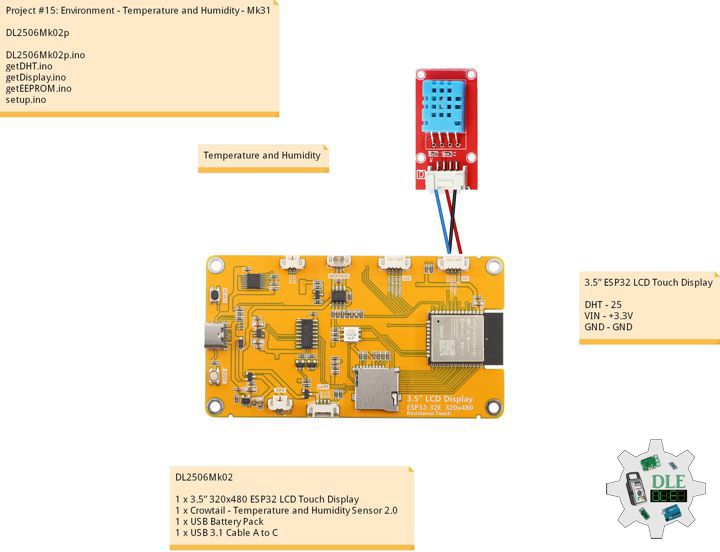
DL2509Mk02
1 x DFRobot FireBeetle 2 ESP32-E
1 x Fermion: 2.0″ 320×240 IPS TFT LCD
1 x GDL Line 10 CM
1 x Gravity: IO Shield for FireBeetle 2
1 x Gravity: Geiger Counter Module Ionizing Radiation Detector
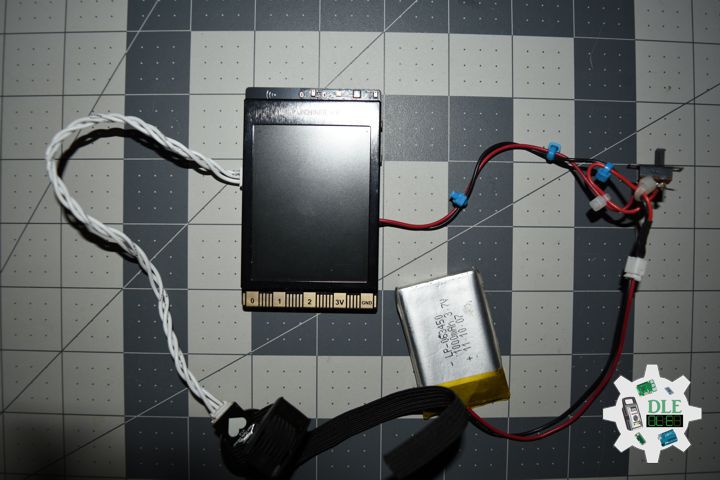
1 x Lithium Ion Battery – 1000mAh
1 x Switch
1 x SPDT Slide Switch
1 x USB 3.1 Cable A to C
DL2509Mk02p
DL2508Mk01p.ino
/****** Don Luc Electronics © ******
Software Version Information
Project #15: Environment - Geiger  - Mk33
15-33
DL2509Mk02p.ino
DL2509Mk02
1 x DFRobot FireBeetle 2 ESP32-E
1 x Fermion: 2.0" 320x240 IPS TFT LCD
1 x GDL Line 10 CM
1 x Gravity: IO Shield for FireBeetle 2
1 x Gravity: Geiger Counter Module Ionizing Radiation Detector
1 x Lithium Ion Battery - 1000mAh
1 x Switch
1 x USB 3.1 Cable A to C
*/

// Include the Library Code
// EEPROM Library to Read and Write EEPROM
// with Unique ID for Unit
#include "EEPROM.h"
// DFRobot Display GDL API
#include <DFRobot_GDL.h>
// DFRobot Geiger
#include <DFRobot_Geiger.h>

// DFRobot Geiger
#define detect_pin D5
DFRobot_Geiger  geiger(detect_pin);
float iCPM = 0;
float inSvh = 0;
float iuSvh = 0;

// Defined ESP32
#define TFT_DC  D2
#define TFT_CS  D6
#define TFT_RST D3

/*dc=*/ /*cs=*/ /*rst=*/
// DFRobot Display 240x320
DFRobot_ST7789_240x320_HW_SPI screen(TFT_DC, TFT_CS, TFT_RST);

// EEPROM Unique ID Information
#define EEPROM_SIZE 64
String uid = "";

// Software Version Information
String sver = "15-33";

void loop() {

  // isGeiger
  isGeiger();

  // isGeiger Display
  isDisplayGeiger();

  // Delay 3 Second
  //delay( 3000 );

}
getDisplay,ino
// DFRobot Display 240x320
// DFRobot Display 240x320 - UID
void isDisplayUID(){

  // DFRobot Display 240x320
  // Text Display
  // Text Wrap
  screen.setTextWrap(false);
  // Rotation
  screen.setRotation(3);
  // Fill Screen => black
  screen.fillScreen(0x0000);
  // Text Color => white
  screen.setTextColor(0xffff);
  // Font => Free Sans Bold 12pt
  screen.setFont(&FreeSansBold12pt7b);
  // TextSize => 1.5
  screen.setTextSize(1.5);
  // Don Luc Electronics
  screen.setCursor(0, 30);
  screen.println("Don Luc Electronics");
  // SD
  screen.setCursor(0, 60);
  screen.println("Geiger");
  // Version
  screen.setCursor(0, 90);
  screen.println("Version");
  screen.setCursor(0, 120);
  screen.println( sver );
  // EEPROM
  screen.setCursor(0, 150);
  screen.println("EEPROM");
  screen.setCursor(0, 180);
  screen.println( uid );

}
// isGeiger Display
void isDisplayGeiger(){

  // DFRobot Display 240x320
  // Text Display
  // Text Wrap
  screen.setTextWrap(false);
  // Rotation
  screen.setRotation(3);
  // Fill Screen => white
  screen.fillScreen(0xffff);
  // Text Color => blue
  screen.setTextColor(0x001F);
  // Font => Free Sans Bold 12pt
  screen.setFont(&FreeSansBold12pt7b);
  // TextSize => 1.5
  screen.setTextSize(1.5);
  // Geiger
  screen.setCursor(0, 30);
  screen.println("Geiger");
  // CPM
  screen.setCursor(0, 60);
  screen.println("CPM: ");
  screen.setCursor(90, 60);
  screen.println( iCPM );
  // nSvh
  screen.setCursor(0, 90);
  screen.println( "nSvh: " );
  screen.setCursor(90, 90);
  screen.println( inSvh );
  // uSvh
  screen.setCursor(0, 120);
  screen.println( "uSvh: " );
  screen.setCursor(90, 120);
  screen.println( iuSvh );

}
getEEPROM.ino
// EEPROM
// isUID EEPROM Unique ID
void isUID() {

  // Is Unit ID
  uid = "";
  for (int x = 0; x < 7; x++)
  {
    uid = uid + char(EEPROM.read(x));
  }

}
getGeiger,ino
// DFRobot Geiger
// isGeiger
void isGeiger(){

  // Delay 3 Second
  delay( 3000 );

  // Geiger
  iCPM = geiger.getCPM();
  inSvh = geiger.getnSvh();
  iuSvh = geiger.getuSvh();

}
setup.ino
// Setup
void setup()
{

  // Delay
  delay( 100 );

  // EEPROM Size
  EEPROM.begin(EEPROM_SIZE);

  // EEPROM Unique ID
  isUID();

  // Delay
  delay(100);

  // DFRobot Geiger
  geiger.start();

  // Delay
  delay(100);

  // DFRobot Display 240x320
  screen.begin();

  // Delay
  delay( 100 );

  // DFRobot Display 240x320 - UID
  // Don Luc Electronics
  // Version
  isDisplayUID();

  // Delay 5 Second
  delay( 5000 );

}
——
People can contact us: https://www.donluc.com/?page_id=1927
Consultant, R&D, Electronics, IoT, Teacher and Instructor
- Programming Language
- Single-Board Microcontrollers (PIC, Arduino, Raspberry Pi, Arm, Silicon Labs, Espressif, Etc…)
- IoT
- Wireless (Radio Frequency, Bluetooth, WiFi, Etc…)
- Robotics
- Automation
- Camera and Video Capture Receiver Stationary, Wheel/Tank , Underwater and UAV Vehicle
- Unmanned Vehicles Terrestrial, Marine and UAV
- Machine Learning
- Artificial Intelligence (AI)
- RTOS
- Sensors, eHealth Sensors, Biosensor, and Biometric
- Research & Development (R & D)
- Consulting
Follow Us
Luc Paquin – Curriculum Vitae – 2024
https://www.donluc.com/luc/
Web: https://www.donluc.com/
Facebook: https://www.facebook.com/neosteam.labs.9/
YouTube: https://www.youtube.com/@thesass2063
Twitter: https://twitter.com/labs_steam
Pinterest: https://www.pinterest.com/NeoSteamLabs/
Instagram: https://www.instagram.com/neosteamlabs/
DFRobot: https://learn.dfrobot.com/user-10186.html
Elecrow: https://www.elecrow.com/share/sharepj/center/no/760816d385ebb1edc0732fd873bfbf13
TikTok: https://www.tiktok.com/@luc.paquin8
Hackster: https://www.hackster.io/luc-paquin
LinkedIn: https://www.linkedin.com/in/jlucpaquin/
Don Luc