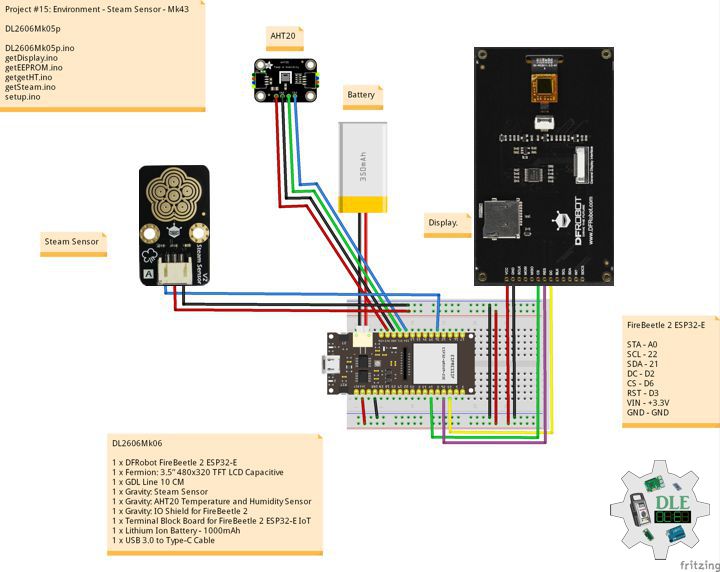
——
#DonLucElectronics #DonLuc #Mozzi #Potentiometer #ArduinoUNO #IoT #Project #Fritzing #Programming #Electronics #Microcontrollers #Consultant
——
——
——
——
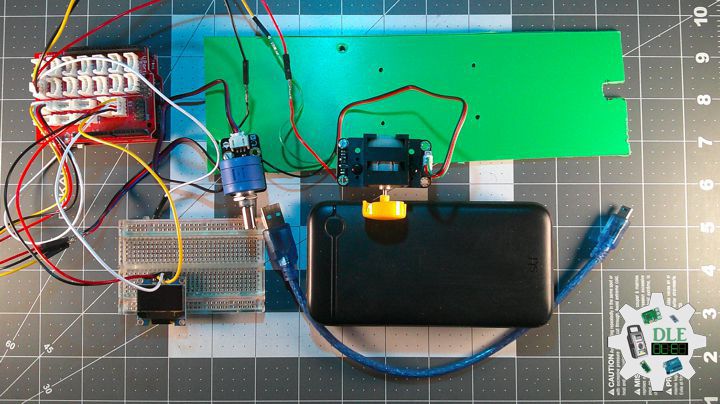
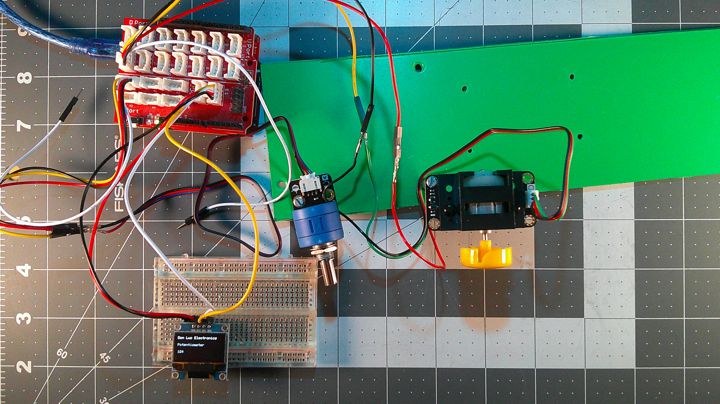
Mozzi
Currently your Arduino can only beep like a microwave oven. Mozzi brings your Arduino to life by allowing it to produce much more complex and interesting growls, sweeps and chorusing atmospherics. These sounds can be quickly and easily constructed from familiar synthesis units like oscillators, delays, filters and envelopes.
You can use Mozzi to generate algorithmic music for an installation or performance, or make interactive sonifications of sensors, on a small, modular and super cheap Arduino, without the need for additional shields, message passing or external synths.
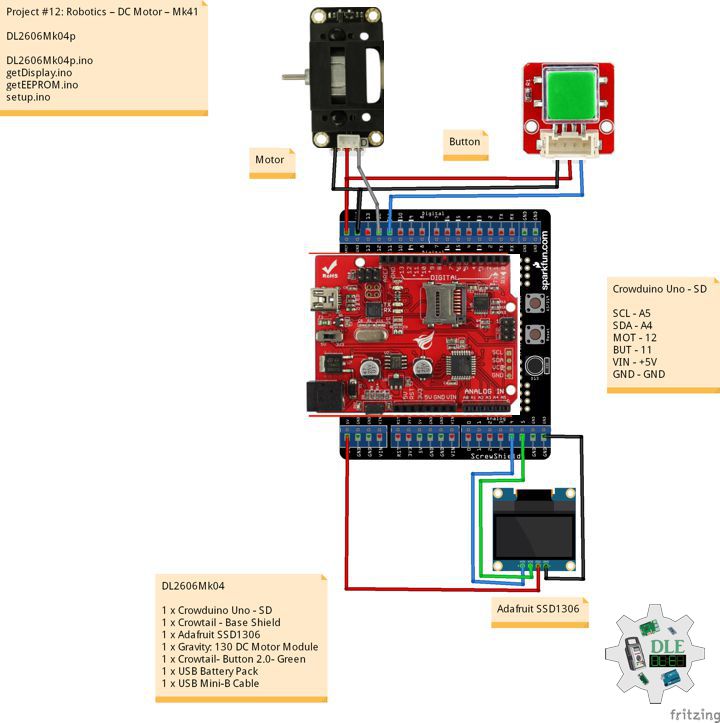
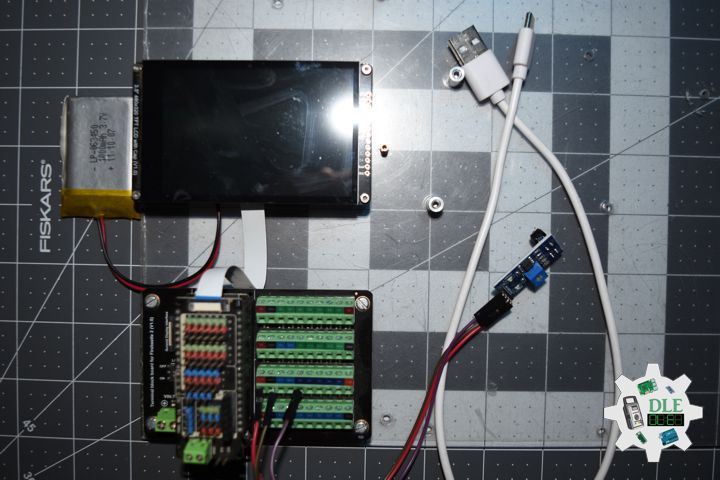
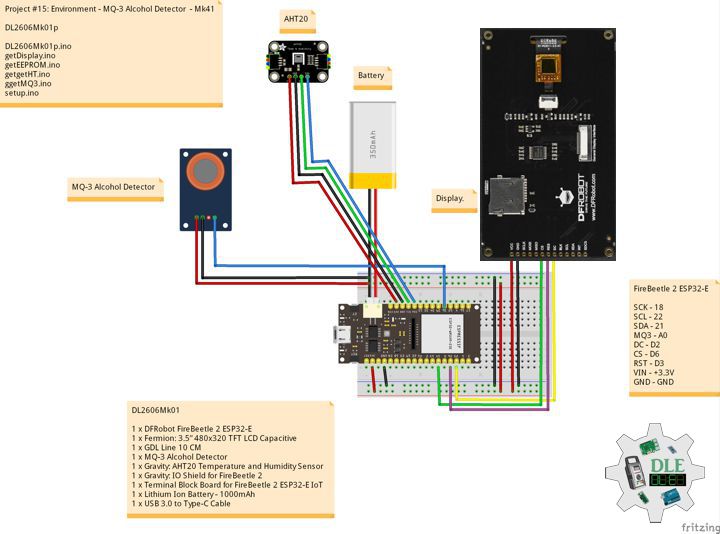
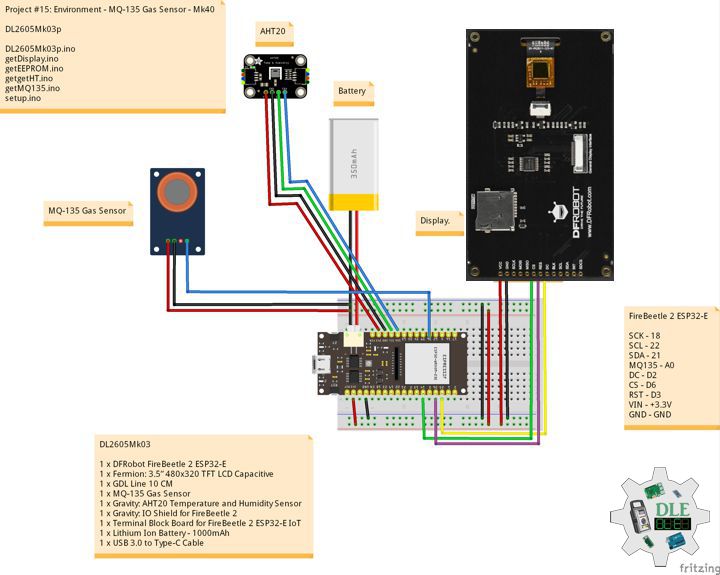
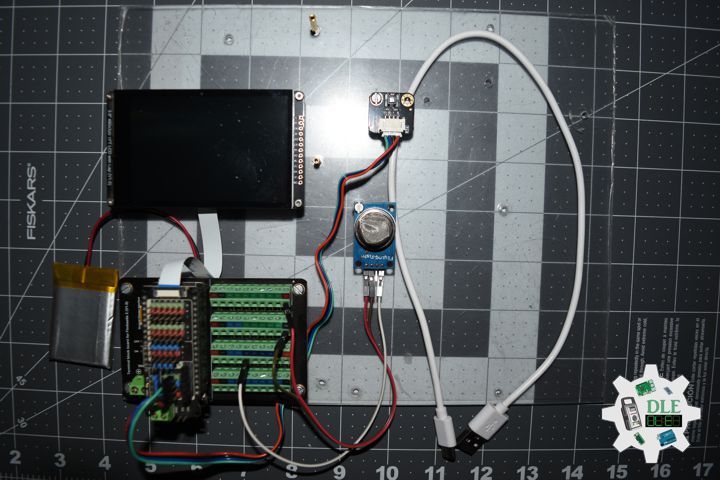
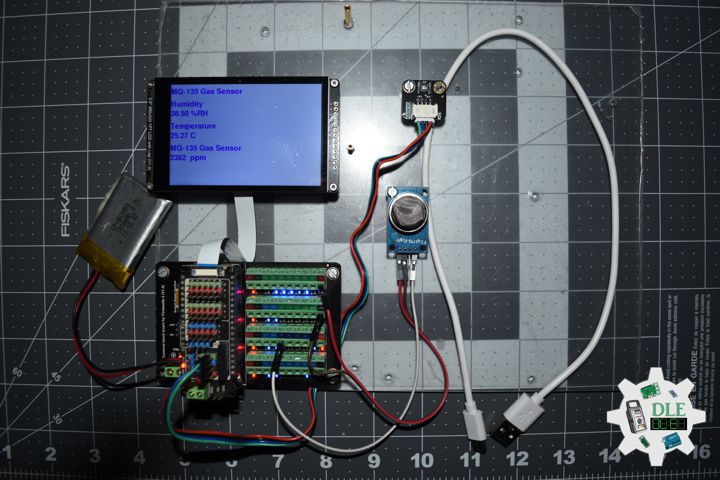
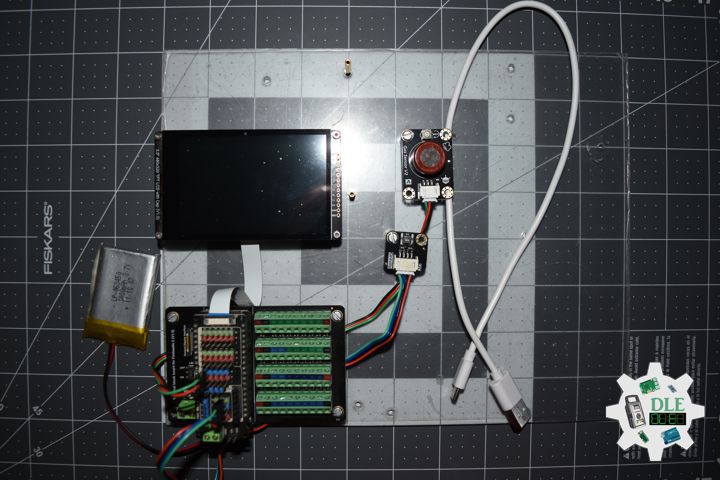
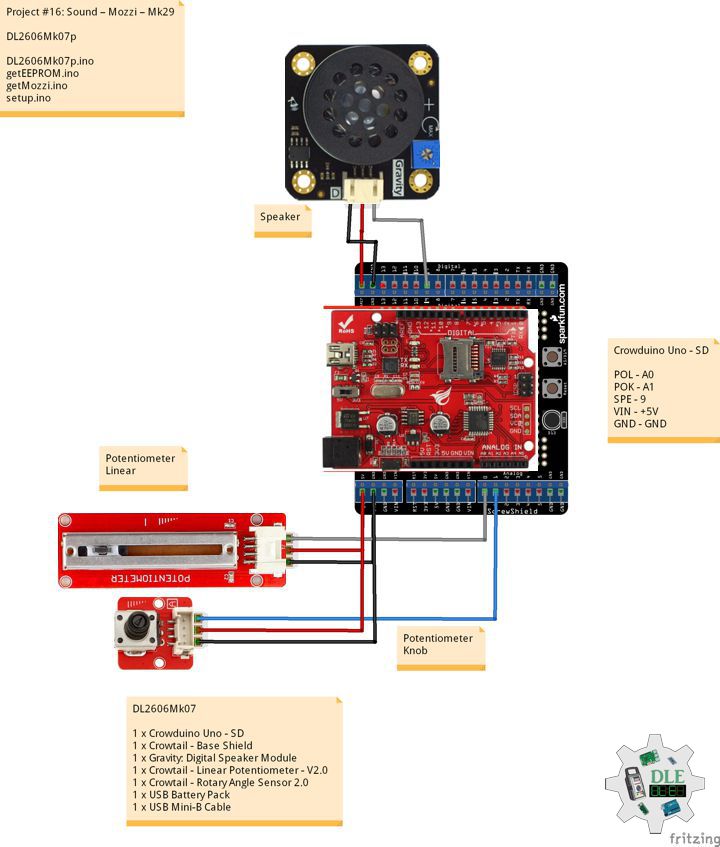
DL2606Mk07
1 x Crowduino Uno – SD
1 x Crowtail – Base Shield
1 x Gravity: Digital Speaker Module
1 x Crowtail – Linear Potentiometer – V2.0
1 x Crowtail – Rotary Angle Sensor 2.0
1 x USB Battery Pack
1 x USB Mini-B Cable
DL2606Mk07p
DL2606Mk07p.ino
/****** Don Luc Electronics © ******
Software Version Information
Project #16: Sound – Mozzi – Mk29
16-29
DL2606Mk07p.ino
DL2606Mk07
1 x Crowduino Uno - SD
1 x Crowtail - Base Shield
1 x Gravity: Digital Speaker Module
1 x Crowtail - Linear Potentiometer - V2.0
1 x Crowtail - Rotary Angle Sensor 2.0
1 x USB Battery Pack
1 x USB Mini-B Cable
*/

// Include the Library Code
// EEPROM Library to Read and Write EEPROM with Unique ID for Unit
#include "EEPROM.h"
// Mozzi
#include <Mozzi.h>
// Oscillator template
#include <Oscil.h>
// Sine table for oscillator
#include <tables/sin2048_int8.h>

// iPotLinear Linear
int iPotLinear = A0;
int iStateLinear;

// iPotKnob
int iPotKnob = A1;
// Volume
byte volume;

// Oscil <table_size, update_rate> oscilName (wavetable),
//look in .h file of table #included above
Oscil <SIN2048_NUM_CELLS, MOZZI_AUDIO_RATE> aSin(SIN2048_DATA);

// Software Version Information
// EEPROM Unique ID Information
String uid = "";

// Software Version Information
String sver = "16-29";

void loop() {

  // Audio Hook
  audioHook();

}
getEEPROM.ino
// isUID EEPROM Unique ID
void isUID()
{

  // Is Unit ID
  uid = "";
  for (int x = 0; x < 7; x++)
  {
    uid = uid + char(EEPROM.read(x));
  }

}
getMozzi.ino
// Mozzi
// Update Control
void updateControl(){

  // Read the potentiometer as only 8 bit volume range for
  //efficient calculations in updateAudio
  // Value is 0-255
  volume = mozziAnalogRead<8>(iPotKnob);

  // We request 10 bits, here, however. Value is 0-1023
  iStateLinear = mozziAnalogRead<10>(iPotLinear);

  // Set the frequency
  aSin.setFreq(iStateLinear);

}
// Audio Output
AudioOutput updateAudio(){

  // Cast char output from aSin.next() to int to make room for multiplication
  // 8 bit * 8 bit gives 16 bits value
  return MonoOutput::from16Bit((int)aSin.next() * volume);

  }
setup.ino
// Setup
void setup()
{

  // Delay
  delay( 100 );

  // EEPROM Unique ID
  isUID();

  // Delay
  delay( 100 );

  // Start Mozzi
  startMozzi();

}
——
People can contact us: https://www.donluc.com/?page_id=1927
Consultant, R&D, Electronics, IoT, Teacher and Instructor
- Programming Language
- Single-Board Microcontrollers (PIC, Arduino, Raspberry Pi, Arm, Silicon Labs, Espressif, Etc…)
- IoT
- Wireless (Radio Frequency, Bluetooth, WiFi, Etc…)
- Robotics
- Automation
- Camera and Video Capture Receiver Stationary, Wheel/Tank , Underwater and UAV Vehicle
- Unmanned Vehicles Terrestrial, Marine and UAV
- Machine Learning
- Artificial Intelligence (AI)
- RTOS
- Sensors, eHealth Sensors, Biosensor, and Biometric
- Research & Development (R & D)
- Consulting
Follow Us
Luc Paquin – Curriculum Vitae – 2026
https://www.donluc.com/luc/LucPaquinCVEng2026Mk01.pdf
https://www.donluc.com/luc/
Web: https://www.donluc.com/
Web: https://www.jlpconsultants.com/
Facebook: https://www.facebook.com/neosteam.labs.9/
YouTube: https://www.youtube.com/@thesass2063
DFRobot: https://learn.dfrobot.com/user-10186.html
TikTok: https://www.tiktok.com/@luc.paquin8
Hackster: https://www.hackster.io/luc-paquin
LinkedIn: https://www.linkedin.com/in/jlucpaquin/
Don Luc