——
#DonLucElectronics #DonLuc #Environment #DHT11 #ArduinoUNOR4 #Project #IoT #Fritzing #Programming #Electronics #Microcontrollers #Consultant
——
——
——
——
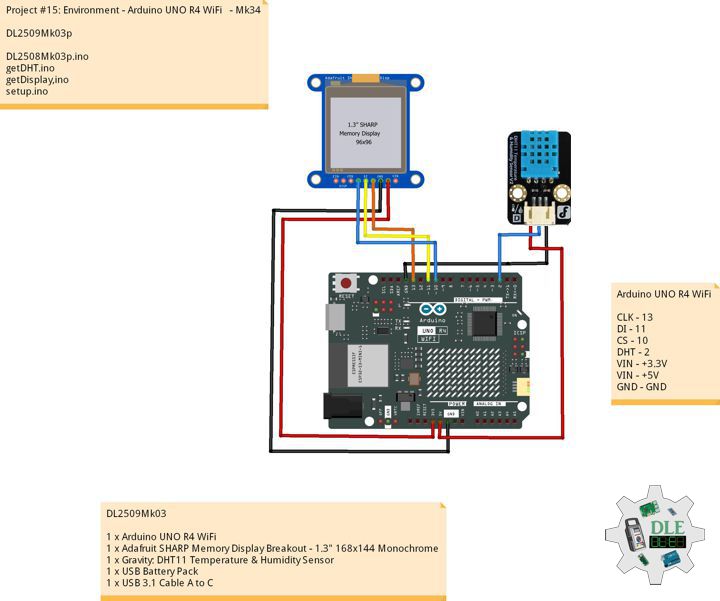
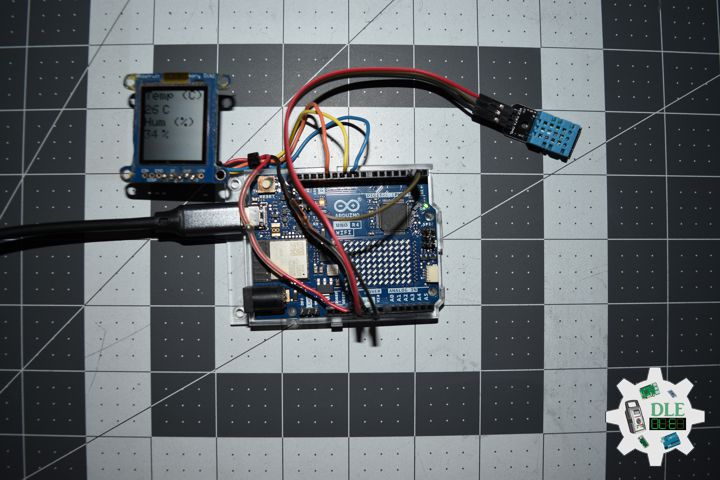
Arduino UNO R4 WiFi
The new Arduino UNO R4 development board UNO R4 WiFi. It runs on the Renesas RA4M1 (Arm Cortex®-M4) processor with a clock speed of 48MHz, which provides a 3x increase over the UNO R3. In addition to that, the SRAM has been upgraded from 2kB to 32kB and the flash memory has been increased from 32kB to 256kB to accommodate to more complex projects. Furthermore, in response to requests from the Arduino community, the USB port has been upgraded to USB-C and the maximum power supply voltage has been increased to 24V. The board provides a CAN bus, allowing users to minimize wiring and perform different tasks by connecting multiple extension boards. Finally, the new board also includes a 12-bit analog DAC. The WiFi version comes with an Espressif S3 WiFi module, expanding creative opportunities for makers, educators, and hobbyists alike. Based on the success of UNO R3, the UNO R4 board is the ideal prototype and learning tool for anyone. While retaining the well-known features of the UNO series, such as standard form factor, shield compatibility, 5V voltage, and robustness, new features have been added.
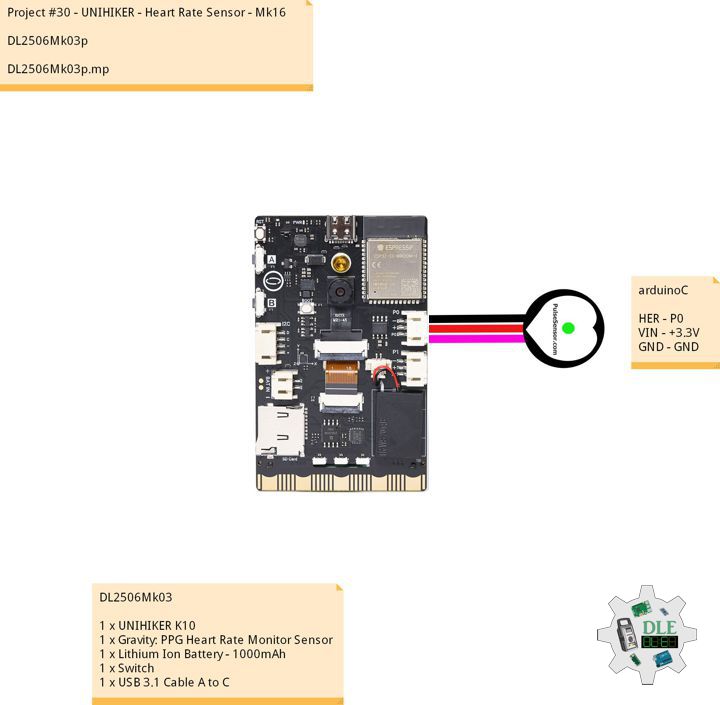
DL2509Mk03
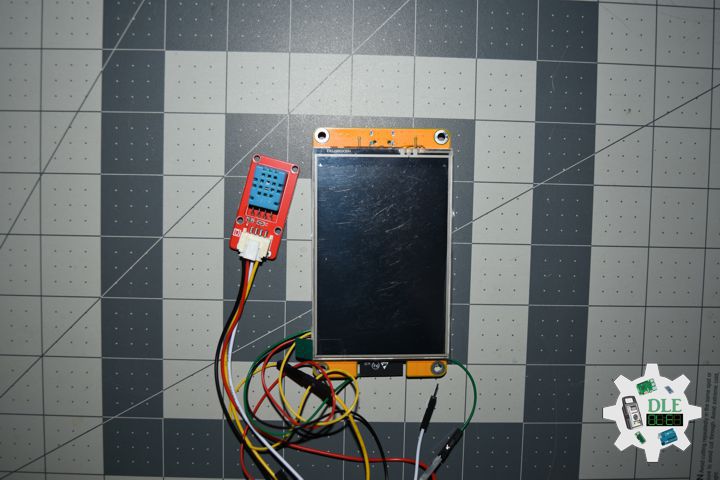
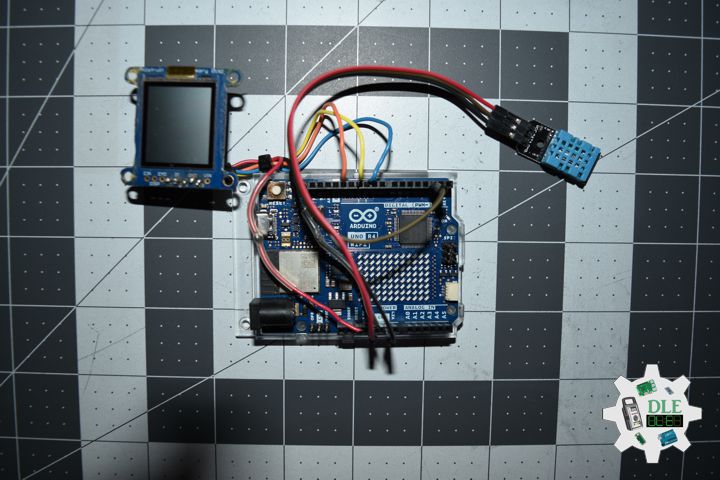
1 x Arduino UNO R4 WiFi
1 x Adafruit SHARP Memory Display Breakout – 1.3″ 168×144 Monochrome
1 x Gravity: DHT11 Temperature & Humidity Sensor
1 x USB Battery Pack
1 x USB 3.1 Cable A to C
DL2509Mk03p
DL2508Mk03p.ino
/****** Don Luc Electronics © *****Software Version Information
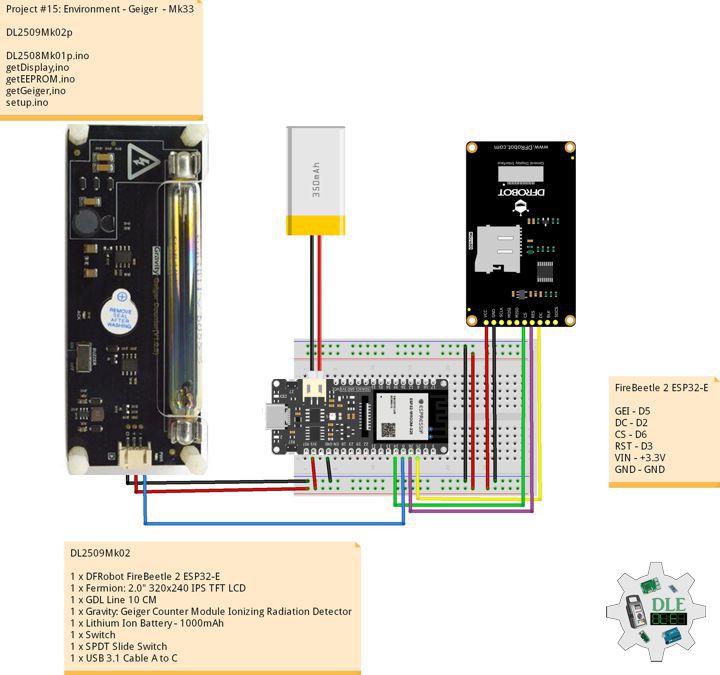
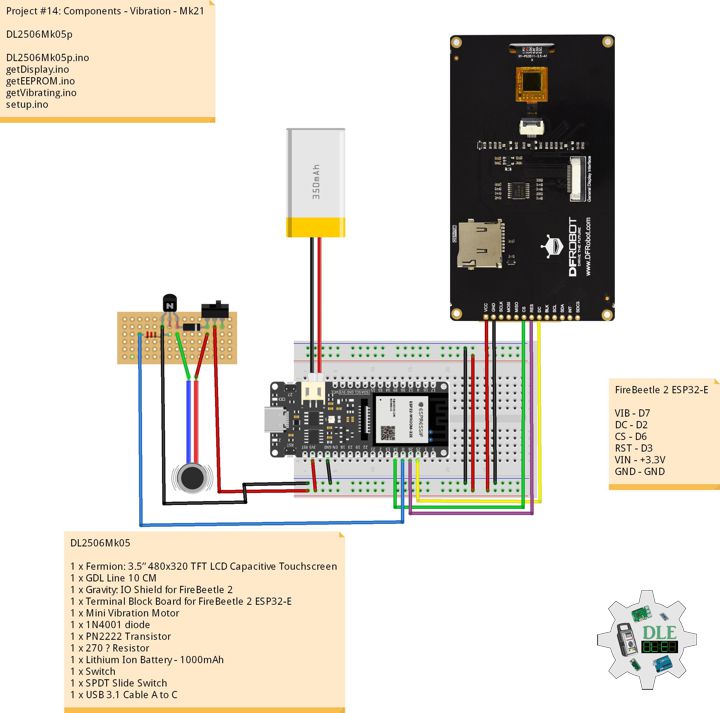
Project #15: Environment - Arduino UNO R4 WiFi - Mk34
15-34
DL2509Mk03.ino
DL2509Mk03
1 x Arduino UNO R4 WiFi
1 x Adafruit SHARP Memory Display Breakout - 1.3" 168x144 Monochrome
1 x Gravity: DHT11 Temperature & Humidity Sensor
1 x USB Battery Pack
1 x USB 3.1 Cable A to C
*/
// Include the Library Code
// DHT11
#include <DHT11.h>
// SHARP Memory Display
#include <Adafruit_SharpMem.h>
#include <Adafruit_GFX.h>
// DHT11
#define DHT11PIN 2
DHT11 dht11(DHT11PIN);
int temperature = 0;
int humidity = 0;
// SHARP Memory Display
// any pins can be used
#define SHARP_SCK 13
#define SHARP_MOSI 11
#define SHARP_SS 10
// Set the size of the display here, e.g. 144x168!
Adafruit_SharpMem display(SHARP_SCK, SHARP_MOSI, SHARP_SS, 144, 168);
// The currently-available SHARP Memory Display (144x168 pixels)
// requires > 4K of microcontroller RAM; it WILL NOT WORK on Arduino Uno
// or other <4K "classic" devices! The original display (96x96 pixels)
// does work there, but is no longer produced.
#define BLACK 0
#define WHITE 1
// Software Version Information
String sver = "15-34";
void loop() {
// DHT11
isDHT11();
// isDT11 Display
isDisplayDHT();
// Delay 1 Second
delay( 1000 );
}
getDHT.ino
// DHT11
// isDHT11
void isDHT11(){

  // Attempt to read the temperature and humidity values from the DHT11 sensor.
  int result = dht11.readTemperatureHumidity(temperature, humidity);

}
getDisplay.ino
// Adafruit SHARP Memory Display
// Adafruit SHARP Memory Display - UID
void isDisplayUID(){
// text display
display.setRotation(4);
display.setTextSize(3);
display.setTextColor(BLACK);
display.setCursor(0,2);
display.println( "Don Luc" );
//display.setTextSize(2);
display.setTextColor(BLACK);
display.setCursor(0,35);
display.println( sver );
display.refresh();
delay( 100 );
}
// isDHT11 Display
void isDisplayDHT(){
// text display Date and Time
display.clearDisplay();
display.setRotation(4);
display.setTextSize(3);
display.setTextColor(BLACK);
display.setCursor(0,0);
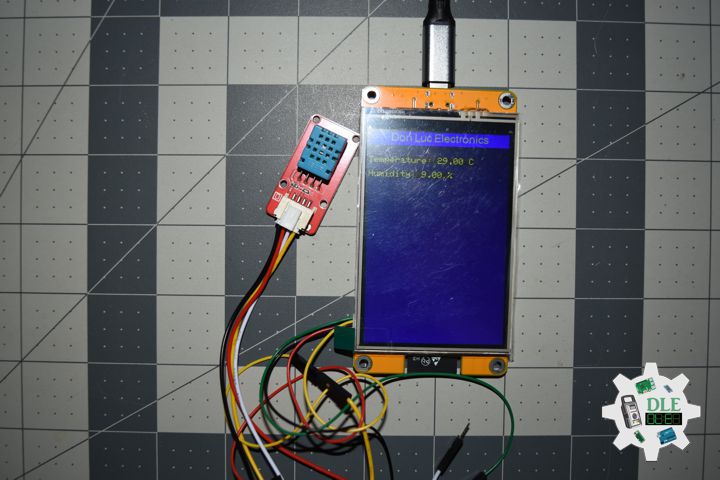
display.println( "Temp (C)" );
display.setCursor(0,35);
display.print( temperature );
display.setCursor(45,35);
display.println( "C" );
//display.setTextSize(3);
//display.setTextColor(BLACK);
display.setCursor(0,65);
display.println( "Hum (%)" );
display.setCursor(0,95);
display.print( humidity );
display.setCursor(45,95);
display.println( "%" );
display.refresh();
delay( 100 );
}
setup.ino
// Setup
void setup()
{

  // Delay
  delay(100);

  // SHARP Display start & clear the display
  display.begin();
  display.clearDisplay();

  // Delay
  delay( 100 );

  // Display - UID
  // Don Luc Electronics
  // Version
  isDisplayUID();

  // Delay 5 Second
  delay( 5000 );

}
——
People can contact us: https://www.donluc.com/?page_id=1927
Consultant, R&D, Electronics, IoT, Teacher and Instructor
- Programming Language
- Single-Board Microcontrollers (PIC, Arduino, Raspberry Pi, Arm, Silicon Labs, Espressif, Etc…)
- IoT
- Wireless (Radio Frequency, Bluetooth, WiFi, Etc…)
- Robotics
- Automation
- Camera and Video Capture Receiver Stationary, Wheel/Tank , Underwater and UAV Vehicle
- Unmanned Vehicles Terrestrial, Marine and UAV
- Machine Learning
- Artificial Intelligence (AI)
- RTOS
- Sensors, eHealth Sensors, Biosensor, and Biometric
- Research & Development (R & D)
- Consulting
Follow Us
Luc Paquin – Curriculum Vitae – 2024
https://www.donluc.com/luc/
Web: https://www.donluc.com/
Facebook: https://www.facebook.com/neosteam.labs.9/
YouTube: https://www.youtube.com/@thesass2063
Twitter: https://twitter.com/labs_steam
Pinterest: https://www.pinterest.com/NeoSteamLabs/
Instagram: https://www.instagram.com/neosteamlabs/
DFRobot: https://learn.dfrobot.com/user-10186.html
Elecrow: https://www.elecrow.com/share/sharepj/center/no/760816d385ebb1edc0732fd873bfbf13
TikTok: https://www.tiktok.com/@luc.paquin8
Hackster: https://www.hackster.io/luc-paquin
LinkedIn: https://www.linkedin.com/in/jlucpaquin/
Don Luc