Adafruit
Adafruit
Project #28 – Sensors – Magnetometer HMC5883L – Mk02
——
#DonLucElectronics #DonLuc #Sensors #HMC5883L #ADXL335 #Adafruit #SparkFun #Arduino #Project #Fritzing #Programming #Electronics #Microcontrollers #Consultant
——
——
——
——
SparkFun Triple Axis Magnetometer – HMC5883L
This is a breakout board for Honeywell’s HMC5883L, a 3-axis digital compass. Communication with the HMC5883L is simple and all done through an I2C interface. There is no on-board regulator, so a regulated voltage of 2.16-3.6VDC should be supplied. The Honeywell HMC5883L is a surface-mount, multi-chip module designed for low-field magnetic sensing with a digital interface for applications such as low-cost compassing and magnetometry. Applications for the HMC5883L include Mobile Phones, Netbooks, Consumer Electronics, Auto Navigation Systems, and Personal Navigation Devices.
DL2308Mk03
1 x Adafruit METRO M0 Express
1 x DS3231 Precision RTC FeatherWing
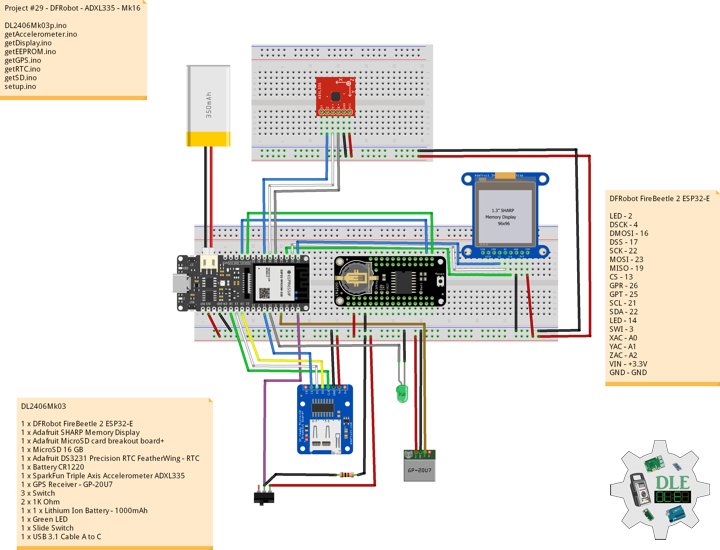
1 x SparkFun Triple Axis Accelerometer ADXL335
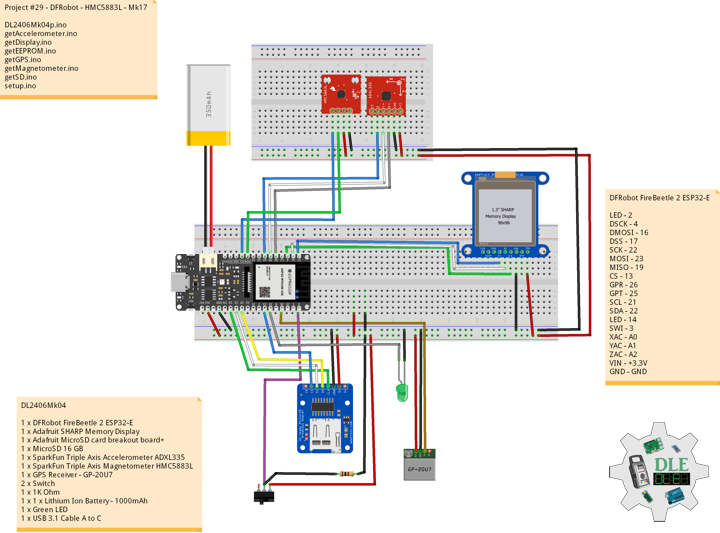
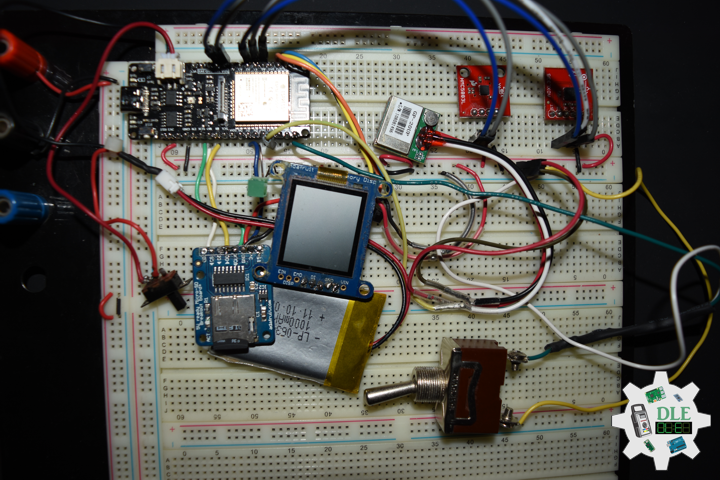
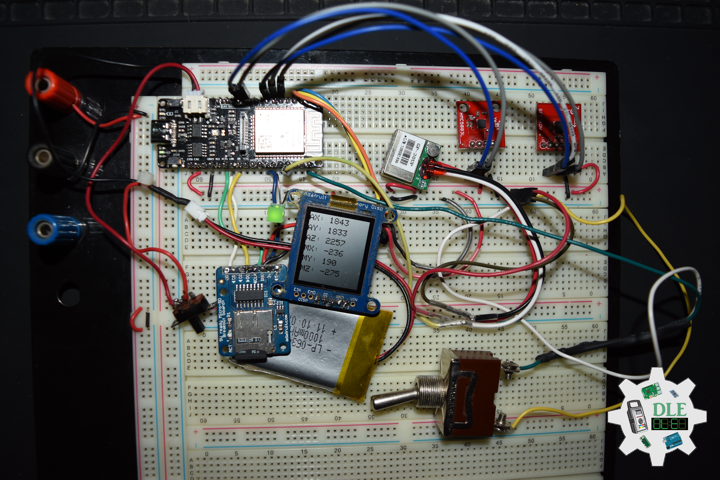
1 x SparkFun Triple Axis Magnetometer – HMC5883L
1 x Rocker Switch – SPST
1 x Resistor 10K Ohm
1 x CR1220 3V Lithium Coin Cell Battery
1 x SparkFun Cerberus USB Cable
Adafruit METRO M0 Express
LED – LED_BUILTIN
SDA – Digital 20
SCL – Digital 21
SW1 – Digital 2
ACX – Analog A0
ACY – Analog A1
ACZ – Analog A2
VIN – +3.3V
GND – GND
——
DL2308Mk03p.ino
/****** Don Luc Electronics © ****** Software Version Information Project #28 - Sensors - Magnetometer HMC5883L - Mk02 28-02 DL2308Mk03p.ino 1 x Adafruit METRO M0 Express 1 x DS3231 Precision RTC FeatherWing 1 x SparkFun Triple Axis Accelerometer ADXL335 1 x Rocker Switch - SPST 1 x Resistor 10K Ohm 1 x CR1220 3V Lithium Coin Cell Battery 1 x SparkFun Cerberus USB Cable */ // Include the Library Code // DS3231 Precision RTC #include <RTClib.h> // Two Wire Interface (TWI/I2C) #include <Wire.h> // Keyboard #include <Keyboard.h> // Triple Axis Magnetometer #include <HMC5883L.h> // Keyboard String sKeyboard = ""; // DS3231 Precision RTC RTC_DS3231 rtc; String dateRTC = ""; String timeRTC = ""; // Accelerometer int iX = A0; int iY = A1; int iZ = A2; // Accelerometer int X = 0; int Y = 0; int Z = 0; // Triple Axis Magnetometer HMC5883L compass; // Triple Axis Magnetometer int mX = 0; int mY = 0; int mZ = 0; // The number of the pushbutton pin int iButton = 2; // Variable for reading the pushbutton status int buttonState = 0; // Software Version Information String sver = "28-02"; void loop() { // Date and Time RTC isRTC (); // Accelerometer isAccelerometer(); // Magnetometer isMagnetometer(); // Read the state of the button value: buttonState = digitalRead(iButton); // Check if the button is pressed. If it is, the buttonState is HIGH: if (buttonState == HIGH) { Keyboard.println(sKeyboard); } // Delay 1 sec delay(1000); }
getAccelerometer.ino
// Accelerometer // Accelerometer void isAccelerometer(){ // Accelerometer X, Y, Z // X X = analogRead(iX); // Y Y = analogRead(iY); // Z Z = analogRead(iZ); sKeyboard = sKeyboard + String(X) + "|" + String(Y) + "|" + String(Z) + "|"; }
getMagnetometer.ino
// Magnetometer // Setup Magnetometer void isSetupMagnetometer(){ // Magnetometer Serial // Initialize HMC5883L while (!compass.begin()) { delay(500); } // Set measurement range // +/- 1.30 Ga: HMC5883L_RANGE_1_3GA (default) compass.setRange(HMC5883L_RANGE_1_3GA); // Set measurement mode // Continuous-Measurement: HMC5883L_CONTINOUS (default) compass.setMeasurementMode(HMC5883L_CONTINOUS); // Set data rate // 15.00Hz: HMC5883L_DATARATE_15HZ (default) compass.setDataRate(HMC5883L_DATARATE_15HZ); // Set number of samples averaged // 1 sample: HMC5883L_SAMPLES_1 (default) compass.setSamples(HMC5883L_SAMPLES_1); } // Magnetometer void isMagnetometer(){ // Vector Norm Vector norm = compass.readNormalize(); // Vector X, Y, Z // X Normalize mX = norm.XAxis; // Y Normalize mY = norm.YAxis; // Z Normalize mZ = norm.ZAxis; sKeyboard = sKeyboard + String(mX) + "|" + String(mY) + "|" + String(mZ) + "|*"; }
getRTC.ino
// Date & Time // DS3231 Precision RTC void setupRTC() { // DS3231 Precision RTC if (! rtc.begin()) { //Serial.println("Couldn't find RTC"); //Serial.flush(); while (1) delay(10); } if (rtc.lostPower()) { //Serial.println("RTC lost power, let's set the time!"); // When time needs to be set on a new device, or after a power loss, the // following line sets the RTC to the date & time this sketch was compiled rtc.adjust(DateTime(F(__DATE__), F(__TIME__))); // This line sets the RTC with an explicit date & time, for example to set // January 21, 2014 at 3am you would call: //rtc.adjust(DateTime(2023, 8, 10, 11, 0, 0)); } } // Date and Time RTC void isRTC () { // Date and Time dateRTC = ""; timeRTC = ""; DateTime now = rtc.now(); // Date dateRTC = now.year(), DEC; dateRTC = dateRTC + "/"; dateRTC = dateRTC + now.month(), DEC; dateRTC = dateRTC + "/"; dateRTC = dateRTC + now.day(), DEC; Serial.print("Date: "); Serial.println(dateRTC); // Time timeRTC = now.hour(), DEC; timeRTC = timeRTC + ":"; timeRTC = timeRTC + now.minute(), DEC; timeRTC = timeRTC + ":"; timeRTC = timeRTC + now.second(), DEC; Serial.print("Time: "); Serial.println(timeRTC); sKeyboard = "SEN|" + sver + "|" + String(dateRTC) + "|" + String(timeRTC) + "|"; }
setup.ino
// Setup void setup() { // Give display time to power on delay(100); // Wire - Inialize I2C Hardware Wire.begin(); // Give display time to power on delay(100); // Date & Time RTC // DS3231 Precision RTC setupRTC(); // Initialize control over the keyboard: Keyboard.begin(); // Setup Triple Axis Magnetometer isSetupMagnetometer(); // Initialize the button pin as an input pinMode(iButton, INPUT); // Initialize digital pin LED_BUILTIN as an output pinMode(LED_BUILTIN, OUTPUT); // Turn the LED on HIGH digitalWrite(LED_BUILTIN, HIGH); delay( 5000 ); }
——
People can contact us: https://www.donluc.com/?page_id=1927
Technology Experience
- Programming Language
- Single-Board Microcontrollers (PIC, Arduino, Raspberry Pi,Espressif, etc…)
- IoT
- Wireless (Radio Frequency, Bluetooth, WiFi, Etc…)
- Robotics
- Camera and Video Capture Receiver Stationary, Wheel/Tank and Underwater Vehicle
- Unmanned Vehicles Terrestrial and Marine
- Machine Learning
- RTOS
- Research & Development (R & D)
Instructor, E-Mentor, STEAM, and Arts-Based Training
- Programming Language
- IoT
- PIC Microcontrollers
- Arduino
- Raspberry Pi
- Espressif
- Robotics
Follow Us
Luc Paquin – Curriculum Vitae – 2023
https://www.donluc.com/luc/
Web: https://www.donluc.com/
Facebook: https://www.facebook.com/neosteam.labs.9/
YouTube: https://www.youtube.com/@thesass2063
Twitter: https://twitter.com/labs_steam
Pinterest: https://www.pinterest.com/NeoSteamLabs/
Instagram: https://www.instagram.com/neosteamlabs/
Don Luc
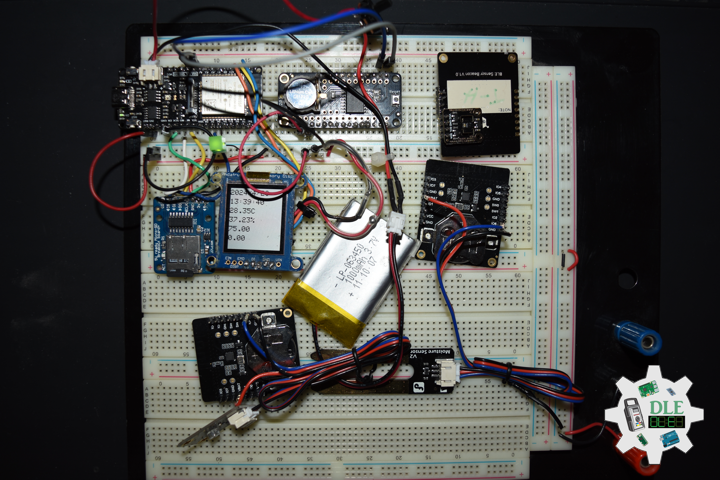
Project #28 – Sensors – Accelerometer ADXL335 – Mk01
——
#DonLucElectronics #DonLuc #Sensors #ADXL335 #Adafruit #SparkFun #Arduino #Project #Fritzing #Programming #Electronics #Microcontrollers #Consultant
——
——
——
——
Sensor
A sensor is a device that produces an output signal for the purpose of sensing a physical phenomenon. In the broadest definition, a sensor is a device, module, machine, or subsystem that detects events or changes in its environment and sends the information to other electronics, frequently a computer processor.
- Acoustic, sound, vibration
- Automotive
- Chemical
- Electric current, electric potential, magnetic, radio
- Environment, weather, moisture, humidity
- Flow, fluid velocity
- Ionizing radiation, subatomic particles
- Navigation instruments
- Position, angle, displacement, distance, speed, acceleration
- Optical, light, imaging, photon
- Pressure
- Force, density, level
- Thermal, heat, temperature
- Proximity, presence
- Sensor technology
- Speed sensor
- Others
- Etc…
SparkFun Triple Axis Accelerometer Breakout – ADXL335
Breakout board for the 3 axis ADXL335 from Analog Devices. This is the latest in a long, proven line of analog sensors, the holy grail of accelerometers. The ADXL335 is a triple axis MEMS accelerometer with extremely low noise and power consumption.
DL2308Mk02
1 x Adafruit METRO M0 Express
1 x DS3231 Precision RTC FeatherWing
1 x SparkFun Triple Axis Accelerometer ADXL335
1 x Rocker Switch – SPST
1 x Resistor 10K Ohm
1 x CR1220 3V Lithium Coin Cell Battery
1 x SparkFun Cerberus USB Cable
Adafruit METRO M0 Express
LED – LED_BUILTIN
SDA – Digital 20
SCL – Digital 21
SW1 – Digital 2
ACX – Analog A0
ACY – Analog A1
ACZ – Analog A2
VIN – +3.3V
GND – GND
——
DL2308Mk02p.ino
/****** Don Luc Electronics © ****** Software Version Information Project #28 - Sensors - Accelerometer ADXL335 - Mk01 28-01 DL2308Mk02p.ino 1 x Adafruit METRO M0 Express 1 x DS3231 Precision RTC FeatherWing 1 x SparkFun Triple Axis Accelerometer ADXL335 1 x Rocker Switch - SPST 1 x Resistor 10K Ohm 1 x CR1220 3V Lithium Coin Cell Battery 1 x SparkFun Cerberus USB Cable */ // Include the Library Code // DS3231 Precision RTC #include <RTClib.h> // Two Wire Interface (TWI/I2C) #include <Wire.h> // Keyboard #include <Keyboard.h> // Keyboard String sKeyboard = ""; // DS3231 Precision RTC RTC_DS3231 rtc; String dateRTC = ""; String timeRTC = ""; // Accelerometer int iX = A0; int iY = A1; int iZ = A2; // Accelerometer int X = 0; int Y = 0; int Z = 0; // The number of the pushbutton pin int iButton = 2; // Variable for reading the pushbutton status int buttonState = 0; // Software Version Information String sver = "28-01"; void loop() { // Date and Time RTC isRTC (); // Accelerometer isAccelerometer(); // Read the state of the pushbutton value: buttonState = digitalRead(iButton); // Check if the pushbutton is pressed. If it is, the buttonState is HIGH: if (buttonState == HIGH) { Keyboard.println(sKeyboard); } // Delay 1 sec delay(1000); }
getAccelerometer.ino
// Accelerometer // Accelerometer void isAccelerometer(){ // Accelerometer X, Y, Z // X X = analogRead(iX); Serial.print("X: "); Serial.println(X); // Y Y = analogRead(iY); Serial.print("Y: "); Serial.println(Y); // Z Z = analogRead(iZ); Serial.print("Z: "); Serial.println(Z); sKeyboard = sKeyboard + String(X) + "|" + String(Y) + "|" + String(Z) + "|*"; }
getRTC.ino
// Date & Time // DS3231 Precision RTC void setupRTC() { // DS3231 Precision RTC if (! rtc.begin()) { Serial.println("Couldn't find RTC"); Serial.flush(); while (1) delay(10); } if (rtc.lostPower()) { Serial.println("RTC lost power, let's set the time!"); // When time needs to be set on a new device, or after a power loss, the // following line sets the RTC to the date & time this sketch was compiled rtc.adjust(DateTime(F(__DATE__), F(__TIME__))); // This line sets the RTC with an explicit date & time, for example to set // January 21, 2014 at 3am you would call: //rtc.adjust(DateTime(2023, 8, 10, 11, 0, 0)); } } // Date and Time RTC void isRTC () { // Date and Time dateRTC = ""; timeRTC = ""; DateTime now = rtc.now(); // Date dateRTC = now.year(), DEC; dateRTC = dateRTC + "/"; dateRTC = dateRTC + now.month(), DEC; dateRTC = dateRTC + "/"; dateRTC = dateRTC + now.day(), DEC; Serial.print("Date: "); Serial.println(dateRTC); // Time timeRTC = now.hour(), DEC; timeRTC = timeRTC + ":"; timeRTC = timeRTC + now.minute(), DEC; timeRTC = timeRTC + ":"; timeRTC = timeRTC + now.second(), DEC; Serial.print("Time: "); Serial.println(timeRTC); sKeyboard = "SEN|" + sver + "|" + String(dateRTC) + "|" + String(timeRTC) + "|"; }
setup.ino
// Setup void setup() { // Serial Begin Serial.begin(115200); Serial.println("Starting Serial work!"); // Give display time to power on delay(100); // Wire - Inialize I2C Hardware Wire.begin(); // Give display time to power on delay(100); // Date & Time RTC // DS3231 Precision RTC setupRTC(); // Initialize control over the keyboard: Keyboard.begin(); // Initialize the pushbutton pin as an input pinMode(iButton, INPUT); // Initialize digital pin LED_BUILTIN as an output pinMode(LED_BUILTIN, OUTPUT); // Turn the LED on HIGH digitalWrite(LED_BUILTIN, HIGH); delay( 5000 ); }
——
People can contact us: https://www.donluc.com/?page_id=1927
Technology Experience
- Programming Language
- Single-Board Microcontrollers (PIC, Arduino, Raspberry Pi,Espressif, etc…)
- IoT
- Wireless (Radio Frequency, Bluetooth, WiFi, Etc…)
- Robotics
- Camera and Video Capture Receiver Stationary, Wheel/Tank and Underwater Vehicle
- Unmanned Vehicles Terrestrial and Marine
- Machine Learning
- RTOS
- Research & Development (R & D)
Instructor, E-Mentor, STEAM, and Arts-Based Training
- Programming Language
- IoT
- PIC Microcontrollers
- Arduino
- Raspberry Pi
- Espressif
- Robotics
Follow Us
Luc Paquin – Curriculum Vitae – 2023
https://www.donluc.com/luc/
Web: https://www.donluc.com/
Facebook: https://www.facebook.com/neosteam.labs.9/
YouTube: https://www.youtube.com/@thesass2063
Twitter: https://twitter.com/labs_steam
Pinterest: https://www.pinterest.com/NeoSteamLabs/
Instagram: https://www.instagram.com/neosteamlabs/
Don Luc
Project #26 – Radio Frequency – Universally Unique IDentifier – Mk27
——
#DonLucElectronics #DonLuc #RadioFrequency #Bluetooth #UUID #Display #SparkFun #Adafruit #BME280 #CCS811 #Arduino #Project #Fritzing #Programming #Electronics #Microcontrollers #Consultant
——
——
——
——
Universally Unique IDentifier
A Universally Unique IDentifier (UUID) is a 128-bit label used for information in computer systems. When generated according to the standard methods, UUIDs are, for practical purposes, unique. Their uniqueness does not depend on a central registration authority or coordination between the parties generating them, unlike most other numbering schemes. While the probability that a UUID will be duplicated is not zero, it is generally considered close enough to zero to be negligible.
Thus, anyone can create a UUID and use it to identify something with near certainty that the identifier does not duplicate one that has already been, or will be, created to identify something else. Information labeled with UUIDs by independent parties can therefore be later combined into a single database or transmitted on the same channel, with a negligible probability of duplication. Adoption of UUIDs is widespread, with many computing platforms providing support for generating them and for parsing their textual representation.
DL2307Mk08
2 x SparkFun Thing Plus – ESP32 WROOM
1 x SparkFun BME280 – Temperature, Humidity, Barometric Pressure, and Altitude
1 x SparkFun Air Quality Breakout – CCS811
1 x Adafruit SHARP Memory Display Breakout
1 x Adalogger FeatherWing – RTC + SD
1 x 8 GB MicroSD Memory Card
1 x CR1220 3V Lithium Coin Cell Battery
2 x Lithium Ion Battery – 850mAh
2 x SparkFun Cerberus USB Cable
SparkFun Thing Plus – ESP32 WROOM (Server)
LED – LED_BUILTIN
SDA – Digital 23
SCL – Digital 22
RX2 – Bluetooth
TX2 – Bluetooth
VIN – +3.3V
GND – GND
——
DL2307Mk08ps.ino
/* ***** Don Luc Electronics © ***** Software Version Information Project #26 - Radio Frequency - Universally Unique IDentifier - Mk27 26-27 DL2307Mk08ps.ino 2 x SparkFun Thing Plus - ESP32 WROOM 1 x SparkFun BME280 - Temperature, Humidity, Barometric Pressure, and Altitude 1 x SparkFun Air Quality Breakout - CCS811 1 x Adafruit SHARP Memory Display Breakout 1 x Adalogger FeatherWing - RTC + SD 1 x 8 GB MicroSD Memory Card 1 x CR1220 3V Lithium Coin Cell Battery 2 x Lithium Ion Battery - 850mAh 2 x SparkFun Cerberus USB Cable */ // Include the Library Code // BLE Device #include <BLEDevice.h> // BLE Utils #include <BLEUtils.h> // BLE Serve #include <BLEServer.h> // Two Wire Interface (TWI/I2C) #include <Wire.h> // SparkFun BME280 - Temperature, Humidity, Barometric Pressure, and Altitude #include <SparkFunBME280.h> // SparkFun CCS811 - eCO2 & tVOC #include <SparkFunCCS811.h> // See the following for generating UUIDs: // https://www.uuidgenerator.net/ #define SERVICE_UUID "7c394dc4-49a8-4c22-8a5b-b1612d8c13c1" #define CHARACTERISTIC_UUID "a4c4cec2-f394-4f7a-b9de-89047feca74b" #define CHARACTERISTIC_TEM_UUID "74bd92c6-89d0-4387-823e-97e7e0fb7a2b" #define CHARACTERISTIC_HUM_UUID "1b63f246-b97f-4d2e-b8eb-f69e20a23a34" #define CHARACTERISTIC_BAR_UUID "43788175-37a7-4280-93c6-c690324d088e" #define CHARACTERISTIC_ALT_UUID "609deed9-a72d-45c3-aaba-14a73b0d8fda" #define CHARACTERISTIC_ECO_UUID "ab17aace-c0b9-4bd3-bb93-7715d9afaeea" #define CHARACTERISTIC_VOC_UUID "6a8bf86a-9d40-457c-9f7f-f13a3d6803f1" // Makes the chracteristic globlal static BLECharacteristic *pCharacteristicTEM; static BLECharacteristic *pCharacteristicHUM; static BLECharacteristic *pCharacteristicBAR; static BLECharacteristic *pCharacteristicALT; static BLECharacteristic *pCharacteristicECO; static BLECharacteristic *pCharacteristicVOC; // SparkFun BME280 - Temperature, Humidity, Barometric Pressure, and Altitude BME280 myBME280; float BMEtempC = 0; float BMEhumid = 0; float BMEpressure = 0; float BMEaltitudeM = 0; String FullString = ""; // SparkFun CCS811 - eCO2 & tVOC // Default I2C Address #define CCS811_ADDR 0x5B CCS811 myCCS811(CCS811_ADDR); float CCS811CO2 = 0; float CCS811TVOC = 0; String FullStringA = ""; // Software Version Information String sver = "26-27"; void loop() { // SparkFun BME280 - Temperature, Humidity, Barometric Pressure, and Altitude isBME280(); // SparkFun CCS811 - eCO2 & tVOC isCCS811(); // Delay 1 sec delay(1000); }
getBME280.ino
// SparkFun BME280 - Temperature, Humidity, Barometric Pressure, and Altitude // isBME280 - Temperature, Humidity, Barometric Pressure, and Altitude void isBME280(){ // Temperature Celsius BMEtempC = myBME280.readTempC(); // Humidity BMEhumid = myBME280.readFloatHumidity(); // Barometric Pressure BMEpressure = myBME280.readFloatPressure(); // Altitude Meters BMEaltitudeM = (myBME280.readFloatAltitudeMeters(), 2); // setValue takes uint8_t, uint16_t, uint32_t, int, float, double and string pCharacteristicTEM->setValue(BMEtempC); pCharacteristicHUM->setValue(BMEhumid); pCharacteristicBAR->setValue(BMEpressure); pCharacteristicALT->setValue(BMEaltitudeM); // FullString FullString = "Temperature = " + String(BMEtempC,2) + " Humidity = " + String(BMEhumid,2) + " Barometric = " + String(BMEpressure,2) + " Altitude Meters = " + String(BMEaltitudeM,2) + "\r\n"; // FullString Bluetooth Serial + Serial for(int i = 0; i < FullString.length(); i++) { // Serial Serial.write(FullString.c_str()[i]); } }
getCCS811.ino
// CCS811 - eCO2 & tVOC // isCCS811 - eCO2 & tVOC void isCCS811(){ // This sends the temperature & humidity data to the CCS811 myCCS811.setEnvironmentalData(BMEhumid, BMEtempC); // Calling this function updates the global tVOC and eCO2 variables myCCS811.readAlgorithmResults(); // eCO2 Concentration CCS811CO2 = myCCS811.getCO2(); // tVOC Concentration CCS811TVOC = myCCS811.getTVOC(); // setValue takes uint8_t, uint16_t, uint32_t, int, float, double and string pCharacteristicECO->setValue(CCS811CO2); pCharacteristicVOC->setValue(CCS811TVOC); // FullStringA FullStringA = "TVOCs = " + String(CCS811TVOC,2) + " eCO2 = " + String(CCS811CO2,2) + "\r\n"; // FullStringA Bluetooth Serial + Serial for(int i = 0; i < FullStringA.length(); i++) { // Serial Serial.write(FullStringA.c_str()[i]); } }
setup.ino
// Setup void setup() { // Serial Begin Serial.begin(115200); Serial.println("Starting BLE work!"); // Give display time to power on delay(100); // Wire - Inialize I2C Hardware Wire.begin(); // Give display time to power on delay(100); // SparkFun BME280 - Temperature, Humidity, Barometric Pressure, and Altitude myBME280.begin(); // CCS811 - eCO2 & tVOC myCCS811.begin(); // Initialize digital pin LED_BUILTIN as an output pinMode(LED_BUILTIN, OUTPUT); // Turn the LED on HIGH digitalWrite(LED_BUILTIN, HIGH); // BLE Device Init BLEDevice::init("Don Luc Electronics Server"); BLEServer *pServer = BLEDevice::createServer(); BLEService *pService = pServer->createService(SERVICE_UUID); BLECharacteristic *pCharacteristic = pService->createCharacteristic( CHARACTERISTIC_UUID, BLECharacteristic::PROPERTY_READ | BLECharacteristic::PROPERTY_WRITE ); pCharacteristicTEM = pService->createCharacteristic( CHARACTERISTIC_TEM_UUID, BLECharacteristic::PROPERTY_READ | BLECharacteristic::PROPERTY_WRITE ); pCharacteristicHUM = pService->createCharacteristic( CHARACTERISTIC_HUM_UUID, BLECharacteristic::PROPERTY_READ | BLECharacteristic::PROPERTY_WRITE ); pCharacteristicBAR = pService->createCharacteristic( CHARACTERISTIC_BAR_UUID, BLECharacteristic::PROPERTY_READ | BLECharacteristic::PROPERTY_WRITE ); pCharacteristicALT = pService->createCharacteristic( CHARACTERISTIC_ALT_UUID, BLECharacteristic::PROPERTY_READ | BLECharacteristic::PROPERTY_WRITE ); pCharacteristicVOC = pService->createCharacteristic( CHARACTERISTIC_VOC_UUID, BLECharacteristic::PROPERTY_READ | BLECharacteristic::PROPERTY_WRITE ); pCharacteristicECO = pService->createCharacteristic( CHARACTERISTIC_ECO_UUID, BLECharacteristic::PROPERTY_READ | BLECharacteristic::PROPERTY_WRITE ); pCharacteristic->setValue("Luc Paquin"); pService->start(); // This still is working for backward compatibility // BLEAdvertising *pAdvertising = pServer->getAdvertising(); // BLE Advertising BLEAdvertising *pAdvertising = BLEDevice::getAdvertising(); pAdvertising->addServiceUUID(SERVICE_UUID); pAdvertising->setScanResponse(true); // Functions that help with iPhone connections issue pAdvertising->setMinPreferred(0x06); pAdvertising->setMinPreferred(0x12); BLEDevice::startAdvertising(); }
——
SparkFun Thing Plus – ESP32 WROOM (Client)
LED – Digital 21
SCK – Digital 13
MOSI – Digital 12
SS – Digital 27
MISO – Digital 19
MOSI – Digital 18
SCK – Digital 5
CS – Digital 33
SDA – Digital 23
SCL – Digital 22
RX2 – Bluetooth
TX2 – Bluetooth
VIN – +3.3V
GND – GND
——
DL2307Mk08pr.ino
/* ***** Don Luc Electronics © ***** Software Version Information Project #26 - Radio Frequency - Universally Unique IDentifier - Mk27 26-27 DL2307Mk08pr.ino 2 x SparkFun Thing Plus - ESP32 WROOM 1 x SparkFun BME280 - Temperature, Humidity, Barometric Pressure, and Altitude 1 x SparkFun Air Quality Breakout - CCS811 1 x Adafruit SHARP Memory Display Breakout 1 x Adalogger FeatherWing - RTC + SD 1 x 8 GB MicroSD Memory Card 1 x CR1220 3V Lithium Coin Cell Battery 2 x Lithium Ion Battery - 850mAh 2 x SparkFun Cerberus USB Cable */ // Include the Library Code // Bluetooth BLE Device #include "BLEDevice.h" // SHARP Memory Display #include <Adafruit_SharpMem.h> // Adafruit GFX Library #include <Adafruit_GFX.h> // Date and Time #include "RTClib.h" // SD Card #include "FS.h" #include "SD.h" #include "SPI.h" // SHARP Memory Display // any pins can be used #define SHARP_SCK 13 #define SHARP_MOSI 12 #define SHARP_SS 27 // Set the size of the display here, e.g. 144x168! Adafruit_SharpMem display(SHARP_SCK, SHARP_MOSI, SHARP_SS, 144, 168); // The currently-available SHARP Memory Display (144x168 pixels) // requires > 4K of microcontroller RAM; it WILL NOT WORK on Arduino Uno // or other <4K "classic" devices. #define BLACK 0 #define WHITE 1 // 1/2 of lesser of display width or height int minorHalfSize; // The remote service we wish to connect to. static BLEUUID serviceUUID("7c394dc4-49a8-4c22-8a5b-b1612d8c13c1"); // The characteristic of the remote service we are interested in. static BLEUUID charUUID("a4c4cec2-f394-4f7a-b9de-89047feca74b"); // Use the same UUID as on the server static BLEUUID charTEMUUID("74bd92c6-89d0-4387-823e-97e7e0fb7a2b"); static BLEUUID charHUMUUID("1b63f246-b97f-4d2e-b8eb-f69e20a23a34"); static BLEUUID charBARUUID("43788175-37a7-4280-93c6-c690324d088e"); static BLEUUID charALTUUID("609deed9-a72d-45c3-aaba-14a73b0d8fda"); static BLEUUID charECOUUID("ab17aace-c0b9-4bd3-bb93-7715d9afaeea"); static BLEUUID charVOCUUID("6a8bf86a-9d40-457c-9f7f-f13a3d6803f1"); static boolean doConnect = false; static boolean connected = false; static boolean doScan = false; static BLERemoteCharacteristic* pRemoteCharacteristic; static BLERemoteCharacteristic* pRemoteCharacteristicTEM; static BLERemoteCharacteristic* pRemoteCharacteristicHUM; static BLERemoteCharacteristic* pRemoteCharacteristicBAR; static BLERemoteCharacteristic* pRemoteCharacteristicALT; static BLERemoteCharacteristic* pRemoteCharacteristicECO; static BLERemoteCharacteristic* pRemoteCharacteristicVOC; static BLEAdvertisedDevice* myDevice; float TEMValue; float HUMValue; float BARValue; float ALTValue; float ECOValue; float VOCValue; int iLED = 21; // Date and Time // PCF8523 Precision RTC RTC_PCF8523 rtc; String dateRTC = ""; String timeRTC = ""; // microSD Card const int chipSelect = 33; String zzzzzz = ""; // Software Version Information String sver = "26-27"; void loop() { // Bluetooth BLE isBluetoothBLE(); // Date and Time isRTC(); // Display Environmental isDisplayEnvironmental(); // microSD Card isSD(); }
getBluetoothBLE.ino
// Bluetooth BLE // isBluetoothBLE void isBluetoothBLE(){ // If the flag "doConnect" is true then we have scanned for // and found the desired // BLE Server with which we wish to connect. Now we connect to it. // Once we are connected we set the connected flag to be true. if (doConnect == true) { if (connectToServer()) { Serial.println("We are now connected to the BLE Server."); } else { Serial.println("We have failed to connect to the server; there is nothin more we will do."); } doConnect = false; } // If we are connected to a peer BLE Server, update the characteristic each time we are reached // with the current time since boot. if (connected) { String newValue = "Time since boot: " + String(millis()/1000); //Serial.println("Setting new characteristic value to \"" + newValue + "\""); // Set the characteristic's value to be the array of bytes that is actually a string. // pRemoteCharacteristic->writeValue(newValue.c_str(), newValue.length());//***********JKO }else if(doScan){ BLEDevice::getScan()->start(0); // this is just example to start scan after disconnect, most likely there is better way to do it in arduino } // read the Characteristics and store them in a variable // This also makes the print command do float handling TEMValue = pRemoteCharacteristicTEM->readFloat(); HUMValue = pRemoteCharacteristicHUM->readFloat(); BARValue = pRemoteCharacteristicBAR->readFloat(); ALTValue = pRemoteCharacteristicALT->readFloat(); ECOValue = pRemoteCharacteristicECO->readFloat(); VOCValue = pRemoteCharacteristicVOC->readFloat(); } // Notify Callback static void notifyCallback( BLERemoteCharacteristic* pBLERemoteCharacteristic, uint8_t* pData, size_t length, bool isNotify) { Serial.print("Notify callback for characteristic "); Serial.print(pBLERemoteCharacteristic->getUUID().toString().c_str()); Serial.print(" of data length "); Serial.println(length); Serial.print("data: "); Serial.println((char*)pData); } // My Client Callback class MyClientCallback : public BLEClientCallbacks { void onConnect(BLEClient* pclient) { } void onDisconnect(BLEClient* pclient) { connected = false; Serial.println("onDisconnect"); } }; // Connect To Server bool connectToServer() { Serial.print("Forming a connection to "); Serial.println(myDevice->getAddress().toString().c_str()); BLEClient* pClient = BLEDevice::createClient(); Serial.println(" - Created client"); pClient->setClientCallbacks(new MyClientCallback()); // Connect to the remove BLE Server. // if you pass BLEAdvertisedDevice instead of address, //it will be recognized type of peer device address (public or private) pClient->connect(myDevice); Serial.println(" - Connected to server"); //set client to request maximum MTU from server (default is 23 otherwise) pClient->setMTU(517); // Obtain a reference to the service we are after in the remote BLE server. BLERemoteService* pRemoteService = pClient->getService(serviceUUID); if (pRemoteService == nullptr) { Serial.print("Failed to find our service UUID: "); Serial.println(serviceUUID.toString().c_str()); pClient->disconnect(); return false; } Serial.println(" - Found our service"); // Obtain a reference to the characteristic in the service of the remote BLE server. pRemoteCharacteristic = pRemoteService->getCharacteristic(charUUID); if (pRemoteCharacteristic == nullptr) { Serial.print("Failed to find our characteristic UUID: "); Serial.println(charUUID.toString().c_str()); pClient->disconnect(); return false; } Serial.println(" - Found our characteristic"); // Temperature Obtain a reference to the characteristic in the service // of the remote BLE server. pRemoteCharacteristicTEM = pRemoteService->getCharacteristic(charTEMUUID); if (pRemoteCharacteristicTEM == nullptr) { Serial.print("Failed to find our characteristic UUID Temperature: "); Serial.println(charTEMUUID.toString().c_str()); pClient->disconnect(); return false; } // Humidity Obtain a reference to the characteristic in the service // of the remote BLE server. pRemoteCharacteristicHUM = pRemoteService->getCharacteristic(charHUMUUID); if (pRemoteCharacteristicHUM == nullptr) { Serial.print("Failed to find our characteristic UUID Temperature: "); Serial.println(charHUMUUID.toString().c_str()); pClient->disconnect(); return false; } Serial.println(" - Found our characteristic"); // Barometric Obtain a reference to the characteristic in the service // of the remote BLE server. pRemoteCharacteristicBAR = pRemoteService->getCharacteristic(charBARUUID); if (pRemoteCharacteristicBAR == nullptr) { Serial.print("Failed to find our characteristic UUID Barometric: "); Serial.println(charBARUUID.toString().c_str()); pClient->disconnect(); return false; } Serial.println(" - Found our characteristic"); // Altitude Obtain a reference to the characteristic in the service // of the remote BLE server. pRemoteCharacteristicALT = pRemoteService->getCharacteristic(charALTUUID); if (pRemoteCharacteristicALT == nullptr) { Serial.print("Failed to find our characteristic UUID Altitude: "); Serial.println(charALTUUID.toString().c_str()); pClient->disconnect(); return false; } // eCO2 Concentration Obtain a reference to the characteristic in the service // of the remote BLE server. pRemoteCharacteristicECO = pRemoteService->getCharacteristic(charECOUUID); if (pRemoteCharacteristicECO == nullptr) { Serial.print("Failed to find our characteristic UUID eCO2 Concentration: "); Serial.println(charECOUUID.toString().c_str()); pClient->disconnect(); return false; } Serial.println(" - Found our characteristic"); // tVOC Concentration Obtain a reference to the characteristic in the service // of the remote BLE server. pRemoteCharacteristicVOC = pRemoteService->getCharacteristic(charVOCUUID); if (pRemoteCharacteristicVOC == nullptr) { Serial.print("Failed to find our characteristic UUID tVOC Concentration: "); Serial.println(charVOCUUID.toString().c_str()); pClient->disconnect(); return false; } Serial.println(" - Found our characteristic"); // Read the value of the characteristic. if(pRemoteCharacteristic->canRead()) { std::string value = pRemoteCharacteristic->readValue(); Serial.print("The characteristic value was: "); Serial.println(value.c_str()); } if(pRemoteCharacteristic->canNotify()) pRemoteCharacteristic->registerForNotify(notifyCallback); connected = true; return true; } /** * Scan for BLE servers and find the first one that advertises the service we are looking for. */ class MyAdvertisedDeviceCallbacks: public BLEAdvertisedDeviceCallbacks { /** * Called for each advertising BLE server. */ void onResult(BLEAdvertisedDevice advertisedDevice) { Serial.print("BLE Advertised Device found: "); Serial.println(advertisedDevice.toString().c_str()); // We have found a device, let us now see if it contains the service we are looking for. if (advertisedDevice.haveServiceUUID() && advertisedDevice.isAdvertisingService(serviceUUID)) { BLEDevice::getScan()->stop(); myDevice = new BLEAdvertisedDevice(advertisedDevice); doConnect = true; doScan = true; } // Found our server } // onResult }; // MyAdvertisedDeviceCallbacks
getDisplay.ino
// Display // SHARP Memory Display - UID void isDisplayUID() { // Text Display // Clear Display display.clearDisplay(); display.setRotation(2); display.setTextSize(3); display.setTextColor(BLACK); // Don Luc Electronics display.setCursor(0,10); display.println( "Don Luc" ); display.setTextSize(2); display.setCursor(0,40); display.println( "Electronics" ); // Version display.setTextSize(3); display.setCursor(0,70); display.println( "Version" ); display.setTextSize(2); display.setCursor(0,100); display.println( sver ); display.setCursor(0,125); display.println( dateRTC ); display.setCursor(0,150); display.println( timeRTC ); // Refresh display.refresh(); delay( 5000 ); } // Display Environmental void isDisplayEnvironmental(){ // Text Display Environmental // Clear Display display.clearDisplay(); display.setRotation(2); display.setTextSize(2); display.setTextColor(BLACK); // Temperature Celsius display.setCursor(0,5); display.print( "T: " ); display.print( TEMValue ); display.println( "C" ); // Humidity display.setCursor(0,25); display.print( "H: " ); display.print( HUMValue ); display.println( "%" ); // Pressure display.setCursor(0,45); display.print( "B: " ); display.print( BARValue ); display.println( "" ); // Altitude Meters display.setCursor(0,65); display.print( "A: " ); display.print( ALTValue ); display.println( "M" ); // eCO2 Concentration display.setCursor(0,85); display.print( "C: " ); display.print( ECOValue ); display.println( "ppm" ); // tVOC Concentration display.setCursor(0,105); display.print( "V: " ); display.print( VOCValue ); display.println( "ppb" ); // Date display.setCursor(0,125); display.println( dateRTC ); // Time display.setCursor(0,145); display.println( timeRTC ); // Refresh display.refresh(); delay( 100 ); }
getRTC.ino
// Date & Time // PCF8523 Precision RTC void setupRTC() { // Date & Time // pcf8523 Precision RTC if (! rtc.begin()) { while (1); } if (! rtc.initialized()) { // Following line sets the RTC to the date & time this sketch was compiled rtc.adjust(DateTime(F(__DATE__), F(__TIME__))); // This line sets the RTC with an explicit date & time, for example to set // January 21, 2014 at 3am you would call: //rtc.adjust(DateTime(2023, 7, 24, 11, 0, 0)); } } // Date and Time RTC void isRTC () { // Date and Time dateRTC = ""; timeRTC = ""; DateTime now = rtc.now(); // Date dateRTC = now.year(), DEC; dateRTC = dateRTC + "/"; dateRTC = dateRTC + now.month(), DEC; dateRTC = dateRTC + "/"; dateRTC = dateRTC + now.day(), DEC; // Time timeRTC = now.hour(), DEC; timeRTC = timeRTC + ":"; timeRTC = timeRTC + now.minute(), DEC; timeRTC = timeRTC + ":"; timeRTC = timeRTC + now.second(), DEC; }
getSD.ino
// microSD Card // microSD Setup void setupSD() { // microSD Card pinMode( chipSelect , OUTPUT ); if(!SD.begin( chipSelect )){ ; return; } uint8_t cardType = SD.cardType(); if(cardType == CARD_NONE){ ; return; } //Serial.print("SD Card Type: "); if(cardType == CARD_MMC){ ; } else if(cardType == CARD_SD){ ; } else if(cardType == CARD_SDHC){ ; } else { ; } uint64_t cardSize = SD.cardSize() / (1024 * 1024); } // microSD Card void isSD() { zzzzzz = ""; // BLE|Version|Date|Time|Temperature Celsius|Humidity|Barometric Pressure //|Altitude Meters|eCO2 Concentration|tVOC Concentration|* zzzzzz = "BLE|" + sver + "|" + dateRTC + "|" + timeRTC + "|" + TEMValue + "|" + HUMValue + "|" + BARValue + "|" + ALTValue + "|" + ECOValue + "|" + VOCValue + "|*\r"; char msg[zzzzzz.length() + 1]; zzzzzz.toCharArray(msg, zzzzzz.length() + 1); appendFile(SD, "/espdata.txt", msg ); } // List Dir void listDir(fs::FS &fs, const char * dirname, uint8_t levels){ dirname; File root = fs.open(dirname); if(!root){ return; } if(!root.isDirectory()){ return; } File file = root.openNextFile(); while(file){ if(file.isDirectory()){ file.name(); if(levels){ listDir(fs, file.name(), levels -1); } } else { file.name(); file.size(); } file = root.openNextFile(); } } // Write File void writeFile(fs::FS &fs, const char * path, const char * message){ path; File file = fs.open(path, FILE_WRITE); if(!file){ return; } if(file.print(message)){ ; } else { ; } file.close(); } // Append File void appendFile(fs::FS &fs, const char * path, const char * message){ path; File file = fs.open(path, FILE_APPEND); if(!file){ return; } if(file.print(message)){ ; } else { ; } file.close(); }
setup.ino
// Setup void setup() { // Serial Serial.begin(115200); Serial.println("Starting Arduino BLE Client application..."); // Initialize digital pin iLED as an output pinMode(iLED, OUTPUT); // Turn the LED on HIGH digitalWrite(iLED, HIGH); // SHARP Display start & clear the display display.begin(); display.clearDisplay(); // Date & Time RTC // PCF8523 Precision RTC setupRTC(); // Date & Time isRTC(); // Display UID isDisplayUID(); // microSD Card setupSD(); // Bluetooth BLE BLEDevice::init(""); // Give display time to power on delay(100); BLEScan* pBLEScan = BLEDevice::getScan(); pBLEScan->setAdvertisedDeviceCallbacks(new MyAdvertisedDeviceCallbacks()); pBLEScan->setInterval(1349); pBLEScan->setWindow(449); pBLEScan->setActiveScan(true); pBLEScan->start(5, false); }
——
People can contact us: https://www.donluc.com/?page_id=1927
Technology Experience
- Programming Language
- Single-Board Microcontrollers (PIC, Arduino, Raspberry Pi,Espressif, etc…)
- IoT
- Wireless (Radio Frequency, Bluetooth, WiFi, Etc…)
- Robotics
- Camera and Video Capture Receiver Stationary, Wheel/Tank and Underwater Vehicle
- Unmanned Vehicles Terrestrial and Marine
- Machine Learning
- RTOS
- Research & Development (R & D)
Instructor, E-Mentor, STEAM, and Arts-Based Training
- Programming Language
- IoT
- PIC Microcontrollers
- Arduino
- Raspberry Pi
- Espressif
- Robotics
Follow Us
Luc Paquin – Curriculum Vitae – 2023
https://www.donluc.com/luc/
Web: https://www.donluc.com/
Facebook: https://www.facebook.com/neosteam.labs.9/
YouTube: https://www.youtube.com/@thesass2063
Twitter: https://twitter.com/labs_steam
Pinterest: https://www.pinterest.com/NeoSteamLabs/
Instagram: https://www.instagram.com/neosteamlabs/
Don Luc
Project #12: Robotics – Micro OLED – Mk26
——
#DonLucElectronics #DonLuc #Robotics #MicroOLED #AdafruitMETROM0Express #Arduino #Project #Fritzing #Programming #Electronics #Microcontrollers #Consultant
——
——
——
——-
Micro OLED
Micro OLED displays are silicon-based OLED display that use a monocrystalline silicon wafer as the actively driven backplane, so it is easier to achieve high PPI (Pixel Density), a high degree of integration, and small size. This ensures they are easy to carry, have good anti-seismic performance, and have ultra-low power consumption.
DL2305Mk02
1 x Adafruit METRO M0 Express
1 x ProtoScrewShield
1 x SparkFun Micro OLED Breakout (Qwiic)
1 x Thumb Joystick
1 x SparkFun Thumb Joystick Breakout
2 x Pololu DRV8834 Low-Voltage Stepper Motor Driver Carrier
2 x Electrolytic Decoupling Capacitors – 100uF/25V
2 x Pololu Stepper Motor Bipolar, 2.8V, 1.7 A/Phase
2 x Pololu Universal Aluminum Mounting Hub for 5mm Shaft, M3 Holes
1 x SparkFun Solderable Breadboard – Large
1 x SparkFun Cerberus USB Cable
Adafruit METRO M0 Express
SCL – Digital 21
SDA – Digital 20
JH – Analog A0
JV – Analog A1
JS – Digital 2
DIR – Digital 7
SPR – Digital 8
DIL – Digital 9
SPL – Digital 10
LED – Digital 13
VIN – +3.3V
VIN – +5V
GND – GND
——
DL2305Mk02p.ino
/* ***** Don Luc Electronics © ***** Software Version Information Project #12: Robotics - Micro OLED - Mk26 12-26 DL2305Mk02p.ino 1 x Adafruit METRO M0 Express 1 x ProtoScrewShield 1 x SparkFun Micro OLED Breakout (Qwiic) 1 x Thumb Joystick 1 x SparkFun Thumb Joystick Breakout 2 x Pololu DRV8834 Low-Voltage Stepper Motor Driver Carrier 2 x Electrolytic Decoupling Capacitors - 100uF/25V 2 x Pololu Stepper Motor Bipolar, 2.8V, 1.7 A/Phase 2 x Pololu Universal Aluminum Mounting Hub for 5mm Shaft, M3 Holes 1 x SparkFun Solderable Breadboard - Large 1 x SparkFun Cerberus USB Cable */ // Include the Library Code // Arduino #include <Arduino.h> // DRV8834 Stepper Motor Driver #include <BasicStepperDriver.h> #include <MultiDriver.h> // Wire communicate with I2C / TWI devices #include <Wire.h> // SparkFun Micro OLED #include <SFE_MicroOLED.h> // DRV8834 Stepper Motor Driver // Stepper motor steps per revolution. // Most steppers are 200 steps or 1.8 degrees/step #define MOTOR_STEPS 200 // Target RPM for X axis stepper motor #define MOTOR_X_RPM 800 // Target RPM for Y axis stepper motor #define MOTOR_Y_RPM 800 // Since microstepping is set externally, // make sure this matches the selected mode // If it doesn't, the motor will move at a // different RPM than chosen // 1=full step, 2=half step etc. #define MICROSTEPS 1 // X Stepper motor #define DIR_X 7 #define STEP_X 8 // Y Stepper motor #define DIR_Y 9 #define STEP_Y 10 // BasicStepperDriver BasicStepperDriver stepperX(MOTOR_STEPS, DIR_X, STEP_X); BasicStepperDriver stepperY(MOTOR_STEPS, DIR_Y, STEP_Y); // Pick one of the two controllers below // each motor moves independently MultiDriver controller(stepperX, stepperY); // Joystick #define JH A0 #define JV A1 #define JS 2 // Variable for reading the button int JSState = 0; // Adjusted Value int adjustedValue = 0; int adjustedValue2 = 0; // LED Yellow int iLED = 13; // SparkFun Micro OLED #define PIN_RESET 9 #define DC_JUMPER 1 // I2C declaration MicroOLED oled(PIN_RESET, DC_JUMPER); // Software Version Information String sver = "12-26"; void loop() { // Button isButton(); // Joystick isThumbJoystick(); // Stepper isStepper(); // Micro OLED isMicroOLED(); }
getButton.ino
// Button // Button Setup void isButtonSetup() { // Make the button line an input pinMode(JS, INPUT_PULLUP); // Initialize digital pin iLED as an output pinMode(iLED, OUTPUT); } // Button void isButton(){ // Read the state of the button JSState = digitalRead(JS); // Check if the button is pressed. // If it is, the JSState is HIGH: if (JSState == HIGH) { // Button // Turn the LED on HIGH digitalWrite(iLED, HIGH); } else { // Button // Turn the LED on LOW digitalWrite(iLED, LOW); } }
getMicroOLED.ino
// SparkFun Micro OLED // Setup Micro OLED void isMicroOLEDSetup() { // Initialize the OLED oled.begin(); // Clear the display's internal memory oled.clear(ALL); // Display what's in the buffer (Splash Screen SparkFun) oled.display(); // Delay 1000 ms delay(1000); // Clear the buffer. oled.clear(PAGE); } // Micro OLED void isMicroOLED() { // Text Display FreeIMU // Clear the display oled.clear(PAGE); // Set cursor to top-left oled.setCursor(0, 0); // Set font to type 0 oled.setFontType(0); // Horizontal oled.print("Horizontal"); // Horizontal oled.setCursor(0, 13); oled.print( adjustedValue ); // Vertical oled.setCursor(0, 24); oled.print("Vertical"); // Vertical oled.setCursor(0, 37); oled.print( adjustedValue2 ); oled.display(); }
getStepper.ino
// Stepper // isStepperSetup void isStepperSetup() { // Set stepper target motors RPM. stepperX.begin(MOTOR_X_RPM, MICROSTEPS); stepperY.begin(MOTOR_Y_RPM, MICROSTEPS); } // Stepper void isStepper() { // Stepper => Controller rotate controller.rotate(adjustedValue, adjustedValue2); }
getThumbJoystick.ino
// Thumb Joystick void isThumbJoystick() { // Joystick JH // Horizontal // Joystick Pot Values JH int potValue = analogRead(JH); int potValues = 0; // Adjusted Value potValues = map(potValue, 0, 1023, 1000, -1000); if (potValues > 300) { adjustedValue = potValues; } else if (potValues < -300) { adjustedValue = potValues; } else { adjustedValue = 0; } // Joystick JV // Vertical // Joystick Pot Values JV int potValue2 = analogRead(JV); int potValues2 = 0; // Adjusted Value2 potValues2 = map(potValue2, 0, 1023, 1000, -1000); if (potValues2 > 300) { adjustedValue2 = potValues2; } else if (potValues2 < -300) { adjustedValue2 = potValues2; } else { adjustedValue2 = 0; } }
setup.ino
// Setup void setup() { // Wire communicate with I2C / TWI devices Wire.begin(); // Setup Micro OLED isMicroOLEDSetup(); // Button Setup isButtonSetup(); // DRV8834 Stepper Motor Driver isStepperSetup(); }
——
People can contact us: https://www.donluc.com/?page_id=1927
Technology Experience
- Programming Language
- Single-Board Microcontrollers (PIC, Arduino, Raspberry Pi,Espressif, etc…)
- IoT
- Wireless (Radio Frequency, Bluetooth, WiFi, Etc…)
- Robotics
- Camera and Video Capture Receiver Stationary, Wheel/Tank and Underwater Vehicle
- Unmanned Vehicles Terrestrial and Marine
- Machine Learning
- RTOS
- Research & Development (R & D)
Instructor, E-Mentor, STEAM, and Arts-Based Training
- Programming Language
- IoT
- PIC Microcontrollers
- Arduino
- Raspberry Pi
- Espressif
- Robotics
Follow Us
Luc Paquin – Curriculum Vitae – 2023
https://www.donluc.com/luc/
Web: https://www.donluc.com/
Facebook: https://www.facebook.com/neosteam.labs.9/
YouTube: https://www.youtube.com/@thesass2063
Twitter: https://twitter.com/labs_steam
Pinterest: https://www.pinterest.com/NeoSteamLabs/
Instagram: https://www.instagram.com/neosteamlabs/
Don Luc
Project #12: Robotics – Multi-Motor Control – Mk25
——
#DonLucElectronics #DonLuc #Robotics #MultiMotorControl #AdafruitMETROM0Express #Arduino #Project #Fritzing #Programming #Electronics #Microcontrollers #Consultant
——
——
——
——
Multi-Motor Control
In order to synchronize the multi-motor system, a novel method for this system based on embedded control terminal. A controller of the strategy with the function of synchronous control is also completed. According to the requirements of this system, a distributed control structure which based on Hierarchical Approach is chosen. The hardware platform of this structure is composed of embedded control terminal motor could be driven independently. The experiment results verified that the multi-motor system is reliable, the control strategy is rational applied this multi-motor system has better dynamic response and higher reliability.
DL2305Mk01
1 x Adafruit METRO M0 Express
1 x ProtoScrewShield
1 x Thumb Joystick
1 x SparkFun Thumb Joystick Breakout
2 x Pololu DRV8834 Low-Voltage Stepper Motor Driver Carrier
2 x Electrolytic Decoupling Capacitors – 100uF/25V
2 x Pololu Stepper Motor Bipolar, 2.8V, 1.7 A/Phase
2 x Pololu Universal Aluminum Mounting Hub for 5mm Shaft, M3 Holes
1 x SparkFun Solderable Breadboard – Large
1 x SparkFun Cerberus USB Cable
Adafruit METRO M0 Express
JH – Analog A0
JV – Analog A1
JS – Digital 2
DIR – Digital 7
SPR – Digital 8
DIL – Digital 9
SPL – Digital 10
LED – Digital 13
VIN – +3.3V
VIN – +5V
GND – GND
——
DL2305Mk01p.ino
/* ***** Don Luc Electronics © ***** Software Version Information Project #12: Robotics - Multi-Motor Control - Mk25 12-25 DL2305Mk01p.ino 1 x Adafruit METRO M0 Express 1 x ProtoScrewShield 1 x Thumb Joystick 1 x SparkFun Thumb Joystick Breakout 2 x Pololu DRV8834 Low-Voltage Stepper Motor Driver Carrier 2 x Electrolytic Decoupling Capacitors - 100uF/25V 2 x Pololu Stepper Motor Bipolar, 2.8V, 1.7 A/Phase 2 x Pololu Universal Aluminum Mounting Hub for 5mm Shaft, M3 Holes 1 x SparkFun Solderable Breadboard - Large 1 x SparkFun Cerberus USB Cable */ // Include the Library Code // Arduino #include <Arduino.h> // DRV8834 Stepper Motor Driver #include <BasicStepperDriver.h> #include <MultiDriver.h> // DRV8834 Stepper Motor Driver // Stepper motor steps per revolution. // Most steppers are 200 steps or 1.8 degrees/step #define MOTOR_STEPS 200 // Target RPM for X axis stepper motor #define MOTOR_X_RPM 800 // Target RPM for Y axis stepper motor #define MOTOR_Y_RPM 800 // Since microstepping is set externally, // make sure this matches the selected mode // If it doesn't, the motor will move at a // different RPM than chosen // 1=full step, 2=half step etc. #define MICROSTEPS 1 // X Stepper motor #define DIR_X 7 #define STEP_X 8 // Y Stepper motor #define DIR_Y 9 #define STEP_Y 10 // BasicStepperDriver BasicStepperDriver stepperX(MOTOR_STEPS, DIR_X, STEP_X); BasicStepperDriver stepperY(MOTOR_STEPS, DIR_Y, STEP_Y); // Pick one of the two controllers below // each motor moves independently MultiDriver controller(stepperX, stepperY); // Joystick #define JH A0 #define JV A1 #define JS 2 // Variable for reading the button int JSState = 0; // Adjusted Value int adjustedValue = 0; int adjustedValue2 = 0; // LED Yellow int iLED = 13; // Software Version Information String sver = "12-25"; void loop() { // Button isButton(); // Joystick isThumbJoystick(); // Stepper isStepper(); }
getButton.ino
// Button // Button Setup void isButtonSetup() { // Make the button line an input pinMode(JS, INPUT_PULLUP); // Initialize digital pin iLED as an output pinMode(iLED, OUTPUT); } // Button void isButton(){ // Read the state of the button JSState = digitalRead(JS); // Check if the button is pressed. // If it is, the JSState is HIGH: if (JSState == HIGH) { // Button // Turn the LED on HIGH digitalWrite(iLED, HIGH); } else { // Button // Turn the LED on LOW digitalWrite(iLED, LOW); } }
getStepper.ino
// Stepper // isStepperSetup void isStepperSetup() { // Set stepper target motors RPM. stepperX.begin(MOTOR_X_RPM, MICROSTEPS); stepperY.begin(MOTOR_Y_RPM, MICROSTEPS); } // Stepper void isStepper() { // Stepper => Controller rotate controller.rotate(adjustedValue, adjustedValue2); }
getThumbJoystick.ino
// Thumb Joystick void isThumbJoystick() { // Joystick JH // Horizontal // Joystick Pot Values JH int potValue = analogRead(JH); int potValues = 0; // Adjusted Value potValues = map(potValue, 0, 1023, 1000, -1000); if (potValues > 300) { adjustedValue = potValues; } else if (potValues < -300) { adjustedValue = potValues; } else { adjustedValue = 0; } // Joystick JV // Vertical // Joystick Pot Values JV int potValue2 = analogRead(JV); int potValues2 = 0; // Adjusted Value2 potValues2 = map(potValue2, 0, 1023, 1000, -1000); if (potValues2 > 300) { adjustedValue2 = potValues2; } else if (potValues2 < -300) { adjustedValue2 = potValues2; } else { adjustedValue2 = 0; } }
setup.ino
// Setup void setup() { // Button Setup isButtonSetup(); // DRV8834 Stepper Motor Driver isStepperSetup(); }
——
People can contact us: https://www.donluc.com/?page_id=1927
Technology Experience
- Programming Language
- Single-Board Microcontrollers (PIC, Arduino, Raspberry Pi,Espressif, etc…)
- IoT
- Wireless (Radio Frequency, Bluetooth, WiFi, Etc…)
- Robotics
- Camera and Video Capture Receiver Stationary, Wheel/Tank and Underwater Vehicle
- Unmanned Vehicles Terrestrial and Marine
- Machine Learning
- RTOS
- Research & Development (R & D)
Instructor, E-Mentor, STEAM, and Arts-Based Training
- Programming Language
- IoT
- PIC Microcontrollers
- Arduino
- Raspberry Pi
- Espressif
- Robotics
Follow Us
Luc Paquin – Curriculum Vitae – 2023
https://www.donluc.com/luc/
Web: https://www.donluc.com/
Facebook: https://www.facebook.com/neosteam.labs.9/
YouTube: https://www.youtube.com/@thesass2063
Twitter: https://twitter.com/labs_steam
Pinterest: https://www.pinterest.com/NeoSteamLabs/
Instagram: https://www.instagram.com/neosteamlabs/
Don Luc
Project #12: Robotics – ProtoScrewShield – Mk24
——
#DonLucElectronics #DonLuc #Robotics #AdafruitMETROM0Express #Arduino #Project #Fritzing #Programming #Electronics #Microcontrollers #Consultant
——
——
——
——
ProtoScrewShield
The ProtoScrewShield extends all pins of the Arduino out to 3.5mm pitch screw terminals. It also has a lot of the utility provided including: a large prototyping space of both connected and unconnected 0.1″ spaced through-holes, a couple 5V and GND busses, a reset button, general use push button, and a 5mm yellow LED. This product includes all the parts shown and comes in kit form and must be soldered together by the end user.
DL2304Mk04
1 x Adafruit METRO M0 Express
1 x ProtoScrewShield
2 x Pololu DRV8834 Low-Voltage Stepper Motor Driver Carrier
2 x Electrolytic Decoupling Capacitors – 100uF/25V
2 x Pololu Stepper Motor Bipolar, 2.8V, 1.7 A/Phase
2 x Pololu Universal Aluminum Mounting Hub for 5mm Shaft, M3 Holes
1 x SparkFun Solderable Breadboard – Large
1 x SparkFun Cerberus USB Cable
Adafruit METRO M0 Express
DIR – Digital 7
SPR – Digital 8
DIL – Digital 9
SPL – Digital 10
LED – LED_BUILTIN
VIN – +3.3V
GND – GND
——
DL2304Mk04p.ino
/* ***** Don Luc Electronics © ***** Software Version Information Project #12: Robotics - ProtoScrewShield - Mk24 12-24 DL2304Mk04p.ino 1 x Adafruit METRO M0 Express 1 x ProtoScrewShield 2 x Pololu DRV8834 Low-Voltage Stepper Motor Driver Carrier 2 x Electrolytic Decoupling Capacitors - 100uF/25V 2 x Pololu Stepper Motor Bipolar, 2.8V, 1.7 A/Phase 2 x Pololu Universal Aluminum Mounting Hub for 5mm Shaft, M3 Holes 1 x SparkFun Solderable Breadboard - Large 1 x SparkFun Cerberus USB Cable */ // Include the Library Code // Arduino #include <Arduino.h> // DRV8834 Stepper Motor Driver #include <BasicStepperDriver.h> #include <MultiDriver.h> // DRV8834 Stepper Motor Driver // Stepper motor steps per revolution. // Most steppers are 200 steps or 1.8 degrees/step #define MOTOR_STEPS 200 // Target RPM for X axis stepper motor #define MOTOR_X_RPM 800 // Target RPM for Y axis stepper motor #define MOTOR_Y_RPM 800 // Since microstepping is set externally, // make sure this matches the selected mode // If it doesn't, the motor will move at a // different RPM than chosen // 1=full step, 2=half step etc. #define MICROSTEPS 1 // X Stepper motor #define DIR_X 7 #define STEP_X 8 // Y Stepper motor #define DIR_Y 9 #define STEP_Y 10 // BasicStepperDriver BasicStepperDriver stepperX(MOTOR_STEPS, DIR_X, STEP_X); BasicStepperDriver stepperY(MOTOR_STEPS, DIR_Y, STEP_Y); // Pick one of the two controllers below // each motor moves independently MultiDriver controller(stepperX, stepperY); // LED Yellow int iLED = 13; // Software Version Information String sver = "12-24"; void loop() { // Stepper isStepper(); }
getStepper.ino
// Stepper // isStepperSetup void isStepperSetup() { // Set stepper target motors RPM. stepperX.begin(MOTOR_X_RPM, MICROSTEPS); stepperY.begin(MOTOR_Y_RPM, MICROSTEPS); } // Stepper void isStepper() { // Stepper => Controller rotate controller.rotate(360, 360); }
setup.ino
// Setup void setup() { // Initialize digital pin iLED as an output. pinMode(iLED, OUTPUT); // Turn the LED on HIGH digitalWrite(iLED, HIGH); // DRV8834 Stepper Motor Driver isStepperSetup(); }
——
People can contact us: https://www.donluc.com/?page_id=1927
Technology Experience
- Programming Language
- Single-Board Microcontrollers (PIC, Arduino, Raspberry Pi,Espressif, etc…)
- IoT
- Wireless (Radio Frequency, Bluetooth, WiFi, Etc…)
- Robotics
- Camera and Video Capture Receiver Stationary, Wheel/Tank and Underwater Vehicle
- Unmanned Vehicles Terrestrial and Marine
- Machine Learning
- RTOS
- Research & Development (R & D)
Instructor, E-Mentor, STEAM, and Arts-Based Training
- Programming Language
- IoT
- PIC Microcontrollers
- Arduino
- Raspberry Pi
- Espressif
- Robotics
Follow Us
Luc Paquin – Curriculum Vitae – 2023
https://www.donluc.com/luc/
Web: https://www.donluc.com/
Facebook: https://www.facebook.com/neosteam.labs.9/
YouTube: https://www.youtube.com/@thesass2063
Twitter: https://twitter.com/labs_steam
Pinterest: https://www.pinterest.com/NeoSteamLabs/
Instagram: https://www.instagram.com/neosteamlabs/
Don Luc
Project #26 – Radio Frequency – Gamepad Tester – Mk14
——
#DonLucElectronics #DonLuc #RadioFrequency #Bluetooth #JoystickTest #Gamepad #ESP32 #Arduino #Project #Fritzing #Programming #Electronics #Microcontrollers #Consultant
——
——
——
——
Controller & Gamepad Tester
You can begin testing your controller or gamepad by pressing a button or moving one of the analog sticks on your gamepad. When you press a button or move an analog stick, the illustration above should light up or display the movement of your analog stick. When we detect movement or button presses, the “Controller Detected” message will show up with your controller’s name in it. If you have multiple controllers or gamepads connected, then please try them one by one. Even though the illustration represents an Xbox controller, the test also works with other similar controllers.
DL2304Mk02
1 x SparkFun Thing Plus – ESP32 WROOM
1 x SparkFun Joystick Shield Kit
1 x Thumb Joystick
1 x SparkFun Thumb Joystick Breakout
1 x Terminal Block Breakout FeatherWing
1 x Lithium Ion Battery – 1 Ah
1 x SparkFun Cerberus USB Cable
SparkFun Thing Plus – ESP32 WROOM
LJH – Analog A3
LJV – Analog A2
LJS – Digital 12
RJH – Analog A1
RJV – Analog A0
RJS – Digital 21
LD1 – Digital 16
LD2 – Digital 18
LD3 – Digital 19
LD4 – Digital 17
LT – Digital 5
LED – LED_BUILTIN
VIN – +3.3V
GND – GND
——
DL2304Mk02p.ino
/* ***** Don Luc Electronics © ***** Software Version Information Project #26 - Radio Frequency - - Mk14 26-14 DL2304Mk02p.ino 1 x SparkFun Thing Plus - ESP32 WROOM 1 x SparkFun Joystick Shield Kit 1 x Thumb Joystick 1 x SparkFun Thumb Joystick Breakout 1 x Terminal Block Breakout FeatherWing 1 x Lithium Ion Battery - 1 Ah 1 x SparkFun Cerberus USB Cable */ // Include the Library Code // Arduino #include <Arduino.h> // ESP32 BLE Gamepad #include <BleGamepad.h> // ESP32 BLE Gamepad BleGamepad bleGamepad; // Left Joystick #define LJH A3 #define LJV A2 #define LJS 12 // Right Joystick #define RJH A0 #define RJV A1 #define RJS 21 // D-pad #define LD1 19 #define LD2 17 #define LD3 18 #define LD4 16 // LT #define LT 5 // Previous Button State int previousButton1State = HIGH; int previousButton2State = HIGH; int previousButton3State = HIGH; int previousButton4State = HIGH; int previousButton5State = HIGH; int previousButton6State = HIGH; int previousButton7State = HIGH; // Number of pot samples to take (to smooth the values) const int numberOfPotSamples = 5; // Delay in milliseconds between pot samples const int delayBetweenSamples = 2; // Additional delay in milliseconds between HID reports const int delayBetweenHIDReports = 5; // Delay in milliseconds between button press const int debounceDelay = 10; // Software Version Information String sver = "26-14"; void loop() { // Bluetooth Serial (ESP32SPP) isBluetooth(); }
getBluetooth.ino
// Bluetooth // isBluetooth void isBluetooth() { // ESP32 BLE Gamepad if(bleGamepad.isConnected()) { // Button isButton(); // Joystick isThumbJoystick(); } }
getGames.ino
// Games // Set Inputs void setInputs() { // Make the button line an input pinMode(LJS, INPUT_PULLUP); pinMode(RJS, INPUT_PULLUP); pinMode(LD1, INPUT_PULLUP); pinMode(LD2, INPUT_PULLUP); pinMode(LD3, INPUT_PULLUP); pinMode(LD4, INPUT_PULLUP); pinMode(LT, INPUT_PULLUP); // Initialize digital pin LED_BUILTIN as an output. pinMode(LED_BUILTIN, OUTPUT); // Turn the LED on HIGH digitalWrite(LED_BUILTIN, HIGH); } // Button void isButton(){ // Button1 State LD1 int currentButton1State = digitalRead(LD1); if (currentButton1State != previousButton1State) { if (currentButton1State == LOW) { bleGamepad.press(BUTTON_1); } else { bleGamepad.release(BUTTON_1); } } previousButton1State = currentButton1State; // Button2 State LD2 int currentButton2State = digitalRead(LD2); if (currentButton2State != previousButton2State) { if (currentButton2State == LOW) { bleGamepad.press(BUTTON_2); } else { bleGamepad.release(BUTTON_2); } } previousButton2State = currentButton2State; // Button3 State LD3 int currentButton3State = digitalRead(LD3); if (currentButton3State != previousButton3State) { if (currentButton3State == LOW) { bleGamepad.press(BUTTON_3); } else { bleGamepad.release(BUTTON_3); } } previousButton3State = currentButton3State; // Button4 State LD4 int currentButton4State = digitalRead(LD4); if (currentButton4State != previousButton4State) { if (currentButton4State == LOW) { bleGamepad.press(BUTTON_4); } else { bleGamepad.release(BUTTON_4); } } previousButton4State = currentButton4State; // Button5 State LJS int currentButton5State = digitalRead(LJS); if (currentButton5State != previousButton5State) { if (currentButton5State == LOW) { bleGamepad.press(BUTTON_5); } else { bleGamepad.release(BUTTON_5); } } previousButton5State = currentButton5State; // Button6 State RJS int currentButton6State = digitalRead(RJS); if (currentButton6State != previousButton6State) { if (currentButton6State == LOW) { bleGamepad.press(BUTTON_6); } else { bleGamepad.release(BUTTON_6); } } previousButton6State = currentButton6State; // Button7 State LT int currentButton7State = digitalRead(LT); if (currentButton7State != previousButton7State) { if (currentButton7State == LOW) { bleGamepad.press(BUTTON_7); } else { bleGamepad.release(BUTTON_7); } } previousButton7State = currentButton7State; }
getThumbJoystick.ino
// Thumb Joystick void isThumbJoystick() { // Joystick LJH // Joystick Pot Values LJH int potValues[numberOfPotSamples]; for (int i = 0 ; i < numberOfPotSamples ; i++) { potValues[i] = analogRead(LJH); delay(delayBetweenSamples); } int potValue = 0; for (int i = 0 ; i < numberOfPotSamples ; i++) { potValue += potValues[i]; } // Value / Pot Samples potValue = potValue / numberOfPotSamples; // Adjusted Value int adjustedValue = map(potValue, 0, 4095, 32737, 0); // Joystick LJV // Joystick Pot Values LJV int potValues2[numberOfPotSamples]; for (int i = 0 ; i < numberOfPotSamples ; i++) { potValues2[i] = analogRead(LJV); delay(delayBetweenSamples); } int potValue2 = 0; for (int i = 0 ; i < numberOfPotSamples ; i++) { potValue2 += potValues2[i]; } // Value2 / Pot Samples potValue2 = potValue2 / numberOfPotSamples; // Adjusted Value2 int adjustedValue2 = map(potValue2, 0, 4095, 32737, 0); // Joystick RJH // Joystick Pot Values RJH int potValues3[numberOfPotSamples]; for (int i = 0 ; i < numberOfPotSamples ; i++) { potValues3[i] = analogRead(RJH); delay(delayBetweenSamples); } int potValue3 = 0; for (int i = 0 ; i < numberOfPotSamples ; i++) { potValue3 += potValues3[i]; } // Value3 / Pot Samples potValue3 = potValue3 / numberOfPotSamples; // Adjusted Value3 int adjustedValue3 = map(potValue3, 0, 4095, 32737, 0); Serial.print(" RJH: "); Serial.println(potValue3); // Joystick RJV // Joystick Pot Values RJV int potValues4[numberOfPotSamples]; for (int i = 0 ; i < numberOfPotSamples ; i++) { potValues4[i] = analogRead(RJV); delay(delayBetweenSamples); } int potValue4 = 0; for (int i = 0 ; i < numberOfPotSamples ; i++) { potValue4 += potValues4[i]; } // Value4 / Pot Samples potValue4 = potValue4 / numberOfPotSamples; // Adjusted Value4 int adjustedValue4 = map(potValue4, 0, 4095, 0, 32737); Serial.print(" RJV: "); Serial.println(potValue4); //bleGamepad.setAxes(adjustedValue, adjustedValue2, 0, 0, adjustedValue3, adjustedValue4, DPAD_CENTERED); bleGamepad.setAxes(adjustedValue, adjustedValue2, adjustedValue4, 0, adjustedValue3, 0, DPAD_CENTERED); delay(delayBetweenHIDReports); // D-pad // LD1 if (digitalRead(LD1) == LOW){ bleGamepad.setAxes(adjustedValue, adjustedValue2, adjustedValue4, 0, adjustedValue3, 0, DPAD_UP); } // LD2 if (digitalRead(LD2) == LOW){ bleGamepad.setAxes(adjustedValue, adjustedValue2, adjustedValue4, 0, adjustedValue3, 0, DPAD_LEFT); } // LD3 if (digitalRead(LD3) == LOW){ bleGamepad.setAxes(adjustedValue, adjustedValue2, adjustedValue4, 0, adjustedValue3, 0, DPAD_DOWN); } // LD4 if (digitalRead(LD4) == LOW){ bleGamepad.setAxes(adjustedValue, adjustedValue2, adjustedValue4, 0, adjustedValue3, 0, DPAD_RIGHT); } }
setup.ino
// Setup void setup() { // Serial Serial.begin(115200); // Set Inputs setInputs(); // ESP32 BLE Gamepad bleGamepad.begin(); }
——
People can contact us: https://www.donluc.com/?page_id=1927
Technology Experience
- Programming Language
- Single-Board Microcontrollers (PIC, Arduino, Raspberry Pi,Espressif, etc…)
- IoT
- Wireless (Radio Frequency, Bluetooth, WiFi, Etc…)
- Robotics
- Camera and Video Capture Receiver Stationary, Wheel/Tank and Underwater Vehicle
- Unmanned Vehicles Terrestrial and Marine
- Machine Learning
- RTOS
- Research & Development (R & D)
Instructor, E-Mentor, STEAM, and Arts-Based Training
- Programming Language
- IoT
- PIC Microcontrollers
- Arduino
- Raspberry Pi
- Espressif
- Robotics
Follow Us
Luc Paquin – Curriculum Vitae – 2023
https://www.donluc.com/luc/
Web: https://www.donluc.com/
Facebook: https://www.facebook.com/neosteam.labs.9/
YouTube: https://www.youtube.com/@thesass2063
Twitter: https://twitter.com/labs_steam
Pinterest: https://www.pinterest.com/NeoSteamLabs/
Instagram: https://www.instagram.com/neosteamlabs/
Don Luc
Project #26 – Radio Frequency – Joystick Test Application – Mk13
——
#DonLucElectronics #DonLuc #RadioFrequency #Bluetooth #JoystickTest #Gamepad #ESP32 #Arduino #Project #Fritzing #Programming #Electronics #Microcontrollers #Consultant
——
——
——
——
Joystick Test Application
While experimenting with making my own controllers recently, I needed a nice visual way of testing them in Windows. As you can see it’s pretty simple and just shows a visual representation of each axis, POV and button. Currently it supports Joysticks with 8 axes, 4 POV and up to 128 buttons. I haven’t had a chance to test it with over 32 buttons so I would be interested to here from anyone who has such a device. It should work on XP upwards but I have only tested it on Windows 10 64 bit. You just need Net framework 3 and DirectX 9 to run it.
DL2304Mk01
1 x SparkFun Thing Plus – ESP32 WROOM
1 x SparkFun Joystick Shield Kit
1 x Thumb Joystick
1 x SparkFun Thumb Joystick Breakout
1 x Terminal Block Breakout FeatherWing
1 x Lithium Ion Battery – 1 Ah
1 x SparkFun Cerberus USB Cable
SparkFun Thing Plus – ESP32 WROOM
LJH – Analog A3
LJV – Analog A2
LJS – Digital 12
RJH – Analog A1
RJV – Analog A0
RJS – Digital 21
LD1 – Digital 16
LD2 – Digital 18
LD3 – Digital 19
LD4 – Digital 17
LT – Digital 5
LED – LED_BUILTIN
VIN – +3.3V
GND – GND
——
DL2304Mk01p.ino
/* ***** Don Luc Electronics © ***** Software Version Information Project #26 - Radio Frequency - Joystick Test Application - Mk13 26-13 DL2304Mk01p.ino 1 x SparkFun Thing Plus - ESP32 WROOM 1 x SparkFun Joystick Shield Kit 1 x Thumb Joystick 1 x SparkFun Thumb Joystick Breakout 1 x Terminal Block Breakout FeatherWing 1 x Lithium Ion Battery - 1 Ah 1 x SparkFun Cerberus USB Cable */ // Include the Library Code // Arduino #include <Arduino.h> // ESP32 BLE Gamepad #include <BleGamepad.h> // ESP32 BLE Gamepad BleGamepad bleGamepad; // Left Joystick #define LJH A3 #define LJV A2 #define LJS 12 // Right Joystick #define RJH A1 #define RJV A0 #define RJS 21 // D-pad #define LD1 16 #define LD2 18 #define LD3 19 #define LD4 17 // LT #define LT 5 // Previous Button State int previousButton1State = HIGH; int previousButton2State = HIGH; int previousButton3State = HIGH; int previousButton4State = HIGH; int previousButton5State = HIGH; int previousButton6State = HIGH; int previousButton7State = HIGH; // Number of pot samples to take (to smooth the values) const int numberOfPotSamples = 5; // Delay in milliseconds between pot samples const int delayBetweenSamples = 2; // Additional delay in milliseconds between HID reports const int delayBetweenHIDReports = 5; // Delay in milliseconds between button press const int debounceDelay = 10; // Software Version Information String sver = "26-13"; void loop() { // Bluetooth Serial (ESP32SPP) isBluetooth(); }
getBluetooth.ino
// Bluetooth // isBluetooth void isBluetooth() { // ESP32 BLE Gamepad if(bleGamepad.isConnected()) { // Button isButton(); // Joystick isThumbJoystick(); } }
getGames.ino
// Games // Set Inputs void setInputs() { // Make the button line an input pinMode(LJS, INPUT_PULLUP); pinMode(RJS, INPUT_PULLUP); pinMode(LD1, INPUT_PULLUP); pinMode(LD2, INPUT_PULLUP); pinMode(LD3, INPUT_PULLUP); pinMode(LD4, INPUT_PULLUP); pinMode(LT, INPUT_PULLUP); // Initialize digital pin LED_BUILTIN as an output. pinMode(LED_BUILTIN, OUTPUT); // Turn the LED on HIGH digitalWrite(LED_BUILTIN, HIGH); } // Button void isButton(){ // Button1 State LD1 int currentButton1State = digitalRead(LD1); if (currentButton1State != previousButton1State) { if (currentButton1State == LOW) { bleGamepad.press(BUTTON_1); } else { bleGamepad.release(BUTTON_1); } } previousButton1State = currentButton1State; // Button2 State LD2 int currentButton2State = digitalRead(LD2); if (currentButton2State != previousButton2State) { if (currentButton2State == LOW) { bleGamepad.press(BUTTON_2); } else { bleGamepad.release(BUTTON_2); } } previousButton2State = currentButton2State; // Button3 State LD3 int currentButton3State = digitalRead(LD3); if (currentButton3State != previousButton3State) { if (currentButton3State == LOW) { bleGamepad.press(BUTTON_3); } else { bleGamepad.release(BUTTON_3); } } previousButton3State = currentButton3State; // Button4 State LD4 int currentButton4State = digitalRead(LD4); if (currentButton4State != previousButton4State) { if (currentButton4State == LOW) { bleGamepad.press(BUTTON_4); } else { bleGamepad.release(BUTTON_4); } } previousButton4State = currentButton4State; // Button5 State LJS int currentButton5State = digitalRead(LJS); if (currentButton5State != previousButton5State) { if (currentButton5State == LOW) { bleGamepad.press(BUTTON_5); } else { bleGamepad.release(BUTTON_5); } } previousButton5State = currentButton5State; // Button6 State RJS int currentButton6State = digitalRead(RJS); if (currentButton6State != previousButton6State) { if (currentButton6State == LOW) { bleGamepad.press(BUTTON_6); } else { bleGamepad.release(BUTTON_6); } } previousButton6State = currentButton6State; // Button7 State LT int currentButton7State = digitalRead(LT); if (currentButton7State != previousButton7State) { if (currentButton7State == LOW) { bleGamepad.press(BUTTON_7); } else { bleGamepad.release(BUTTON_7); } } previousButton7State = currentButton7State; }
getThumbJoystick.ino
// Thumb Joystick void isThumbJoystick() { // Joystick LJH // Joystick Pot Values LJH int potValues[numberOfPotSamples]; for (int i = 0 ; i < numberOfPotSamples ; i++) { potValues[i] = analogRead(LJH); delay(delayBetweenSamples); } int potValue = 0; for (int i = 0 ; i < numberOfPotSamples ; i++) { potValue += potValues[i]; } // Value / Pot Samples potValue = potValue / numberOfPotSamples; // Adjusted Value int adjustedValue = map(potValue, 0, 4095, 32737, 0); // Joystick LJV // Joystick Pot Values LJV int potValues2[numberOfPotSamples]; for (int i = 0 ; i < numberOfPotSamples ; i++) { potValues2[i] = analogRead(LJV); delay(delayBetweenSamples); } int potValue2 = 0; for (int i = 0 ; i < numberOfPotSamples ; i++) { potValue2 += potValues2[i]; } // Value2 / Pot Samples potValue2 = potValue2 / numberOfPotSamples; // Adjusted Value2 int adjustedValue2 = map(potValue2, 0, 4095, 32737, 0); // Joystick RJH // Joystick Pot Values RJH int potValues3[numberOfPotSamples]; for (int i = 0 ; i < numberOfPotSamples ; i++) { potValues3[i] = analogRead(RJH); delay(delayBetweenSamples); } int potValue3 = 0; for (int i = 0 ; i < numberOfPotSamples ; i++) { potValue3 += potValues3[i]; } // Value3 / Pot Samples potValue3 = potValue3 / numberOfPotSamples; // Adjusted Value3 int adjustedValue3 = map(potValue3, 0, 4095, 32737, 0); // Joystick RJV // Joystick Pot Values RJV int potValues4[numberOfPotSamples]; for (int i = 0 ; i < numberOfPotSamples ; i++) { potValues4[i] = analogRead(RJV); delay(delayBetweenSamples); } int potValue4 = 0; for (int i = 0 ; i < numberOfPotSamples ; i++) { potValue4 += potValues4[i]; } // Value4 / Pot Samples potValue4 = potValue4 / numberOfPotSamples; // Adjusted Value4 int adjustedValue4 = map(potValue4, 0, 4095, 32737, 0); bleGamepad.setAxes(adjustedValue, adjustedValue2, 0, 0, adjustedValue3, adjustedValue4, DPAD_CENTERED); delay(delayBetweenHIDReports); // D-pad // LD1 if (digitalRead(LD1) == LOW){ bleGamepad.setAxes(adjustedValue, adjustedValue2, 0, 0, adjustedValue3, adjustedValue4, DPAD_UP); } // LD2 if (digitalRead(LD2) == LOW){ bleGamepad.setAxes(adjustedValue, adjustedValue2, 0, 0, adjustedValue3, adjustedValue4, DPAD_LEFT); } // LD3 if (digitalRead(LD3) == LOW){ bleGamepad.setAxes(adjustedValue, adjustedValue2, 0, 0, adjustedValue3, adjustedValue4, DPAD_DOWN); } // LD4 if (digitalRead(LD4) == LOW){ bleGamepad.setAxes(adjustedValue, adjustedValue2, 0, 0, adjustedValue3, adjustedValue4, DPAD_RIGHT); } }
setup.ino
// Setup void setup() { // Set Inputs setInputs(); // ESP32 BLE Gamepad bleGamepad.begin(); }
——
People can contact us: https://www.donluc.com/?page_id=1927
Technology Experience
- Programming Language
- Single-Board Microcontrollers (PIC, Arduino, Raspberry Pi,Espressif, etc…)
- IoT
- Wireless (Radio Frequency, Bluetooth, WiFi, Etc…)
- Robotics
- Camera and Video Capture Receiver Stationary, Wheel/Tank and Underwater Vehicle
- Unmanned Vehicles Terrestrial and Marine
- Machine Learning
- RTOS
- Research & Development (R & D)
Instructor, E-Mentor, STEAM, and Arts-Based Training
- Programming Language
- IoT
- PIC Microcontrollers
- Arduino
- Raspberry Pi
- Espressif
- Robotics
Follow Us
Luc Paquin – Curriculum Vitae – 2023
https://www.donluc.com/luc/
Web: https://www.donluc.com/
Facebook: https://www.facebook.com/neosteam.labs.9/
YouTube: https://www.youtube.com/@thesass2063
Twitter: https://twitter.com/labs_steam
Pinterest: https://www.pinterest.com/NeoSteamLabs/
Instagram: https://www.instagram.com/neosteamlabs/
Don Luc
Project #26 – Radio Frequency – Gamepad – Mk12
——
#DonLucElectronics #DonLuc #RadioFrequency #Bluetooth #Gamepad #SparkFunThingPlusESP32WROOM #Arduino #Project #Fritzing #Programming #Electronics #Microcontrollers #Consultant
——
——
——
Gamepad
A gamepad is a type of video game controller held in two hands, where the fingers are used to provide input. They are typically the main input device for video game consoles. Gamepads generally feature a set of buttons handled with the right thumb and a direction controller handled with the left. The direction controller has traditionally been a four-way digital cross, also named a joypad, or alternatively a D-pad, and never called arrow keys, but most modern controllers additionally feature one or more analog sticks.
DL2303Mk03
1 x SparkFun Thing Plus – ESP32 WROOM
1 x SparkFun Joystick Shield Kit
1 x Thumb Joystick
1 x SparkFun Thumb Joystick Breakout
1 x Terminal Block Breakout FeatherWing
1 x SparkFun Cerberus USB Cable
SparkFun Thing Plus – ESP32 WROOM
LJH – Analog A3
LJV – Analog A2
LJS – Digital 12
RJH – Analog A1
RJV – Analog A0
RJS – Digital 21
LD1 – Digital 16
LD2 – Digital 18
LD3 – Digital 19
LD4 – Digital 17
LT – Digital 5
LED – LED_BUILTIN
VIN – +3.3V
GND – GND
——
DL2303Mk03p.ino
/* ***** Don Luc Electronics © ***** Software Version Information Project #26 - Radio Frequency - Gamepad - Mk12 26-12 DL2303Mk03p.ino 1 x SparkFun Thing Plus - ESP32 WROOM 1 x SparkFun Joystick Shield Kit 1 x Thumb Joystick 1 x SparkFun Thumb Joystick Breakout 1 x Terminal Block Breakout FeatherWing 1 x SparkFun Cerberus USB Cable */ // Include the Library Code // Arduino #include <Arduino.h> // ESP32 BLE Gamepad #include <BleGamepad.h> // ESP32 BLE Gamepad BleGamepad bleGamepad; // Left Joystick #define LJH A3 #define LJV A2 #define LJS 12 // Right Joystick #define RJH A1 #define RJV A0 #define RJS 21 // D-pad #define LD1 16 #define LD2 18 #define LD3 19 #define LD4 17 // LT #define LT 5 // Number of pot samples to take (to smooth the values) const int numberOfPotSamples = 5; // Delay in milliseconds between pot samples const int delayBetweenSamples = 2; // Additional delay in milliseconds between HID reports const int delayBetweenHIDReports = 5; // Delay in milliseconds between button press const int debounceDelay = 10; // Software Version Information String sver = "26-12"; void loop() { // Bluetooth Serial (ESP32SPP) isBluetooth(); // Delay delay(500); }
getBluetooth.ino
// Bluetooth // isBluetooth void isBluetooth() { // ESP32 BLE Gamepad if(bleGamepad.isConnected()) { // Button isButton(); // Joystick isThumbJoystick(); // Serial Serial.println(" *"); } }
getGames.ino
// Games // Set Inputs void setInputs() { // Make the button line an input pinMode(LJS, INPUT_PULLUP); pinMode(RJS, INPUT_PULLUP); pinMode(LD1, INPUT_PULLUP); pinMode(LD2, INPUT_PULLUP); pinMode(LD3, INPUT_PULLUP); pinMode(LD4, INPUT_PULLUP); pinMode(LT, INPUT_PULLUP); // Initialize digital pin LED_BUILTIN as an output. pinMode(LED_BUILTIN, OUTPUT); // Turn the LED on HIGH digitalWrite(LED_BUILTIN, HIGH); } // Button void isButton(){ // Left Joystick if (digitalRead(LJS) == LOW) { bleGamepad.press(LJS); delay(debounceDelay); bleGamepad.release(LJS); Serial.print(" LJS"); } // Right Joystick if (digitalRead(RJS) == LOW) { bleGamepad.press(RJS); delay(debounceDelay); bleGamepad.release(RJS); Serial.print(" RJS"); } // LT if (digitalRead(LT) == LOW) { bleGamepad.press(LT); delay(debounceDelay); bleGamepad.release(LT); Serial.print(" LT"); } }
getThumbJoystick.ino
// Thumb Joystick void isThumbJoystick() { // Joystick LJH // Joystick Pot Values LJH int potValues[numberOfPotSamples]; for (int i = 0 ; i < numberOfPotSamples ; i++) { potValues[i] = analogRead(LJH); delay(delayBetweenSamples); } int potValue = 0; for (int i = 0 ; i < numberOfPotSamples ; i++) { potValue += potValues[i]; } // Value / Pot Samples potValue = potValue / numberOfPotSamples; // Serial Serial.print(" LJH: "); Serial.print(potValue); // Adjusted Value int adjustedValue = map(potValue, 0, 4095, 127, -127); // Joystick LJV // Joystick Pot Values LJV int potValues2[numberOfPotSamples]; for (int i = 0 ; i < numberOfPotSamples ; i++) { potValues2[i] = analogRead(LJV); delay(delayBetweenSamples); } int potValue2 = 0; for (int i = 0 ; i < numberOfPotSamples ; i++) { potValue2 += potValues2[i]; } // Value2 / Pot Samples potValue2 = potValue2 / numberOfPotSamples; // Serial Serial.print(" LJV: "); Serial.print(potValue2); // Adjusted Value2 int adjustedValue2 = map(potValue2, 0, 4095, 127, -127); // Joystick RJH // Joystick Pot Values RJH int potValues3[numberOfPotSamples]; for (int i = 0 ; i < numberOfPotSamples ; i++) { potValues3[i] = analogRead(RJH); delay(delayBetweenSamples); } int potValue3 = 0; for (int i = 0 ; i < numberOfPotSamples ; i++) { potValue3 += potValues3[i]; } // Value3 / Pot Samples potValue3 = potValue3 / numberOfPotSamples; // Serial Serial.print(" RJH: "); Serial.print(potValue3); // Adjusted Value3 int adjustedValue3 = map(potValue3, 0, 4095, 255, 0); // Joystick RJV // Joystick Pot Values RJV int potValues4[numberOfPotSamples]; for (int i = 0 ; i < numberOfPotSamples ; i++) { potValues4[i] = analogRead(RJV); delay(delayBetweenSamples); } int potValue4 = 0; for (int i = 0 ; i < numberOfPotSamples ; i++) { potValue4 += potValues4[i]; } // Value4 / Pot Samples potValue4 = potValue4 / numberOfPotSamples; // Serial Serial.print(" RJV: "); Serial.print(potValue4); // Adjusted Value4 int adjustedValue4 = map(potValue4, 0, 4095, 255, 0); bleGamepad.setAxes(adjustedValue, adjustedValue2, 0, 0, adjustedValue3, adjustedValue4, DPAD_CENTERED); delay(delayBetweenHIDReports); // D-pad // LD1 if (digitalRead(LD1) == LOW){ bleGamepad.setAxes(adjustedValue, adjustedValue2, 0, 0, adjustedValue3, adjustedValue4, DPAD_UP); Serial.print(" DPAD_UP"); } // LD2 if (digitalRead(LD2) == LOW){ bleGamepad.setAxes(adjustedValue, adjustedValue2, 0, 0, adjustedValue3, adjustedValue4, DPAD_LEFT); Serial.print(" DPAD_LEFT"); } // LD3 if (digitalRead(LD3) == LOW){ bleGamepad.setAxes(adjustedValue, adjustedValue2, 0, 0, adjustedValue3, adjustedValue4, DPAD_DOWN); Serial.print(" DPAD_DOWN"); } // LD4 if (digitalRead(LD4) == LOW){ bleGamepad.setAxes(adjustedValue, adjustedValue2, 0, 0, adjustedValue3, adjustedValue4, DPAD_RIGHT); Serial.print(" DPAD_RIGHT"); } }
setup.ino
// Setup void setup() { // Serial Serial.begin(115200); Serial.println("Starting BLE work!"); // Set Inputs setInputs(); // ESP32 BLE Gamepad bleGamepad.begin(); }
——
People can contact us: https://www.donluc.com/?page_id=1927
Technology Experience
- Programming Language
- Single-Board Microcontrollers (PIC, Arduino, Raspberry Pi,Espressif, etc…)
- IoT
- Wireless (Radio Frequency, Bluetooth, WiFi, Etc…)
- Robotics
- Camera and Video Capture Receiver Stationary, Wheel/Tank and Underwater Vehicle
- Unmanned Vehicles Terrestrial and Marine
- Machine Learning
- RTOS
- Research & Development (R & D)
Instructor, E-Mentor, STEAM, and Arts-Based Training
- Programming Language
- IoT
- PIC Microcontrollers
- Arduino
- Raspberry Pi
- Espressif
- Robotics
Follow Us
Luc Paquin – Curriculum Vitae – 2023
https://www.donluc.com/luc/
Web: https://www.donluc.com/
Facebook: https://www.facebook.com/neosteam.labs.9/
YouTube: https://www.youtube.com/@thesass2063
Twitter: https://twitter.com/labs_steam
Pinterest: https://www.pinterest.com/NeoSteamLabs/
Instagram: https://www.instagram.com/neosteamlabs/
Don Luc
Instructor, E-Mentor, STEAM, and Arts-Based Training
——
#DonLucElectronics #DonLuc #Instructor #E-Mentor #STEAM #ArtsBasedTraining #Arduino #Project #Fritzing #Programming #Electronics #Microcontrollers #Consultant
——
——
——
——
——
What do remote controllers, routers, and robots all have in common? These beginner-friendly microcontrollers are easy to use and program with just a computers or laptop, a USB cable, and some open-source software. All the projects, here we come. Whether you are looking to build some cool electronic projects, learn programming, or wanting to teach others about electronics, this a teaching session will help you figure out what microcontroller is right for your needs, goals, and budgets. Here is some helpful content to start you on your electronics journey. There are different microcontrollers and it can be daunting to get started, especially if you’re just getting into electronics.
- Arduino Uno – R3, SparkFun RedBoard, Arduino Fio, LilyPad Arduino, FLORA, Adafruit METRO 328, Arduino Pro Mini 328, Adafruit Metro Mini 328, Adafruit Pro Trinket, Adafruit Feather 328P, Moteino, etcetera, is a microcontroller board based on the ATmega328 (5V/16MHz, 3.3V/8MHz).
- SparkFun Pro Micro, SparkFun Fio V3, Adafruit ItsyBitsy 32u4, Adafruit Feather 32u4, Circuit Playground Classic, etcetera, is a microcontroller board based on the ATmega32U4 (5V/16MHz, 3.3V/8MHz).
- Arduino Mega 2560 R3 is a microcontroller board based on the ATmega2560 (5V/16MHz).
- Arduino Nano Every is a microcontroller board based on the ATMega 4809 (5V/20MHz).
- Arduino Due is a microcontroller board based on the AT91SAM3X8E (3.3V/84MHz).
- SparkFun RedBoard Turbo, SparkFun SAMD21 Mini Breakout, Adafruit METRO M0 Express, LilyPad Simblee BLE, etcetera, is a microcontroller board based on the ATSAMD21G18 ARM Cortex M0+ (3.3V/48MHz).
- SparkFun Thing Plus – SAMD51, Adafruit Metro M4 Express, Adafruit Feather M4 Express, etcetera, is a microcontroller board based on the ATSAMD51 Cortex M4 (3.3V/120MHz).
- SparkFun Thing Plus – ESP32 WROOM, Adafruit HUZZAH32 – ESP32 Feather Board, etcetera, is a microcontroller board based on the Espressif Xtensa® dual-core 32-bit LX6 (3.3V/240MHz).
- Raspberry Pi 4 Model B is a microcontroller board based on the Broadcom BCM2711, quad-core Cortex-A72 (ARM v8) 64-bit SoC (5.1V/1.5GHz).
- Raspberry Pi Zero W is a microcontroller board based on the Broadcom BCM2837B0 64-bit ARM Cortex-A53 Quad Core Processor SoC (5.1V/1GHz). Etcetera…
At Don Luc Electronics I believe that an understanding of electronics is a core literacy that opens up a world of opportunities in the fields of robotics, Internet of Things (IoT), machine learning, engineering, fashion, medical industries, environmental sciences, performing arts and more. This guide is designed to explore the connection between software and hardware, introducing code and parts as they are used in the context of building engaging projects. The circuits in this guide progress in difficulty as new concepts and components are introduced. Completing each circuit means much more than just experimenting you will walk away with a fun project you can use and a sense of accomplishment that is just the beginning of your electronics journey. At the end of each circuit, you’ll find coding challenges that extend your learning and fuel ongoing innovation.
People can contact us: https://www.donluc.com/?page_id=1927
Technology Experience
- Single-Board Microcontrollers (PIC, Arduino, Raspberry Pi,Espressif, etc…)
- IoT
- Wireless (Radio Frequency, Bluetooth, WiFi, Etc…)
- Robotics
- Camera and Video Capture Receiver Stationary, Wheel/Tank and Underwater Vehicle
- Unmanned Vehicles Terrestrial and Marine
- Machine Learning
- RTOS
- Research & Development (R & D)
Instructor and E-Mentor
- IoT
- PIC Microcontrollers
- Arduino
- Raspberry Pi
- Espressif
- Robotics
Follow Us
Luc Paquin – Curriculum Vitae – 2023
https://www.donluc.com/luc/
Web: https://www.donluc.com/
Facebook: https://www.facebook.com/neosteam.labs.9/
YouTube: https://www.youtube.com/channel/UC5eRjrGn1CqkkGfZy0jxEdA
Twitter: https://twitter.com/labs_steam
Pinterest: https://www.pinterest.com/NeoSteamLabs/
Instagram: https://www.instagram.com/neosteamlabs/
Don Luc