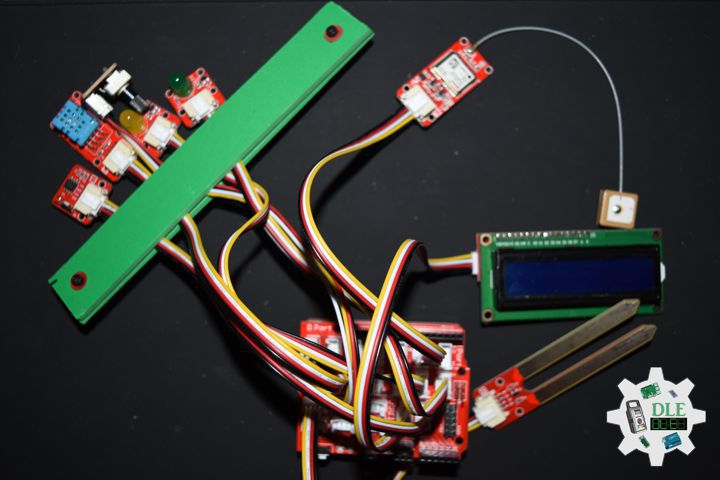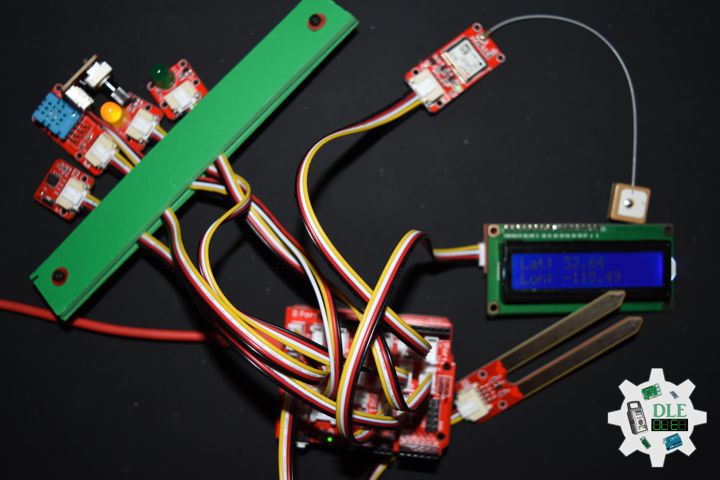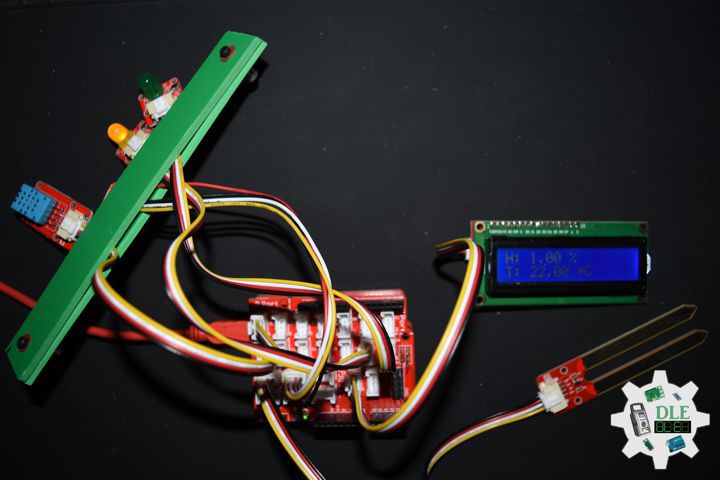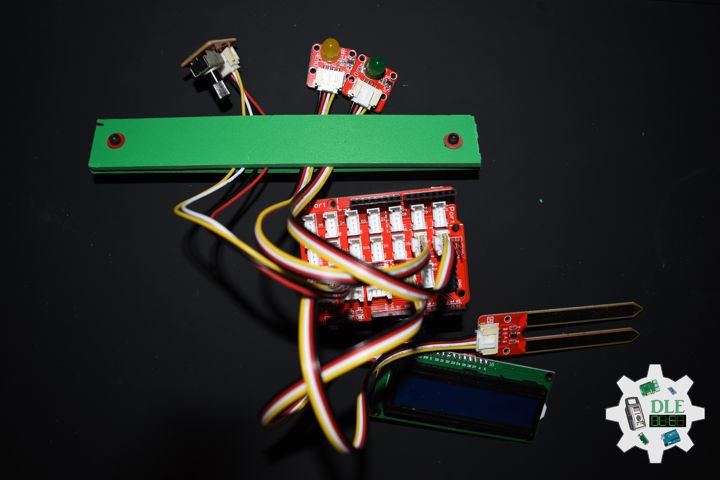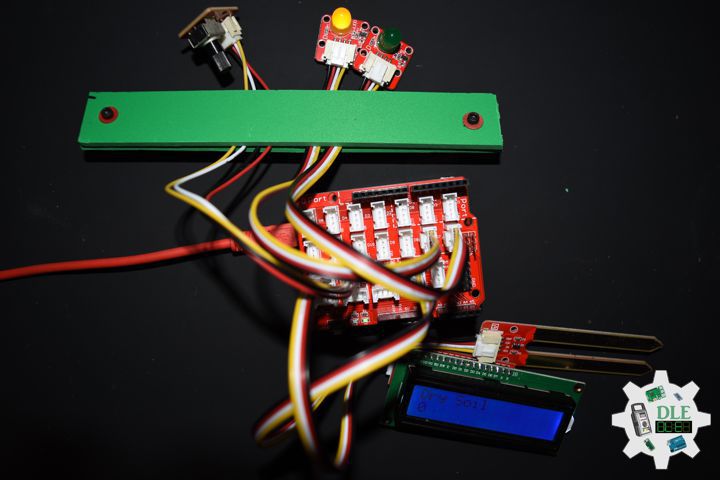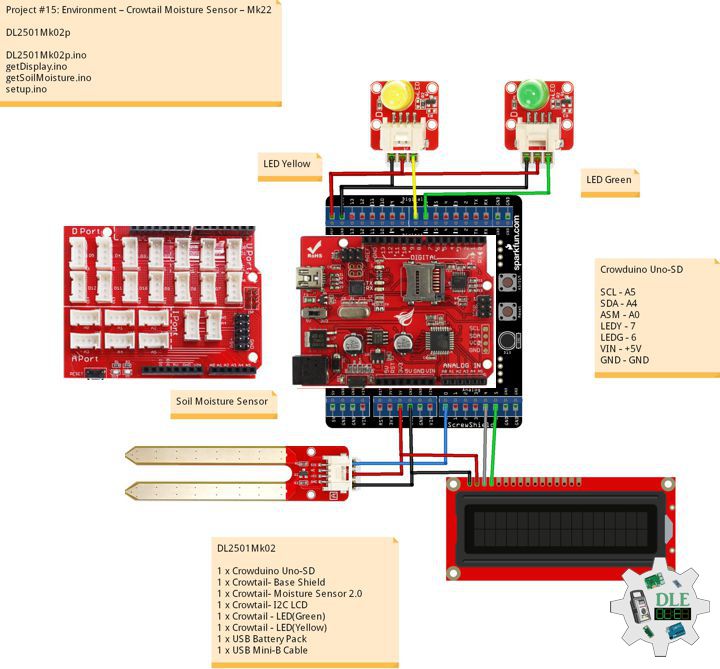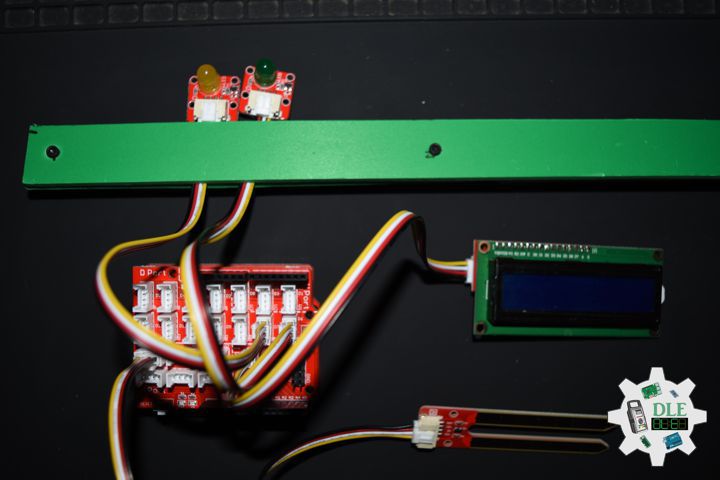
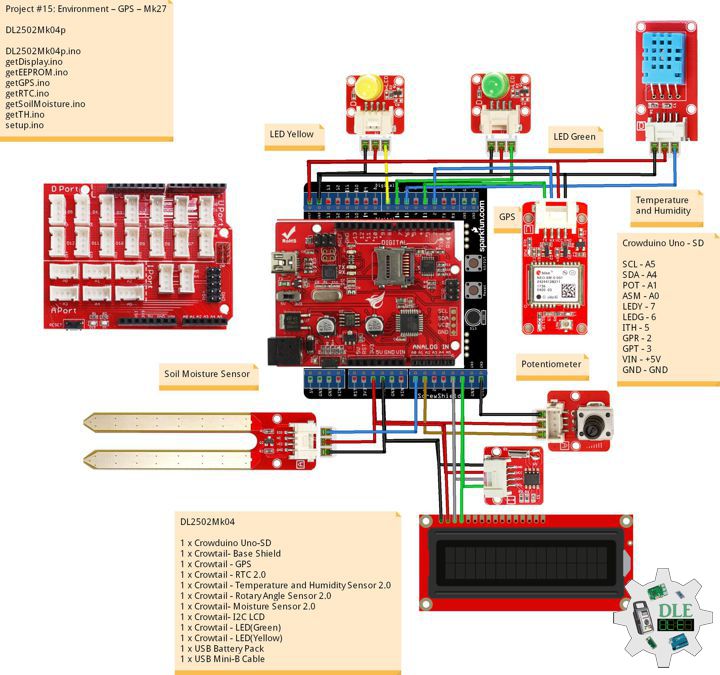
Project #15: Environment – GPS – Mk27

——

#DonLucElectronics #DonLuc #Arduino #RTC #EEPROM #DHT11 #ASM #Display #Elecrow #Project #Patreon #Electronics #Microcontrollers #IoT #Fritzing #Programming #Consultant

——
GPS

——

GPS

——

GPS

——

Crowtail – GPS

This Crowtail – GPS module is a cost-efficient and field-programmable gadget armed with a NEO-6M-0-001 and serial communication configuration. It features 55 channels, and a GPS L1 C/A code receiver. The sensitivity of tracking and acquisition both reach up to -161dBm, making it a great choice for personal navigation projects and location services, as well as an outstanding one among products of the same price class.

  • -Input Voltage: 5 Volt
  • -Supports NMEA and U-Blox Binary
  • -Low power consumption
  • -Baud rates configurable

DL2502Mk04

1 x Crowduino Uno – SD
1 x Crowtail – Base Shield
1 x Crowtail – GPS
1 x Crowtail – RTC 2.0
1 x Crowtail – Temperature and Humidity Sensor 2.0
1 x Crowtail – Rotary Angle Sensor 2.0
1 x Crowtail – Moisture Sensor 2.0
1 x Crowtail – I2C LCD
1 x Crowtail – LED(Green)
1 x Crowtail – LED(Yellow)
1 x USB Battery Pack
1 x USB Mini-B Cable

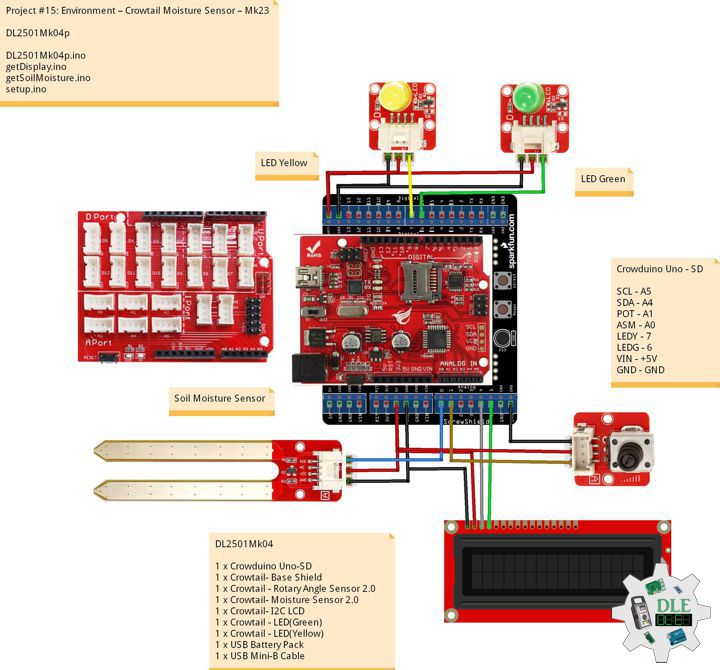
Crowduino Uno – SD

SCL – A5
SDA – A4
POT – A1
ASM – A0
LEDY – 7
LEDG – 6
ITH – 5
GPR – 2
GPT – 3
VIN – +5V
GND – GND

DL2502Mk04p

DL2502Mk04p.ino

/****** Don Luc Electronics © ******
Software Version Information
Project #15: Environment – GPS – Mk27
DL2502Mk04p.ino
DL2502Mk04
1 x Crowduino Uno - SD
1 x Crowtail - Base Shield
1 x Crowtail - GPS
1 x Crowtail - RTC 2.0
1 x Crowtail - Temperature and Humidity Sensor 2.0
1 x Crowtail - Rotary Angle Sensor 2.0
1 x Crowtail - Moisture Sensor 2.0
1 x Crowtail - I2C LCD
1 x Crowtail - LED(Green)
1 x Crowtail - LED(Yellow)
1 x USB Battery Pack
1 x USB Mini-B Cable
*/

// Include the Library Code
// EEPROM library to read and write EEPROM with unique ID for unit
#include <EEPROM.h>
// Wire
#include <Wire.h>
// Liquid Crystal
#include "LiquidCrystal.h"
// Temperature and Humidity Sensor
#include "DHT.h"
// RTC (Real-Time Clock)
#include "RTClib.h"
// GPS Receiver
#include <TinyGPS++.h>
// Software Serial
#include <SoftwareSerial.h>

// GPS Receiver
static const int RXPin = 2;
// This one is unused and doesnt have a conection
static const int TXPin = 3;
// GPS Baud
static const uint32_t GPSBaud = 9600;
// The TinyGPS++ object
TinyGPSPlus gps;
// The serial connection to the GPS device
SoftwareSerial ss(RXPin, TXPin);
// Latitude
float TargetLat;
// Longitude
float TargetLon;
// GPS Status
String GPSSt = "";

// RTC (Real-Time Clock)
RTC_DS1307 RTC;
String dateRTC = "";
String timeRTC = "";

// Temperature and Humidity Sensor
#define DHTPIN 5
// DHT 11
#define DHTTYPE DHT11
DHT dht(DHTPIN, DHTTYPE);
// Temperature and Humidity Sensor
float h = 0;
float t = 0;

// Potentiometer
int iPotentiometer = A1;
// Change Your Threshold Here
int Threshold = 0;
int zz = 0;

// Liquid Crystal
// Connect via i2c
LiquidCrystal lcd(0);

// Crowtail Moisture Sensor
int iSoilMoisture = A0;
int iSoilMoistureVal = 0;

// LED Yellow
int iLEDYellow = 7;

// LED Green
int iLEDGreen = 6;

// EEPROM Unique ID Information
String uid = "";

// Software Version Information
String sver = "15-27";

void loop() {

  // Crowtail Moisture Sensor
  isSoilMoisture();

  // Temperature and Humidity Sensor
  isTH();

  // RTC (Real-Time Clock)
  isRTC();

  // isGPS
  isGPS();

  // Delay 2 Second
  delay( 2000 );

  // Display Temperature and Humidity
  isDisplayTH();

  // Delay 2 Second
  delay( 2000 );

  // Display EEPROM
  isDisplayEEPROM();

  // Delay 2 Second
  delay( 2000 );

  // Display RTC
  isDisplayRTC();

  // Delay 2 Second
  delay( 2000 );

  // GPS Vector Pointer Target
  isDisplayInfo();

  // Delay 2 Second
  delay( 2000 );

}

getDisplay.ino

// getDisplay
// Crowbits - OLED 128X64 UID
void isDisplayUID(){

  // Set up the LCD's number of rows and columns: 
  lcd.begin(16, 2);
  // Print a message to the LCD.
  // Cursor
  lcd.setCursor(0, 0);
  lcd.print("Don Luc Electron");
  // Cursor
  lcd.setCursor(0, 1);
  // Print a message to the LCD.
  lcd.print( sver );

}
// isDisplay Green
void isDisplayG(){

  // Print a message to the LCD
  // Clear
  lcd.clear();
  // Cursor
  lcd.setCursor(0, 0);
  lcd.print("Humid Soil");
  // Cursor
  lcd.setCursor(0, 1);
  // Print a message to the LCD
  lcd.print( iSoilMoistureVal );
  
}
// isDisplay Yellow
void isDisplayY(){

  // Print a message to the LCD
  // Clear
  lcd.clear();
  // Cursor
  lcd.setCursor(0, 0);
  lcd.print("Dry Soil");
  // Cursor
  lcd.setCursor(0, 1);
  // Print a message to the LCD
  lcd.print( iSoilMoistureVal );
  
}
// Display Temperature and Humidity
void isDisplayTH(){

  // Clear
  lcd.clear();
  // Set the cursor to column 0, line 0
  lcd.setCursor(0, 0);
  lcd.print("H: "); 
  lcd.print(h);
  lcd.print(" %");
  // Set the cursor to column 0, line 1
  lcd.setCursor(0, 1);
  lcd.print("T: "); 
  lcd.print(t);
  lcd.print(" *C");
  
}
// Display EEPROM
void isDisplayEEPROM(){

  // Clear
  lcd.clear();
  // Set the cursor to column 0, line 0
  lcd.setCursor(0, 0);
  lcd.print("EEPROM"); 
  // Set the cursor to column 0, line 1
  lcd.setCursor(0, 1);
  lcd.print( uid ); 

}
// Display RTC
void isDisplayRTC(){

  // Clear
  lcd.clear();
  // Set the cursor to column 0, line 0
  lcd.setCursor(0, 0);
  lcd.print( dateRTC );
  // Set the cursor to column 0, line 1
  lcd.setCursor(0, 1);
  lcd.print( timeRTC );
  
}
// GPS Vector Pointer Target
void isDisplayInfo(){

  // Clear
  lcd.clear();
  // Set the cursor to column 0, line 0
  lcd.setCursor(0, 0);
  lcd.print( "Lat: " );
  lcd.print( TargetLat );
  // Set the cursor to column 0, line 1
  lcd.setCursor(0, 1);
  lcd.print( "Lon: " );
  lcd.print( TargetLon );
  
}

getEEPROM.ino

// EEPROM
// isUID EEPROM Unique ID
void isUID() {
  
  // Is Unit ID
  uid = "";
  for (int x = 0; x < 7; x++)
  {
    uid = uid + char(EEPROM.read(x));
  }
  
}

getGPS.ino

// GPS Receiver
// isGPS
void isGPS(){

  // Receives NEMA data from GPS receiver
  // This sketch displays information every time a 
  //new sentence is correctly encoded
  while ( ss.available() > 0) {
    
    // Read
    if ( gps.encode( ss.read() ))
    {
     
       // GPS Vector Pointer Target
       displayInfo();
       
    }
    
  }
  
  if (millis() > 5000 && gps.charsProcessed() < 10)
  {
   
     while(true);
    
  }

}
// GPS Vector Pointer Target
void displayInfo(){

  // Location
  if (gps.location.isValid())
  {
    
     // Latitude
     TargetLat = gps.location.lat();
     // Longitude
     TargetLon = gps.location.lng();
     // GPS Status 2
     GPSSt = "Yes";
    
  }
  else
  {

     // GPS Status 0
     GPSSt = "No";
    
  }

}

getRTC.ino

// RTC (Real-Time Clock)
// Setup RTC
void isSetupRTC(){

  // RTC (Real-Time Clock)
  RTC.begin();

  // RTC Running
  if (! RTC.isrunning()) {
    
    // following line sets the RTC to the date & time
    //this sketch was compiled
    RTC.adjust(DateTime(__DATE__, __TIME__));
    // This line sets the RTC with an explicit date & time, for example to set
    // January 21, 2014 at 3am you would call:
    // RTC.adjust(DateTime(2014, 1, 21, 3, 0, 0))
    
  }
  
}
// RTC (Real-Time Clock)
void isRTC(){

  // RTC (Real-Time Clock)
  DateTime now = RTC.now();
  
  // Date
  dateRTC = now.year(), DEC; 
  dateRTC = dateRTC + "/";
  dateRTC = dateRTC + now.month(), DEC;
  dateRTC = dateRTC + "/";
  dateRTC = dateRTC + now.day(), DEC;
  
  // Time
  timeRTC = now.hour(), DEC;
  timeRTC = timeRTC + ":";
  timeRTC = timeRTC + now.minute(), DEC;
  timeRTC = timeRTC + ":";
  timeRTC = timeRTC + now.second(), DEC;

}

getSoilMoisture.ino

// Crowtail Moisture Sensor
// Soil Moisture
void isSoilMoisture(){

  // Connect Soil Moisture Sensor to Analog 0
  // iSoilMoistureVal => 0~700 Soil Moisture
  iSoilMoistureVal = analogRead( iSoilMoisture );

  // Threshold => 200~500
  zz = analogRead( iPotentiometer );
  Threshold = map( zz, 0, 1024, 200, 500);

  // Threshold
  if (iSoilMoistureVal > Threshold) {

    // 300~700 - Humid Soil
    // LED Yellow
    digitalWrite(iLEDYellow, LOW);
    // Display Green
    isDisplayG();
    // LED Green
    digitalWrite(iLEDGreen, HIGH);
    
  }
  else {
    
    // 0-300 Dry Soil
    // LED Green
    digitalWrite(iLEDGreen, LOW);
    // Display Yellow
    isDisplayY();
    digitalWrite(iLEDYellow, HIGH);
    
  }

}

getTH.ino

// Temperature and Humidity Sensor
void isTH(){

  // Temperature
  t = dht.readTemperature();
  // Humidity
  h = dht.readHumidity();
  
}

setup.ino

// Setup
void setup()
{
 
  // Delay
  delay(100);
  
  // isUID EEPROM Unique ID
  isUID();
  
  // Delay
  delay(100);

  // Initialize the LED iLED Yellow
  pinMode(iLEDYellow, OUTPUT);

  // Initialize the LED LED Green
  pinMode(iLEDGreen, OUTPUT);

  // Temperature and Humidity Sensor
  dht.begin();

  // Delay
  delay(100);
  
  // Setup RTC
  isSetupRTC();
  
  // Delay
  delay(100);

  // GPS Receiver
  // Setup GPS
  ss.begin(GPSBaud);
  
  // Delay
  delay(100);

  // Display UID
  isDisplayUID();
  
  // Delay 5 Second
  delay( 5000 );

}

——

People can contact us: https://www.donluc.com/?page_id=1927

Electronics, IoT, Teacher, Instructor, R&D and Consulting

  • Programming Language
  • Single-Board Microcontrollers (PIC, Arduino, Raspberry Pi, Arm, Silicon Labs, Espressif, Etc…)
  • IoT
  • Wireless (Radio Frequency, Bluetooth, WiFi, Etc…)
  • Robotics
  • Automation
  • Camera and Video Capture Receiver Stationary, Wheel/Tank and Underwater Vehicle
  • Unmanned Vehicles Terrestrial and Marine
  • Machine Learning
  • Artificial Intelligence (AI)
  • RTOS
  • Sensors, eHealth Sensors, Biosensor, and Biometric
  • Research & Development (R & D)
  • Consulting

Follow Us

Luc Paquin – Curriculum Vitae – 2024
https://www.donluc.com/luc/

Web: https://www.donluc.com/
Facebook: https://www.facebook.com/neosteam.labs.9/
YouTube: https://www.youtube.com/@thesass2063
Twitter: https://twitter.com/labs_steam
Pinterest: https://www.pinterest.com/NeoSteamLabs/
Instagram: https://www.instagram.com/neosteamlabs/
Patreon: https://patreon.com/DonLucElectronics59
DFRobot: https://learn.dfrobot.com/user-10186.html
Hackster.io: https://www.hackster.io/neosteam-labs
Elecrow: https://www.elecrow.com/share/sharepj/center/no/760816d385ebb1edc0732fd873bfbf13
TikTok: https://www.tiktok.com/@luc.paquin8
Twitch: https://www.twitch.tv/lucpaquin
LinkedIn: https://www.linkedin.com/in/jlucpaquin/

Don Luc
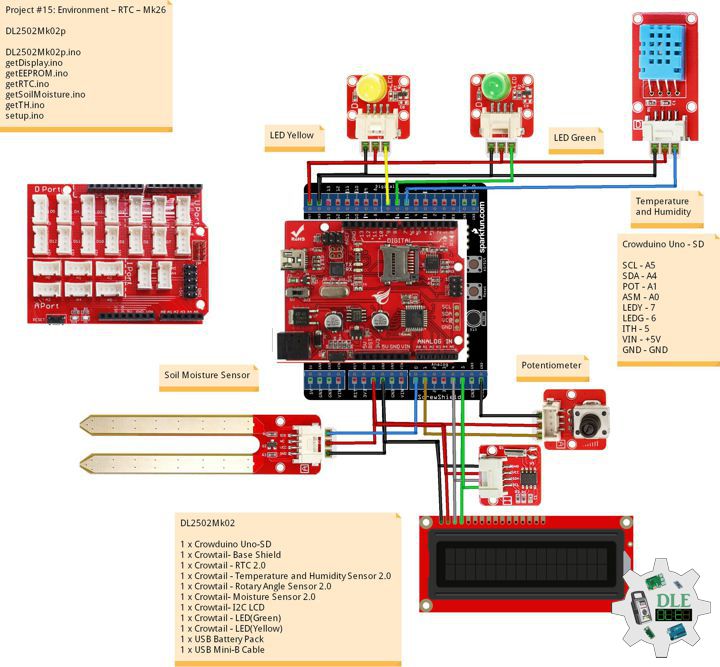
Project #15: Environment – RTC – Mk26

——

#DonLucElectronics #DonLuc #Arduino #RTC #EEPROM #DHT11 #ASM #Display #Elecrow #Project #Patreon #Electronics #Microcontrollers #IoT #Fritzing #Programming #Consultant

——

RTC

——

RTC

——

RTC

——

Crowtail – RTC 2.0

If you want to make your own electronic watch a RTC module is necessary to generate you the right time, with very low power consumption. This tiny RTC module is based on the clock chip DS1307 which communicates with microcontrollers with I2C protocol. The clock/calendar provides seconds, minutes, hours, day, date, month, and year information. The end of the month date is automatically adjusted for months with fewer than 31 days, including corrections for leap year. This module is really low power consumption, it can serves you more than a month with a CR1220 battery.

DL2502Mk02

1 x Crowduino Uno – SD
1 x Crowtail – Base Shield
1 x Crowtail – RTC 2.0
1 x Crowtail – Temperature and Humidity Sensor 2.0
1 x Crowtail – Rotary Angle Sensor 2.0
1 x Crowtail – Moisture Sensor 2.0
1 x Crowtail – I2C LCD
1 x Crowtail – LED(Green)
1 x Crowtail – LED(Yellow)
1 x USB Battery Pack
1 x USB Mini-B Cable

Crowduino Uno – SD

SCL – A5
SDA – A4
POT – A1
ASM – A0
LEDY – 7
LEDG – 6
ITH – 5
VIN – +5V
GND – GND

DL2502Mk02p

DL2502Mk02p.ino

/****** Don Luc Electronics © ******
Software Version Information
Project #15: Environment – RTC – Mk26
DL2502Mk02p.ino
DL2502Mk02
1 x Crowduino Uno - SD
1 x Crowtail - Base Shield
1 x Crowtail - RTC 2.0
1 x Crowtail - Temperature and Humidity Sensor 2.0
1 x Crowtail - Rotary Angle Sensor 2.0
1 x Crowtail - Moisture Sensor 2.0
1 x Crowtail - I2C LCD
1 x Crowtail - LED(Green)
1 x Crowtail - LED(Yellow)
1 x USB Battery Pack
1 x USB Mini-B Cable
*/

// Include the Library Code
// EEPROM library to read and write EEPROM with unique ID for unit
#include <EEPROM.h>
// Wire
#include <Wire.h>
// Liquid Crystal
#include "LiquidCrystal.h"
// Temperature and Humidity Sensor
#include "DHT.h"
// RTC (Real-Time Clock)
#include "RTClib.h"

// RTC (Real-Time Clock)
RTC_DS1307 RTC;
String dateRTC = "";
String timeRTC = "";

// Temperature and Humidity Sensor
#define DHTPIN 5
// DHT 11
#define DHTTYPE DHT11
DHT dht(DHTPIN, DHTTYPE);
// Temperature and Humidity Sensor
float h = 0;
float t = 0;

// Potentiometer
int iPotentiometer = A1;
// Change Your Threshold Here
int Threshold = 0;
int zz = 0;

// Liquid Crystal
// Connect via i2c
LiquidCrystal lcd(0);

// Crowtail Moisture Sensor
int iSoilMoisture = A0;
int iSoilMoistureVal = 0;

// LED Yellow
int iLEDYellow = 7;

// LED Green
int iLEDGreen = 6;

// EEPROM Unique ID Information
String uid = "";

// Software Version Information
String sver = "15-26";

void loop() {

  // Crowtail Moisture Sensor
  isSoilMoisture();

  // Temperature and Humidity Sensor
  isTH();

  // RTC (Real-Time Clock)
  isRTC();

  // Delay 2 Second
  delay( 2000 );

  // Display Temperature and Humidity
  isDisplayTH();

  // Delay 2 Second
  delay( 2000 );

  // Display EEPROM
  isDisplayEEPROM();

  // Delay 2 Second
  delay( 2000 );

  // Display RTC
  isDisplayRTC();

  // Delay 2 Second
  delay( 2000 );

}

getDisplay.ino

/****** Don Luc Electronics © ******
Software Version Information
Project #15: Environment – RTC – Mk26
DL2502Mk02p.ino
DL2502Mk02
1 x Crowduino Uno - SD
1 x Crowtail - Base Shield
1 x Crowtail - RTC 2.0
1 x Crowtail - Temperature and Humidity Sensor 2.0
1 x Crowtail - Rotary Angle Sensor 2.0
1 x Crowtail - Moisture Sensor 2.0
1 x Crowtail - I2C LCD
1 x Crowtail - LED(Green)
1 x Crowtail - LED(Yellow)
1 x USB Battery Pack
1 x USB Mini-B Cable
*/

// Include the Library Code
// EEPROM library to read and write EEPROM with unique ID for unit
#include <EEPROM.h>
// Wire
#include <Wire.h>
// Liquid Crystal
#include "LiquidCrystal.h"
// Temperature and Humidity Sensor
#include "DHT.h"
// RTC (Real-Time Clock)
#include "RTClib.h"

// RTC (Real-Time Clock)
RTC_DS1307 RTC;
String dateRTC = "";
String timeRTC = "";

// Temperature and Humidity Sensor
#define DHTPIN 5
// DHT 11
#define DHTTYPE DHT11
DHT dht(DHTPIN, DHTTYPE);
// Temperature and Humidity Sensor
float h = 0;
float t = 0;

// Potentiometer
int iPotentiometer = A1;
// Change Your Threshold Here
int Threshold = 0;
int zz = 0;

// Liquid Crystal
// Connect via i2c
LiquidCrystal lcd(0);

// Crowtail Moisture Sensor
int iSoilMoisture = A0;
int iSoilMoistureVal = 0;

// LED Yellow
int iLEDYellow = 7;

// LED Green
int iLEDGreen = 6;

// EEPROM Unique ID Information
String uid = "";

// Software Version Information
String sver = "15-26";

void loop() {

  // Crowtail Moisture Sensor
  isSoilMoisture();

  // Temperature and Humidity Sensor
  isTH();

  // RTC (Real-Time Clock)
  isRTC();

  // Delay 2 Second
  delay( 2000 );

  // Display Temperature and Humidity
  isDisplayTH();

  // Delay 2 Second
  delay( 2000 );

  // Display EEPROM
  isDisplayEEPROM();

  // Delay 2 Second
  delay( 2000 );

  // Display RTC
  isDisplayRTC();

  // Delay 2 Second
  delay( 2000 );

}

getEEPROM.ino

// EEPROM
// isUID EEPROM Unique ID
void isUID() {
  
  // Is Unit ID
  uid = "";
  for (int x = 0; x < 7; x++)
  {
    uid = uid + char(EEPROM.read(x));
  }
  
}

getRTC.ino

// RTC (Real-Time Clock)
// Setup RTC
void isSetupRTC(){

  // RTC (Real-Time Clock)
  RTC.begin();

  // RTC Running
  if (! RTC.isrunning()) {
    
    // following line sets the RTC to the date & time
    //this sketch was compiled
    RTC.adjust(DateTime(__DATE__, __TIME__));
    // This line sets the RTC with an explicit date & time, for example to set
    // January 21, 2014 at 3am you would call:
    // RTC.adjust(DateTime(2014, 1, 21, 3, 0, 0))
    
  }
  
}
// RTC (Real-Time Clock)
void isRTC(){

  // RTC (Real-Time Clock)
  DateTime now = RTC.now();
  
  // Date
  dateRTC = now.year(), DEC; 
  dateRTC = dateRTC + "/";
  dateRTC = dateRTC + now.month(), DEC;
  dateRTC = dateRTC + "/";
  dateRTC = dateRTC + now.day(), DEC;
  
  // Time
  timeRTC = now.hour(), DEC;
  timeRTC = timeRTC + ":";
  timeRTC = timeRTC + now.minute(), DEC;
  timeRTC = timeRTC + ":";
  timeRTC = timeRTC + now.second(), DEC;

}

getSoilMoisture.ino

// Crowtail Moisture Sensor
// Soil Moisture
void isSoilMoisture(){

  // Connect Soil Moisture Sensor to Analog 0
  // iSoilMoistureVal => 0~700 Soil Moisture
  iSoilMoistureVal = analogRead( iSoilMoisture );

  // Threshold => 200~500
  zz = analogRead( iPotentiometer );
  Threshold = map( zz, 0, 1024, 200, 500);

  // Threshold
  if (iSoilMoistureVal > Threshold) {

    // 300~700 - Humid Soil
    // LED Yellow
    digitalWrite(iLEDYellow, LOW);
    // Display Green
    isDisplayG();
    // LED Green
    digitalWrite(iLEDGreen, HIGH);
    
  }
  else {
    
    // 0-300 Dry Soil
    // LED Green
    digitalWrite(iLEDGreen, LOW);
    // Display Yellow
    isDisplayY();
    digitalWrite(iLEDYellow, HIGH);
    
  }

}

getTH.ino

// Temperature and Humidity Sensor
void isTH(){

  // Temperature
  t = dht.readTemperature();
  // Humidity
  h = dht.readHumidity();
  
}

setup.ino

// Setup
void setup()
{
 
  // Delay
  delay(100);
  
  // isUID EEPROM Unique ID
  isUID();
  
  // Delay
  delay(100);

  // Initialize the LED iLED Yellow
  pinMode(iLEDYellow, OUTPUT);

  // Initialize the LED LED Green
  pinMode(iLEDGreen, OUTPUT);

  // Temperature and Humidity Sensor
  dht.begin();

  // Delay
  delay(100);
  
  // Setup RTC
  isSetupRTC();
  
  // Delay
  delay(100);

  // Display UID
  isDisplayUID();
  
  // Delay 5 Second
  delay( 5000 );

}

——

People can contact us: https://www.donluc.com/?page_id=1927

Electronics, IoT, Teacher, Instructor, R&D and Consulting

  • Programming Language
  • Single-Board Microcontrollers (PIC, Arduino, Raspberry Pi, Arm, Silicon Labs, Espressif, Etc…)
  • IoT
  • Wireless (Radio Frequency, Bluetooth, WiFi, Etc…)
  • Robotics
  • Automation
  • Camera and Video Capture Receiver Stationary, Wheel/Tank and Underwater Vehicle
  • Unmanned Vehicles Terrestrial and Marine
  • Machine Learning
  • Artificial Intelligence (AI)
  • RTOS
  • Sensors, eHealth Sensors, Biosensor, and Biometric
  • Research & Development (R & D)
  • Consulting

Follow Us

Luc Paquin – Curriculum Vitae – 2024
https://www.donluc.com/luc/

Web: https://www.donluc.com/
Facebook: https://www.facebook.com/neosteam.labs.9/
YouTube: https://www.youtube.com/@thesass2063
Twitter: https://twitter.com/labs_steam
Pinterest: https://www.pinterest.com/NeoSteamLabs/
Instagram: https://www.instagram.com/neosteamlabs/
Patreon: https://patreon.com/DonLucElectronics59
DFRobot: https://learn.dfrobot.com/user-10186.html
Hackster.io: https://www.hackster.io/neosteam-labs
Elecrow: https://www.elecrow.com/share/sharepj/center/no/760816d385ebb1edc0732fd873bfbf13
TikTok: https://www.tiktok.com/@luc.paquin8
Twitch: https://www.twitch.tv/lucpaquin
LinkedIn: https://www.linkedin.com/in/jlucpaquin/

Don Luc

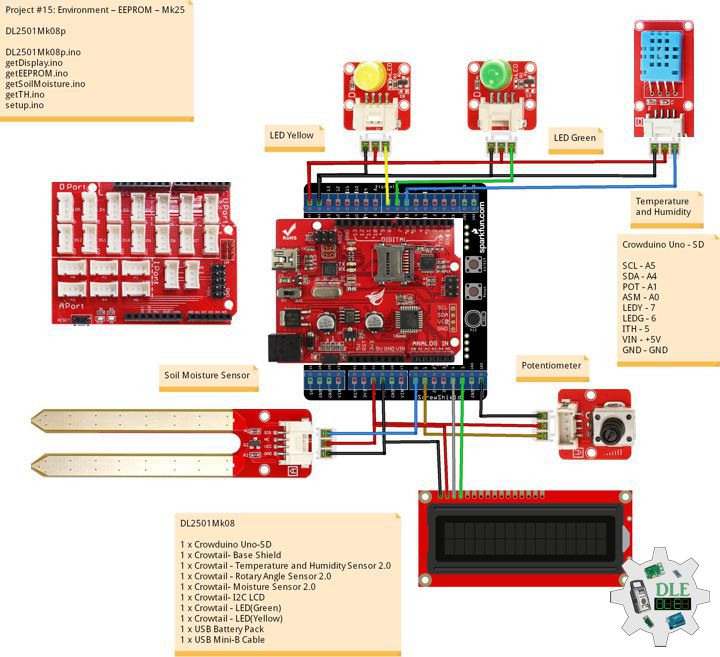
Project #15: Environment – EEPROM – Mk25

——

#DonLucElectronics #DonLuc #Arduino #EEPROM #DHT11 #ASM #Display #Elecrow #Project #Patreon #Electronics #Microcontrollers #IoT #Fritzing #Programming #Consultant

——

EEPROM

——

EEPROM

——

EEPROM

——

EEPROM

EEPROM (Electrically Erasable Programmable Read-only Memory) is a type of non-volatile memory. EEPROM is a type of non-volatile ROM that enables individual bytes of data to be erased and reprogrammed. That is why EEPROM chips are known as byte erasable chips. EEPROM is usually used to store small amounts of data in computing and other electronic devices. It is used in computers, usually integrated in microcontrollers such as smart cards and remote keyless systems, or as a separate chip device, to store relatively small amounts of data by allowing individual bytes to be erased and reprogrammed.

DL2501Mk08

1 x Crowduino Uno – SD
1 x Crowtail – Base Shield
1 x Crowtail – Temperature and Humidity Sensor 2.0
1 x Crowtail – Rotary Angle Sensor 2.0
1 x Crowtail – Moisture Sensor 2.0
1 x Crowtail – I2C LCD
1 x Crowtail – LED(Green)
1 x Crowtail – LED(Yellow)
1 x USB Battery Pack
1 x USB Mini-B Cable

Crowduino Uno – SD

SCL – A5
SDA – A4
POT – A1
ASM – A0
LEDY – 7
LEDG – 6
ITH – 5
VIN – +5V
GND – GND

DLE-EEPROM-UID-UnoMk001

DLE-EEPROM-UID-UnoMk001.ino

/* ***** Don Luc Electronics © ******
Software Version Information
DLE-EEPROM-UID-UnoMk001
Arduino UNO
5V
ver: UnoMk001
EEPROM with unique ID
*/

// Include Library Code
// EEPROM library to read and write EEPROM with unique ID for unit
#include <EEPROM.h>

// Software Version Information
String sver = "UnoMk001";
// Unit ID information
String uid = "DLEU001"; 
// Read Unique ID
// String ruid = "";

void loop() 
{

   // <== Write and Read EEPROM 
   isEEPROMw();
  
}

getEEPROM.ino

// getEEPROM
// Write and Read EEPROM with Unique ID for Unit
void isEEPROMw() {
  
  // Write EEPROM with Unique ID for Unit
  int incb = 0;
  int v = 0;
  String emp = "";
  String ruid = "";
    
  // Set Unit ID
  // The message starts with uid then is followed by 7 characters 
  // First clear a string buffer
  emp = "";
  // Loop through the 7 ID characters and write their ASCII (byte) value to the EEPROM
  for (int y = 0; y < 7; y++)
  {
        
     // Get ASCII value of character
     v = int(uid.charAt(y)); // + 5));
     // Add the actual character to the buffer
     emp = emp + uid.charAt(y + 5);
     // Write the value to the EEPROM
     EEPROM.write(y, v);
         
  } 
    
  // Write EEPROM with Unique ID for Unit
  Serial.println( "Write ID Information");

  // Read ID Information
  // Unit ID
  for (int y = 0; y < 7; y++)
  {
    
    ruid = ruid + char(EEPROM.read(y));
    
  }
  
  // Read ID Information
  Serial.print( "Read ID Information: ");
  Serial.println( ruid );
  Serial.println( "Ok!" );
  ruid = "";

  delay( 5000 );
   
}

setup.ino

// Setup
void setup() 
{

  // Open the serial port at 9600 bps:
  Serial.begin(9600);

  // Serial
  Serial.print( "Software Version Information: ");
  Serial.println( sver );
  Serial.print( "Unit ID Information: ");
  Serial.println( uid );
  
  delay(5000);
   
}

DL2501Mk08p

DL2501Mk08p.ino

/****** Don Luc Electronics © ******
Software Version Information
Project #15: Environment – EEPROM – Mk25
DL2501Mk08p.ino
DL2501Mk08
1 x Crowduino Uno - SD
1 x Crowtail - Base Shield
1 x Crowtail - Temperature and Humidity Sensor 2.0
1 x Crowtail - Rotary Angle Sensor 2.0
1 x Crowtail - Moisture Sensor 2.0
1 x Crowtail - I2C LCD
1 x Crowtail - LED(Green)
1 x Crowtail - LED(Yellow)
1 x USB Battery Pack
1 x USB Mini-B Cable
*/

// Include the Library Code
// EEPROM library to read and write EEPROM with unique ID for unit
#include <EEPROM.h>
// Wire
#include <Wire.h>
// Liquid Crystal
#include "LiquidCrystal.h"
// Temperature and Humidity Sensor
#include "DHT.h"

// Temperature and Humidity Sensor
#define DHTPIN 5
// DHT 11
#define DHTTYPE DHT11
DHT dht(DHTPIN, DHTTYPE);
// Temperature and Humidity Sensor
float h = 0;
float t = 0;

// Potentiometer
int iPotentiometer = A1;
// Change Your Threshold Here
int Threshold = 0;
int zz = 0;

// Liquid Crystal
// Connect via i2c
LiquidCrystal lcd(0);

// Crowtail Moisture Sensor
int iSoilMoisture = A0;
int iSoilMoistureVal = 0;

// LED Yellow
int iLEDYellow = 7;

// LED Green
int iLEDGreen = 6;

// EEPROM Unique ID Information
String uid = "";

// Software Version Information
String sver = "15-25";

void loop() {

  // Crowtail Moisture Sensor
  isSoilMoisture();

  // Temperature and Humidity Sensor
  isTH();

  // Delay 2 Second
  delay( 2000 );

  // Display Temperature and Humidity
  isDisplayTH();

  // Delay 2 Second
  delay( 2000 );

  // Display EEPROM
  isDisplayEEPROM();

  // Delay 2 Second
  delay( 2000 );

}

getDisplay.ino

// getDisplay
// Crowbits - OLED 128X64 UID
void isDisplayUID(){

  // Set up the LCD's number of rows and columns: 
  lcd.begin(16, 2);
  // Print a message to the LCD.
  // Cursor
  lcd.setCursor(0, 0);
  lcd.print("Don Luc Electron");
  // Cursor
  lcd.setCursor(0, 1);
  // Print a message to the LCD.
  lcd.print( sver );

}
// isDisplay Green
void isDisplayG(){

  // Print a message to the LCD
  // Clear
  lcd.clear();
  // Cursor
  lcd.setCursor(0, 0);
  lcd.print("Humid Soil");
  // Cursor
  lcd.setCursor(0, 1);
  // Print a message to the LCD
  lcd.print( iSoilMoistureVal );
  
}
// isDisplay Yellow
void isDisplayY(){

  // Print a message to the LCD
  // Clear
  lcd.clear();
  // Cursor
  lcd.setCursor(0, 0);
  lcd.print("Dry Soil");
  // Cursor
  lcd.setCursor(0, 1);
  // Print a message to the LCD
  lcd.print( iSoilMoistureVal );
  
}
// Display Temperature and Humidity
void isDisplayTH(){

  // Clear
  lcd.clear();
  // Set the cursor to column 0, line 0
  lcd.setCursor(0, 0);
  lcd.print("H: "); 
  lcd.print(h);
  lcd.print(" %");
  // Set the cursor to column 0, line 1
  lcd.setCursor(0, 1);
  lcd.print("T: "); 
  lcd.print(t);
  lcd.print(" *C");
  
}
// Display EEPROM
void isDisplayEEPROM(){

  // Clear
  lcd.clear();
  // Set the cursor to column 0, line 0
  lcd.setCursor(0, 0);
  lcd.print("EEPROM"); 
  // Set the cursor to column 0, line 1
  lcd.setCursor(0, 1);
  lcd.print( uid ); 

}

getEEPROM.ino

// EEPROM
// isUID EEPROM Unique ID
void isUID() {
  
  // Is Unit ID
  uid = "";
  for (int x = 0; x < 7; x++)
  {
    uid = uid + char(EEPROM.read(x));
  }
  
}

getSoilMoisture.ino

// Crowtail Moisture Sensor
// Soil Moisture
void isSoilMoisture(){

  // Connect Soil Moisture Sensor to Analog 0
  // iSoilMoistureVal => 0~700 Soil Moisture
  iSoilMoistureVal = analogRead( iSoilMoisture );

  // Threshold => 200~500
  zz = analogRead( iPotentiometer );
  Threshold = map( zz, 0, 1024, 200, 500);

  // Threshold
  if (iSoilMoistureVal > Threshold) {

    // 300~700 - Humid Soil
    // LED Yellow
    digitalWrite(iLEDYellow, LOW);
    // Display Green
    isDisplayG();
    // LED Green
    digitalWrite(iLEDGreen, HIGH);
    
  }
  else {
    
    // 0-300 Dry Soil
    // LED Green
    digitalWrite(iLEDGreen, LOW);
    // Display Yellow
    isDisplayY();
    digitalWrite(iLEDYellow, HIGH);
    
  }

}

getTH.ino

// Temperature and Humidity Sensor
void isTH(){

  // Temperature
  t = dht.readTemperature();
  // Humidity
  h = dht.readHumidity();
  
}

setup.ino

// Setup
void setup()
{
 
  // Delay
  delay(100);
  
  // isUID EEPROM Unique ID
  isUID();
  
  // Delay
  delay(100);

  // Initialize the LED iLED Yellow
  pinMode(iLEDYellow, OUTPUT);

  // Initialize the LED LED Green
  pinMode(iLEDGreen, OUTPUT);

  // Temperature and Humidity Sensor
  dht.begin();

  // Display UID
  isDisplayUID();
  
  // Delay 5 Second
  delay( 5000 );

}

——

Electronics, IoT, Teacher, Instructor, R&D and Consulting

  • Programming Language
  • Single-Board Microcontrollers (PIC, Arduino, Raspberry Pi, Arm, Silicon Labs, Espressif, Etc…)
  • IoT
  • Wireless (Radio Frequency, Bluetooth, WiFi, Etc…)
  • Robotics
  • Automation
  • Camera and Video Capture Receiver Stationary, Wheel/Tank and Underwater Vehicle
  • Unmanned Vehicles Terrestrial and Marine
  • Machine Learning
  • Artificial Intelligence (AI)
  • RTOS
  • Sensors, eHealth Sensors, Biosensor, and Biometric
  • Research & Development (R & D)
  • Consulting

Follow Us

Luc Paquin – Curriculum Vitae – 2024
https://www.donluc.com/luc/

Web: https://www.donluc.com/
Facebook: https://www.facebook.com/neosteam.labs.9/
YouTube: https://www.youtube.com/@thesass2063
Twitter: https://twitter.com/labs_steam
Pinterest: https://www.pinterest.com/NeoSteamLabs/
Instagram: https://www.instagram.com/neosteamlabs/
Patreon: https://patreon.com/DonLucElectronics59
DFRobot: https://learn.dfrobot.com/user-10186.html
Hackster.io: https://www.hackster.io/neosteam-labs
Elecrow: https://www.elecrow.com/share/sharepj/center/no/760816d385ebb1edc0732fd873bfbf13
TikTok: https://www.tiktok.com/@luc.paquin8
Twitch: https://www.twitch.tv/lucpaquin
LinkedIn: https://www.linkedin.com/in/jlucpaquin/

Don Luc

Project #15: Environment – DHT11 – Mk24

——

#DonLucElectronics #DonLuc #Arduino #DHT11 #ASM #Display #Elecrow #Project #Patreon #Electronics #Microcontrollers #IoT #Fritzing #Programming #Consultant

——

DHT11

——

DHT11

——

DHT11

——

Crowtail – Temperature and Humidity Sensor 2.0

This module can help you detect the temperature and humidity of the environment of your house. The module contains a DHT11 Temperature and Humidity sensor that is a complex sensor with a calibrated digital signal out. It uses digital module acquisition technology and the temperature & humidity sensor technology. The sensor consists of a resistance-type moisture element and an NTC temperature measuring element. Because of the single-wire serial interface, it is easy to use the module.

  • -Work Voltage: 3.3 Volt ~ 5 Volt
  • -Measuring Range: Humidity: 20% – 90% RH
  • -Measuring Range: Temperature: 0 ~ 50 °C
  • -Signal Collecting Period: 2S
  • -Accuracy: Humidity: ±5% RH
  • -Accuracy: Temperature: ±2°C

DL2501Mk06

1 x Crowduino Uno – SD
1 x Crowtail – Base Shield
1 x Crowtail – Temperature and Humidity Sensor 2.0
1 x Crowtail – Rotary Angle Sensor 2.0
1 x Crowtail – Moisture Sensor 2.0
1 x Crowtail – I2C LCD
1 x Crowtail – LED(Green)
1 x Crowtail – LED(Yellow)
1 x USB Battery Pack
1 x USB Mini-B Cable

Crowduino Uno – SD

SCL – A5
SDA – A4
POT – A1
ASM – A0
LEDY – 7
LEDG – 6
ITH – 5
VIN – +5V
GND – GND

DL2501Mk06p

DL2501Mk06p.ino

/****** Don Luc Electronics © ******
Software Version Information
Project #15: Environment – DHT11 – Mk24
DL2501Mk06p.ino
DL2501Mk06
1 x Crowduino Uno - SD
1 x Crowtail - Base Shield
1 x Crowtail - Temperature and Humidity Sensor 2.0
1 x Crowtail - Rotary Angle Sensor 2.0
1 x Crowtail - Moisture Sensor 2.0
1 x Crowtail - I2C LCD
1 x Crowtail - LED(Green)
1 x Crowtail - LED(Yellow)
1 x USB Battery Pack
1 x USB Mini-B Cable
*/

// Include the Library Code
// Wire
#include <Wire.h>
// Liquid Crystal
#include "LiquidCrystal.h"
// Temperature and Humidity Sensor
#include "DHT.h"

// Temperature and Humidity Sensor
#define DHTPIN 5
// DHT 11
#define DHTTYPE DHT11
DHT dht(DHTPIN, DHTTYPE);
// Temperature and Humidity Sensor
float h = 0;
float t = 0;

// Potentiometer
int iPotentiometer = A1;
// Change Your Threshold Here
int Threshold = 0;
int zz = 0;

// Liquid Crystal
// Connect via i2c
LiquidCrystal lcd(0);

// Crowtail Moisture Sensor
int iSoilMoisture = A0;
int iSoilMoistureVal = 0;

// LED Yellow
int iLEDYellow = 7;

// LED Green
int iLEDGreen = 6;

// Software Version Information
String sver = "15-24";

void loop() {

  // Crowtail Moisture Sensor
  isSoilMoisture();

  // Temperature and Humidity Sensor
  isTH();

  // Delay 2 Second
  delay( 2000 );

  // Display Temperature and Humidity
  isDisplayTH();

  // Delay 2 Second
  delay( 2000 );

}

getDisplay.ino

// getDisplay
// Crowbits - OLED 128X64 UID
void isDisplayUID(){

  // Set up the LCD's number of rows and columns: 
  lcd.begin(16, 2);
  // Print a message to the LCD.
  // Cursor
  lcd.setCursor(0, 0);
  lcd.print("Don Luc Electron");
  // Cursor
  lcd.setCursor(0, 1);
  // Print a message to the LCD.
  lcd.print( sver );

}
// isDisplay Green
void isDisplayG(){

  // Print a message to the LCD
  // Clear
  lcd.clear();
  // Cursor
  lcd.setCursor(0, 0);
  lcd.print("Humid Soil");
  // Cursor
  lcd.setCursor(0, 1);
  // Print a message to the LCD
  lcd.print( iSoilMoistureVal );
  
}
// isDisplay Yellow
void isDisplayY(){

  // Print a message to the LCD
  // Clear
  lcd.clear();
  // Cursor
  lcd.setCursor(0, 0);
  lcd.print("Dry Soil");
  // Cursor
  lcd.setCursor(0, 1);
  // Print a message to the LCD
  lcd.print( iSoilMoistureVal );
  
}
// Display Temperature and Humidity
void isDisplayTH(){

  // Set the cursor to column 0, line 0
  lcd.setCursor(0, 0);
  lcd.print("H: "); 
  lcd.print(h);
  lcd.print(" %");
  // Set the cursor to column 0, line 1
  lcd.setCursor(0, 1);
  lcd.print("T: "); 
  lcd.print(t);
  lcd.print(" *C");
  
}

getSoilMoisture.ino

// Crowtail Moisture Sensor
// Soil Moisture
void isSoilMoisture(){

  // Connect Soil Moisture Sensor to Analog 0
  // iSoilMoistureVal => 0~700 Soil Moisture
  iSoilMoistureVal = analogRead( iSoilMoisture );

  // Threshold => 200~500
  zz = analogRead( iPotentiometer );
  Threshold = map( zz, 0, 1024, 200, 500);

  // Threshold
  if (iSoilMoistureVal > Threshold) {

    // 300~700 - Humid Soil
    // LED Yellow
    digitalWrite(iLEDYellow, LOW);
    // Display Green
    isDisplayG();
    // LED Green
    digitalWrite(iLEDGreen, HIGH);
    
  }
  else {
    
    // 0-300 Dry Soil
    // LED Green
    digitalWrite(iLEDGreen, LOW);
    // Display Yellow
    isDisplayY();
    digitalWrite(iLEDYellow, HIGH);
    
  }

}

getTH.ino

// Temperature and Humidity Sensor
void isTH(){

  // Temperature
  t = dht.readTemperature();
  // Humidity
  h = dht.readHumidity();
  
}

setup.ino

// Setup
void setup()
{
 
  // Delay
  delay(100);

  // Initialize the LED iLED Yellow
  pinMode(iLEDYellow, OUTPUT);

  // Initialize the LED LED Green
  pinMode(iLEDGreen, OUTPUT);

  // Temperature and Humidity Sensor
  dht.begin();

  // Display UID
  isDisplayUID();
  
  // Delay 5 Second
  delay( 5000 );

}

——

People can contact us: https://www.donluc.com/?page_id=1927

Electronics, IoT, Teacher, Instructor, R&D and Consulting

  • Programming Language
  • Single-Board Microcontrollers (PIC, Arduino, Raspberry Pi, Arm, Silicon Labs, Espressif, Etc…)
  • IoT
  • Wireless (Radio Frequency, Bluetooth, WiFi, Etc…)
  • Robotics
  • Automation
  • Camera and Video Capture Receiver Stationary, Wheel/Tank and Underwater Vehicle
  • Unmanned Vehicles Terrestrial and Marine
  • Machine Learning
  • Artificial Intelligence (AI)
  • RTOS
  • Sensors, eHealth Sensors, Biosensor, and Biometric
  • Research & Development (R & D)
  • Consulting

Follow Us

Luc Paquin – Curriculum Vitae – 2024
https://www.donluc.com/luc/

Web: https://www.donluc.com/
Facebook: https://www.facebook.com/neosteam.labs.9/
YouTube: https://www.youtube.com/@thesass2063
Twitter: https://twitter.com/labs_steam
Pinterest: https://www.pinterest.com/NeoSteamLabs/
Instagram: https://www.instagram.com/neosteamlabs/
Patreon: https://patreon.com/DonLucElectronics59
DFRobot: https://learn.dfrobot.com/user-10186.html
Hackster.io: https://www.hackster.io/neosteam-labs
Elecrow: https://www.elecrow.com/share/sharepj/center/no/760816d385ebb1edc0732fd873bfbf13
TikTok: https://www.tiktok.com/@luc.paquin8
Twitch: https://www.twitch.tv/lucpaquin
LinkedIn: https://www.linkedin.com/in/jlucpaquin/

Don Luc
Project #15: Environment – Crowtail Rotary Angle Sensor – Mk23

——

#DonLucElectronics #DonLuc #Arduino #ASM #Display #Elecrow #Project #Patreon #Electronics #Microcontrollers #IoT #Fritzing #Programming #Consultant

——

Crowtail Rotary Angle Sensor

——

Crowtail Rotary Angle Sensor

——

Crowtail Rotary Angle Sensor

——

Crowtail – Rotary Angle Sensor 2.0

This rotary angle sensor may also be known as potentiometer that produces analog output between 0 and 3.3-5 Volt. The angular range is 300 degrees with a linear change in value. The resistance value is 10k ohms, perfect for Arduino use. Some applications like smart light control, volume control, only you can not think of things, no impossible things.

DL2501Mk04

1 x Crowduino Uno – SD
1 x Crowtail – Base Shield
1 x Crowtail – Rotary Angle Sensor 2.0
1 x Crowtail – Moisture Sensor 2.0
1 x Crowtail – I2C LCD
1 x Crowtail – LED(Green)
1 x Crowtail – LED(Yellow)
1 x USB Battery Pack
1 x USB Mini-B Cable

Crowduino Uno – SD

SCL – A5
SDA – A4
POT – A1
ASM – A0
LEDY – 7
LEDG – 6
VIN – +5V
GND – GND

DL2501Mk04p

DL2501Mk04p.ino

/****** Don Luc Electronics © ******
Software Version Information
Project #15: Environment – Crowtail Rotary Angle Sensor – Mk23
DL2501Mk04p.ino
DL2501Mk04
1 x Crowduino Uno - SD
1 x Crowtail - Base Shield
1 x Crowtail - Rotary Angle Sensor 2.0
1 x Crowtail - Moisture Sensor 2.0
1 x Crowtail - I2C LCD
1 x Crowtail - LED(Green)
1 x Crowtail - LED(Yellow)
1 x USB Battery Pack
1 x USB Mini-B Cable
*/

// Include the Library Code
// Wire
#include <Wire.h>
// Liquid Crystal
#include "LiquidCrystal.h"

// Potentiometer
int iPotentiometer = A1;
// Change Your Threshold Here
int Threshold = 0;
int zz = 0;

// Liquid Crystal
// Connect via i2c
LiquidCrystal lcd(0);

// Crowtail Moisture Sensor
int iSoilMoisture = A0;
int iSoilMoistureVal = 0;

// LED Yellow
int iLEDYellow = 7;

// LED Green
int iLEDGreen = 6;

// Software Version Information
String sver = "15-23";

void loop() {

  // Crowtail Moisture Sensor
  isSoilMoisture();

  // Delay 1 Second
  delay( 1000 );

}

getDisplay.ino

// getDisplay
// Crowbits - OLED 128X64 UID
void isDisplayUID(){

  // Set up the LCD's number of rows and columns: 
  lcd.begin(16, 2);
  // Print a message to the LCD.
  // Cursor
  lcd.setCursor(0, 0);
  lcd.print("Don Luc Electron");
  // Cursor
  lcd.setCursor(0, 1);
  // Print a message to the LCD.
  lcd.print( sver );

}
// isDisplay Green
void isDisplayG(){

  // Print a message to the LCD
  // Clear
  lcd.clear();
  // Cursor
  lcd.setCursor(0, 0);
  lcd.print("Humid Soil");
  // Cursor
  lcd.setCursor(0, 1);
  // Print a message to the LCD
  lcd.print( iSoilMoistureVal );
  
}
// isDisplay Yellow
void isDisplayY(){

  // Print a message to the LCD
  // Clear
  lcd.clear();
  // Cursor
  lcd.setCursor(0, 0);
  lcd.print("Dry Soil");
  // Cursor
  lcd.setCursor(0, 1);
  // Print a message to the LCD
  lcd.print( iSoilMoistureVal );
  
}

getSoilMoisture.ino

// Crowtail Moisture Sensor
// Soil Moisture
void isSoilMoisture(){

  // Connect Soil Moisture Sensor to Analog 0
  // iSoilMoistureVal => 0~700 Soil Moisture
  iSoilMoistureVal = analogRead( iSoilMoisture );

  // Threshold => 200~500
  zz = analogRead( iPotentiometer );
  Threshold = map( zz, 0, 1024, 200, 500);

  // Threshold
  if (iSoilMoistureVal > Threshold) {

    // 300~700 - Humid Soil
    // LED Yellow
    digitalWrite(iLEDYellow, LOW);
    // Display Green
    isDisplayG();
    // LED Green
    digitalWrite(iLEDGreen, HIGH);
    
  }
  else {
    
    // 0-300 Dry Soil
    // LED Green
    digitalWrite(iLEDGreen, LOW);
    // Display Yellow
    isDisplayY();
    digitalWrite(iLEDYellow, HIGH);
    
  }

}

setup.ino

// Setup
void setup()
{
 
  // Delay
  delay(100);

  // Initialize the LED iLED Yellow
  pinMode(iLEDYellow, OUTPUT);

  // Initialize the LED LED Green
  pinMode(iLEDGreen, OUTPUT);

  // Display UID
  isDisplayUID();
  
  // Delay 5 Second
  delay( 5000 );

}

——

People can contact us: https://www.donluc.com/?page_id=1927

Electronics, IoT, Teacher, Instructor, R&D and Consulting

  • Programming Language
  • Single-Board Microcontrollers (PIC, Arduino, Raspberry Pi, Arm, Silicon Labs, Espressif, Etc…)
  • IoT
  • Wireless (Radio Frequency, Bluetooth, WiFi, Etc…)
  • Robotics
  • Automation
  • Camera and Video Capture Receiver Stationary, Wheel/Tank and Underwater Vehicle
  • Unmanned Vehicles Terrestrial and Marine
  • Machine Learning
  • Artificial Intelligence (AI)
  • RTOS
  • Sensors, eHealth Sensors, Biosensor, and Biometric
  • Research & Development (R & D)
  • Consulting

Follow Us

Luc Paquin – Curriculum Vitae – 2024
https://www.donluc.com/luc/

Web: https://www.donluc.com/
Facebook: https://www.facebook.com/neosteam.labs.9/
YouTube: https://www.youtube.com/@thesass2063
Twitter: https://twitter.com/labs_steam
Pinterest: https://www.pinterest.com/NeoSteamLabs/
Instagram: https://www.instagram.com/neosteamlabs/
Patreon: https://patreon.com/DonLucElectronics59
DFRobot: https://learn.dfrobot.com/user-10186.html
Hackster.io: https://www.hackster.io/neosteam-labs
Elecrow: https://www.elecrow.com/share/sharepj/center/no/760816d385ebb1edc0732fd873bfbf13
TikTok: https://www.tiktok.com/@luc.paquin8
Twitch: https://www.twitch.tv/lucpaquin
LinkedIn: https://www.linkedin.com/in/jlucpaquin/

Project #15: Environment – Crowtail Moisture Sensor – Mk22

——

#DonLucElectronics #DonLuc #Arduino #ASM #Display #Elecrow #Project #Patreon #Electronics #Microcontrollers #IoT #Fritzing #Programming #Consultant

——

Crowtail Moisture Sensor

——

Crowtail Moisture Sensor

——

Crowtail Moisture Sensor

——

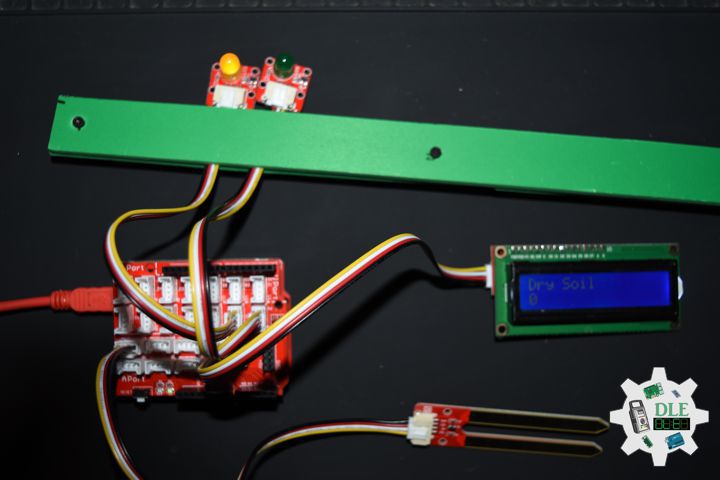
Crowtail Moisture Sensor 2.0

This Moisture Sensor can be used to detect the moisture of soil and thus to monitor if the plants in your garden need some water. This sensor uses the two probes to pass current through the soil, and then it reads then resistance to get the moisture level. More water makes the soil conduct electricity more easily (less resistance), while dry soil conducts electricity poorly (more resistance). Compares to the other moistures sensor using the same moisture test method, this module has super long legs, making it suitable for actual applications. This Moisture Sensor can be used to detect the moisture of soil or your pet plant’s water level, let the plants in your garden reach out for human help.

Crowtail – I2C LCD

A new crowtail for LCD1602, it contains LCD1602 and MCP23008 module. Unique interface for crowtail. Provide convenience to work with a LCD.

DL2501Mk02

1 x Crowduino Uno – SD
1 x Crowtail – Base Shield
1 x Crowtail – Moisture Sensor 2.0
1 x Crowtail – I2C LCD
1 x Crowtail – LED(Green)
1 x Crowtail – LED(Yellow)
1 x USB Battery Pack
1 x USB Mini-B Cable

Crowduino Uno – SD

SCL – A5
SDA – A4
ASM – A0
LEDY – 7
LEDG – 6
VIN – +5V
GND – GND

DL2501Mk02p

DL2501Mk02p.ino

/****** Don Luc Electronics © ******
Software Version Information
Project #15: Environment – Crowtail Moisture Sensor – Mk22
15-22
DL2501Mk02p.ino
DL2501Mk02
1 x Crowduino Uno - SD
1 x Crowtail - Base Shield
1 x Crowtail - Moisture Sensor 2.0
1 x Crowtail - I2C LCD
1 x Crowtail - LED(Green)
1 x Crowtail - LED(Yellow)
1 x USB Battery Pack
1 x USB Mini-B Cable
*/

// Include the Library Code
// Wire
#include <Wire.h>
// Liquid Crystal
#include "LiquidCrystal.h"

// Liquid Crystal
// Connect via i2c
LiquidCrystal lcd(0);

// Crowtail Moisture Sensor
int iSoilMoisture = A0;
int iSoilMoistureVal = 0;
// Change Your Threshold Here
int Threshold = 300;

// LED Yellow
int iLEDYellow = 7;

// LED Green
int iLEDGreen = 6;

// Software Version Information
String sver = "15-22";

void loop() {

  // Crowtail Moisture Sensor
  isSoilMoisture();

  // Delay 1 Second
  delay( 1000 );

}

getDisplay.ino

// getDisplay
// Crowbits - OLED 128X64 UID
void isDisplayUID(){

  // Set up the LCD's number of rows and columns: 
  lcd.begin(16, 2);
  // Print a message to the LCD.
  // Cursor
  lcd.setCursor(0, 0);
  lcd.print("Don Luc Electron");
  // Cursor
  lcd.setCursor(0, 1);
  // Print a message to the LCD.
  lcd.print( sver );

}
// isDisplay Green
void isDisplayG(){

  // Print a message to the LCD
  // Clear
  lcd.clear();
  // Cursor
  lcd.setCursor(0, 0);
  lcd.print("Humid Soil");
  // Cursor
  lcd.setCursor(0, 1);
  // Print a message to the LCD
  lcd.print( iSoilMoistureVal );
  
}
// isDisplay Yellow
void isDisplayY(){

  // Print a message to the LCD
  // Clear
  lcd.clear();
  // Cursor
  lcd.setCursor(0, 0);
  lcd.print("Dry Soil");
  // Cursor
  lcd.setCursor(0, 1);
  // Print a message to the LCD
  lcd.print( iSoilMoistureVal );
  
}

getSoilMoisture.ino

// Crowtail Moisture Sensor
// Soil Moisture
void isSoilMoisture(){

  // Connect Soil Moisture Sensor to Analog 0
  // iSoilMoistureVal => 0~700 Soil Moisture
  iSoilMoistureVal = analogRead( iSoilMoisture );

  // Threshold
  if (iSoilMoistureVal > Threshold) {

    // 300~700 - Humid Soil
    // LED Yellow
    digitalWrite(iLEDYellow, LOW);
    // Display Green
    isDisplayG();
    // LED Green
    digitalWrite(iLEDGreen, HIGH);
    
  }
  else {
    
    // 0-300 Dry Soil
    // LED Green
    digitalWrite(iLEDGreen, LOW);
    // Display Yellow
    isDisplayY();
    digitalWrite(iLEDYellow, HIGH);
    
  }

}

setup.ino

void setup()
{
 
  // Delay
  delay(100);

  // Initialize the LED iLED Yellow
  pinMode(iLEDYellow, OUTPUT);

  // Initialize the LED LED Green
  pinMode(iLEDGreen, OUTPUT);

  // Display UID
  isDisplayUID();
  
  // Delay 5 Second
  delay( 5000 );

}

——

People can contact us: https://www.donluc.com/?page_id=1927

Electronics, IoT, Teacher, Instructor, R&D and Consulting

  • Programming Language
  • Single-Board Microcontrollers (PIC, Arduino, Raspberry Pi, Arm, Silicon Labs, Espressif, Etc…)
  • IoT
  • Wireless (Radio Frequency, Bluetooth, WiFi, Etc…)
  • Robotics
  • Automation
  • Camera and Video Capture Receiver Stationary, Wheel/Tank and Underwater Vehicle
  • Unmanned Vehicles Terrestrial and Marine
  • Machine Learning
  • Artificial Intelligence (AI)
  • RTOS
  • Sensors, eHealth Sensors, Biosensor, and Biometric
  • Research & Development (R & D)
  • Consulting

Follow Us

Luc Paquin – Curriculum Vitae – 2024
https://www.donluc.com/luc/

Web: https://www.donluc.com/
Facebook: https://www.facebook.com/neosteam.labs.9/
YouTube: https://www.youtube.com/@thesass2063
Twitter: https://twitter.com/labs_steam
Pinterest: https://www.pinterest.com/NeoSteamLabs/
Instagram: https://www.instagram.com/neosteamlabs/
Patreon: https://patreon.com/DonLucElectronics59
DFRobot: https://learn.dfrobot.com/user-10186.html
Hackster.io: https://www.hackster.io/neosteam-labs
Elecrow: https://www.elecrow.com/share/sharepj/center/no/760816d385ebb1edc0732fd873bfbf13
TikTok: https://www.tiktok.com/@luc.paquin8
Twitch: https://www.twitch.tv/lucpaquin
LinkedIn: https://www.linkedin.com/in/jlucpaquin/

Don Luc
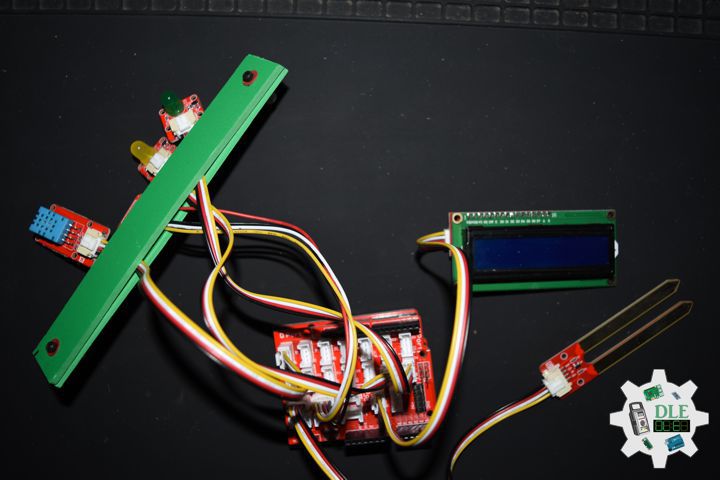
Project #15: Environment – Soil Moisture Sensor – Mk20

——

#DonLucElectronics #DonLuc #Arduino #ASM #Project #Patreon #Electronics #Microcontrollers #IoT #Fritzing #Programming #Consultant

——

Soil Moisture Sensor

——

Soil Moisture Sensor

——

Soil Moisture Sensor

——

Soil Moisture Sensor

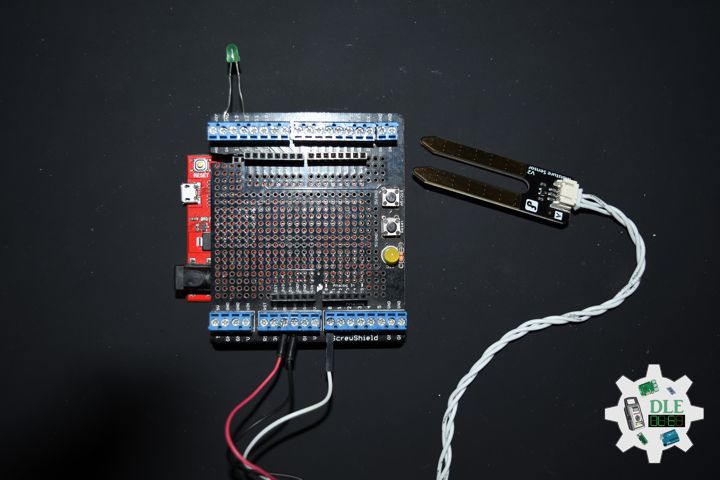
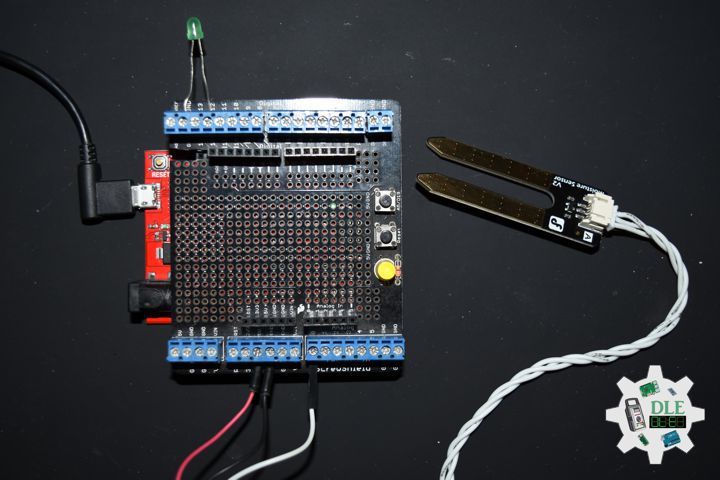
Soil moisture is the critical parameter in agriculture. If there is a shortage or overabundance of water, plants may die. At the same time, this data depends on many external factors, primarily weather conditions and climate changes. That is why it is so vital to understand the most effective methods for analyzing soil moisture content.

This term refers to the entire quantity of water in the ground’s pores or on its surface. The moisture content of soil depends on such factors as weather, type of land, and plants. The parameter is vital in monitoring soil moisture activities, predicting natural disasters, managing water supply, etc. This data may signal a future flood or water deficit ahead of other indicators.

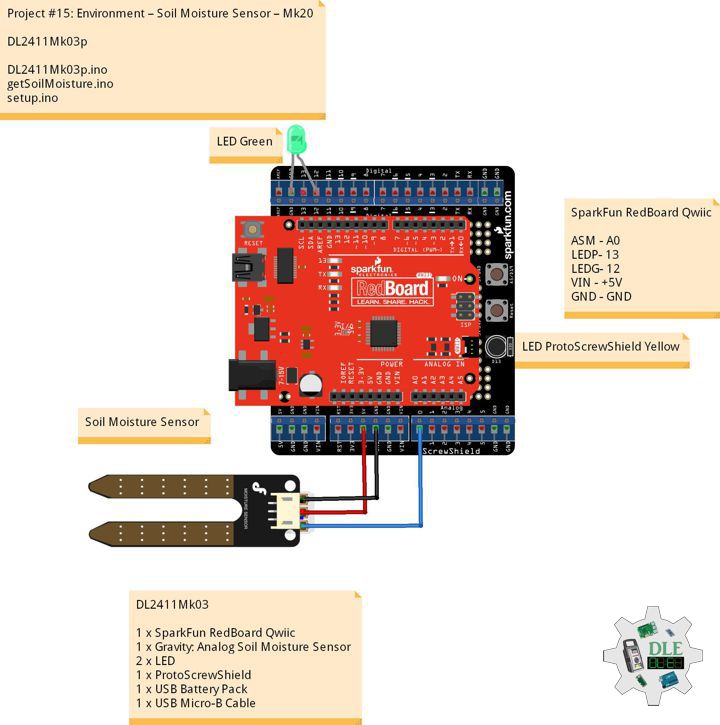
DL2411Mk03

1 x SparkFun RedBoard Qwiic
1 x Gravity: Analog Soil Moisture Sensor
2 x LED
1 x ProtoScrewShield
1 x USB Battery Pack
1 x USB Micro-B Cable

SparkFun RedBoard Qwiic

ASM – A0
LEDP- 13
LEDG- 12
VIN – +5V
GND – GND

DL2411Mk03p

DL2411Mk03p.ino

/****** Don Luc Electronics © ******
Software Version Information
Project #15: Environment – Soil Moisture Sensor – Mk20
15-20
DL2411Mk03p.ino
DL2411Mk03
1 x SparkFun RedBoard Qwiic
1 x Gravity: Analog Soil Moisture Sensor
2 x LED
1 x ProtoScrewShield
1 x USB Battery Pack
1 x USB Micro-B Cable
*/

// Include the Library Code

// Gravity: Analog Soil Moisture Sensor
int iSoilMoisture = A0;
int iSoilMoistureVal = 0;
int zz = 0;
// Change Your Threshold Here
int Threshold = 300;

// LED ProtoScrewShield Yellow
int iLEDProto = 13;

// LED Green
int iLEDGreen = 12;

// Software Version Information
String sver = "15-20";

void loop() {

  // Gravity: Analog Soil Moisture Sensor
  isSoilMoisture();

  // Delay 1 Second
  delay( 1000 );

}

getSoilMoisture.ino

// Gravity: Analog Soil Moisture Sensor
// Soil Moisture
void isSoilMoisture(){

  // Connect Soil Moisture Sensor to Analog 0
  zz = analogRead( iSoilMoisture );

  // iSoilMoistureVal => 0~900 Soil Moisture
  iSoilMoistureVal = map( zz, 0, 715, 0, 900);

  // Serial
  Serial.print("Moisture Sensor Value: ");

  // Threshold
  if (iSoilMoistureVal > Threshold) {

    // 300~900 - Humid Soil
    // LEDProto
    digitalWrite(iLEDProto, LOW);
    // Serial
    Serial.print( "Humid Soil " );
    Serial.println( iSoilMoistureVal );
    // LEDGreen
    digitalWrite(iLEDGreen, HIGH);
    
  }
  else {
    
    // 0-300 Dry Soil
    // LEDGreen
    digitalWrite(iLEDGreen, LOW);
    // Serial
    Serial.print( "Dry Soil " );
    Serial.println( iSoilMoistureVal );
    // LEDProto
    digitalWrite(iLEDProto, HIGH);
    
  }

}

setup.ino

// Setup
void setup()
{
 
  // Delay
  delay(100);

  // Serial
  Serial.begin(57600);

  // Initialize the LED iLEDProto
  pinMode(iLEDProto, OUTPUT);

  // Initialize the LED iLEDGreen
  pinMode(iLEDGreen, OUTPUT);

  // Delay 1 Second
  delay( 1000 );

}

——

People can contact us: https://www.donluc.com/?page_id=1927

Electronics, IoT, Teacher, Instructor, R&D and Consulting

  • Programming Language
  • Single-Board Microcontrollers (PIC, Arduino, Raspberry Pi, Arm, Silicon Labs, Espressif, Etc…)
  • IoT
  • Wireless (Radio Frequency, Bluetooth, WiFi, Etc…)
  • Robotics
  • Automation
  • Camera and Video Capture Receiver Stationary, Wheel/Tank and Underwater Vehicle
  • Unmanned Vehicles Terrestrial and Marine
  • Machine Learning
  • Artificial Intelligence (AI)
  • RTOS
  • Sensors, eHealth Sensors, Biosensor, and Biometric
  • Research & Development (R & D)
  • Consulting

Follow Us

Luc Paquin – Curriculum Vitae – 2024
https://www.donluc.com/luc/

Web: https://www.donluc.com/
Facebook: https://www.facebook.com/neosteam.labs.9/
YouTube: https://www.youtube.com/@thesass2063
Twitter: https://twitter.com/labs_steam
Pinterest: https://www.pinterest.com/NeoSteamLabs/
Instagram: https://www.instagram.com/neosteamlabs/
Patreon: https://patreon.com/DonLucElectronics59
DFRobot: https://learn.dfrobot.com/user-10186.html
Hackster.io: https://www.hackster.io/neosteam-labs
Elecrow: https://www.elecrow.com/share/sharepj/center/no/760816d385ebb1edc0732fd873bfbf13
TikTok: https://www.tiktok.com/@luc.paquin8
Twitch: https://www.twitch.tv/lucpaquin
LinkedIn: https://www.linkedin.com/in/jlucpaquin/

Don Luc
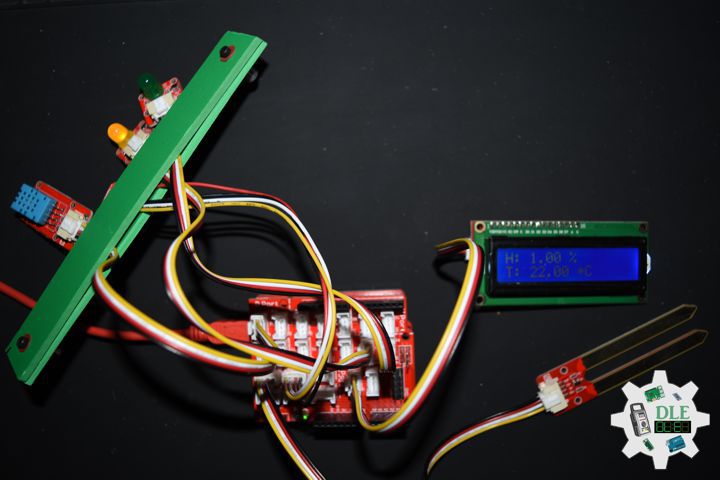
Project #29 – DFRobot – SHTC3 – Mk30

——

#DonLucElectronics #DonLuc #DFRobot #ASM #SHTC3 #FireBeetle2ESP32C6 #Display #EEPROM #ESP32 #IoT #Arduino #Project #Fritzing #Programming #Electronics #Microcontrollers #Consultant

——

SHTC3

——

SHTC3

——

SHTC3

——

Fermion: SHTC3 Temperature and Humidity Sensor

The SHTC3 digital humidity sensor from Sensirion builds on the success of the proven SHTC1 sensor and offers consistent high accuracy within the measuring range. The sensor covers a humidity measurement range of 0 to 100% RH and a temperature detection range of -40 Celsius to 125 Celsius with a typical accuracy of ±2% RH and ±0.2 Celsius. The board supply voltage of 3.3 Volt to 5 Volt and a current consumption below 0.15mA in low power mode make the SHTC3 perfectly suitable for mobile or wireless battery-driven applications.

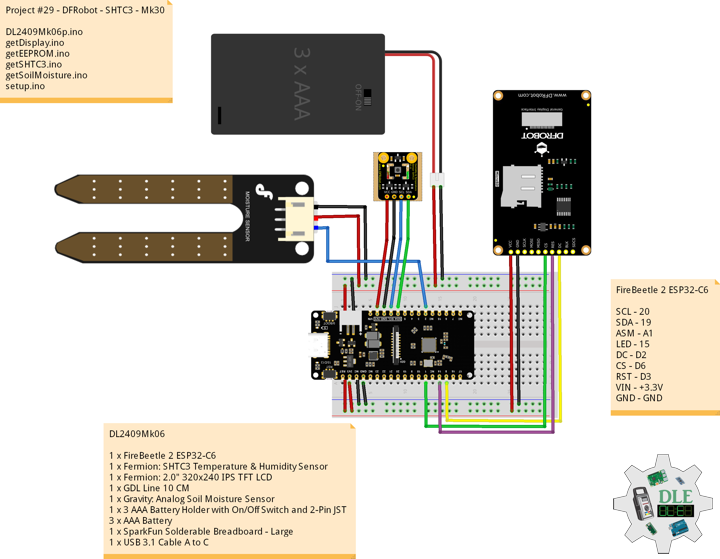
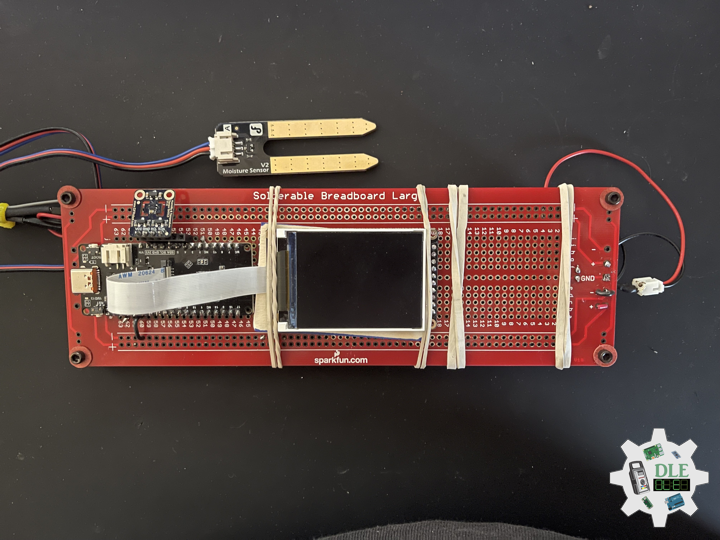
DL2409Mk06

1 x FireBeetle 2 ESP32-C6
1 x Fermion: SHTC3 Temperature & Humidity Sensor
1 x Fermion: 2.0″ 320×240 IPS TFT LCD
1 x GDL Line 10 CM
1 x Gravity: Analog Soil Moisture Sensor
1 x 3 AAA Battery Holder with On/Off Switch and 2-Pin JST
3 x AAA Battery
1 x SparkFun Solderable Breadboard – Large
1 x USB 3.1 Cable A to C

FireBeetle 2 ESP32-C6

SCL – 20
SDA – 19
ASM – A1
LED – 15
DC – D2
CS – D6
RST – D3
VIN – +3.3V
GND – GND

DL2409Mk06p

DL2409Mk06p.ino

/****** Don Luc Electronics © ******
Software Version Information
Project #29 - DFRobot - SHTC3 - Mk30
29-30
DL2409Mk06p.ino
DL2409Mk06
1 x FireBeetle 2 ESP32-C6
1 x Fermion: SHTC3 Temperature & Humidity Sensor
1 x Fermion: 2.0" 320x240 IPS TFT LCD
1 x GDL Line 10 CM
1 x Gravity: Analog Soil Moisture Sensor
1 x 3 AAA Battery Holder with On/Off Switch and 2-Pin JST
3 x AAA Battery
1 x SparkFun Solderable Breadboard - Large
1 x USB 3.1 Cable A to C
*/

// Include the Library Code
// EEPROM Library to Read and Write EEPROM
// with Unique ID for Unit
#include "EEPROM.h"
// Arduino
#include <Arduino.h>
// Wire
#include <Wire.h>
// DFRobot Display GDL API
#include <DFRobot_GDL.h>
// Fermion: SHTC3 Temperature & Humidity Sensor
#include"DFRobot_SHTC3.h"

// Fermion: SHTC3 Temperature & Humidity Sensor
DFRobot_SHTC3 SHTC3;
uint32_t id = 0;
float temperature;
float humidity;

// Defined ESP32
#define TFT_DC  D2
#define TFT_CS  D6
#define TFT_RST D3

/*dc=*/ /*cs=*/ /*rst=*/
// DFRobot Display 240x320
DFRobot_ST7789_240x320_HW_SPI screen(TFT_DC, TFT_CS, TFT_RST);

// Gravity: Analog Soil Moisture Sensor
int iSoilMoisture = A1;
int iSoilMoistureVal = 0;
int zz = 0;
// Change Your Threshold Here
int Threshold = 300;
String SM = "";

// LED Green
int iLEDGreen = 15;

// EEPROM Unique ID Information
#define EEPROM_SIZE 64
String uid = "";

// Software Version Information
String sver = "29-30";

void loop() {

  // SHTC3 Temperature and Humidity Sensor
  isSHTC3();
  
  // Gravity: Analog Soil Moisture Sensor
  isSoilMoisture();

  // DFRobot Display 240x320 - ASM - Temperature and Humidity
  isDisplayTH();

  // Delay 5 Second
  delay( 5000 );

}

getDisplay.ino

// DFRobot Display 240x320
// DFRobot Display 240x320 - UID
void isDisplayUID() {

    // DFRobot Display 240x320
    // Text Display
    // Text Wrap
    screen.setTextWrap(false);
    // Rotation
    screen.setRotation(3);
    // Fill Screen => black
    screen.fillScreen(0x0000);
    // Text Color => white
    screen.setTextColor(0xffff);
    // Font => Free Mono 9pt
    screen.setFont(&FreeMono9pt7b);
    // TextSize => 1.5
    screen.setTextSize(1.5);
    // DFRobot Display
    screen.setCursor(0, 30);
    screen.println("DFRobot Display");
    // Don Luc Electronics
    screen.setCursor(0, 60);
    screen.println("Don Luc Electronics");
    // Version
    screen.setCursor(0, 90);
    screen.println("Version");
    screen.setCursor(0, 120);
    screen.println( sver );
    // EEPROM
    screen.setCursor(0, 150);
    screen.println("EEPROM");
    screen.setCursor(0, 180);
    screen.println( uid );

}
// DFRobot Display 240x320 - ASM - Temperature and Humidity
void isDisplayTH() {
  
    // DFRobot Display 240x320
    // Text Display
    // Text Wrap
    screen.setTextWrap(false);
    // Rotation
    screen.setRotation(3);
    // Fill Screen => black
    screen.fillScreen(0x0000);
    // Text Color => white
    screen.setTextColor(0xffff);
    // Font => Free Mono 9pt
    screen.setFont(&FreeMono9pt7b);
    // TextSize => 1.5
    screen.setTextSize(1.5);
    // Soil Moisture Sensor
    screen.setCursor(0, 30);
    screen.println("Soil Moisture Sensor");
    // Gravity: Analog Soil Moisture Sensor
    screen.setCursor(0, 60);
    screen.println( "ASM: " );
    screen.setCursor(60, 60);
    screen.println( iSoilMoistureVal );
    screen.setCursor(0, 90);
    screen.println( SM );
    // SHTC3 Temperature
    screen.setCursor(0, 120);
    screen.println( "Tem: " );
    screen.setCursor(60, 120);
    screen.println( temperature );
    screen.setCursor(120, 120);
    screen.println( "C" );
    // SHTC3 Humidity
    screen.setCursor(0, 150);
    screen.println( "Hum: " );
    screen.setCursor(60, 150);
    screen.println( humidity );
    screen.setCursor(120, 150);
    screen.println( "%RH" );

}

getEEPROM.ino

// EEPROM
// isUID EEPROM Unique ID
void isUID() {
  
  // Is Unit ID
  uid = "";
  for (int x = 0; x < 7; x++)
  {
    uid = uid + char(EEPROM.read(x));
  }
  
}

getSHTC3.ino

// SHTC3 Temperature and Humidity Sensor
// SHTC3
void isSHTC3(){

  // SHTC3 Temperature and Humidity Sensor
  /**
   *    Mode  For configuring sensor working mode    
   *    SHTC3:
           PRECISION_HIGH_CLKSTRETCH_ON Clock Stretching Enabled 
   *       PRECISION_HIGH_CLKSTRETCH_OFF Clock Stretching Disabled 
   *       PRECISION_LOW_CLKSTRETCH_ON Clock Stretching Enabled & Low Power
   *       PRECISION_LOW_CLKSTRETCH_OFF Clock Stretching Disabled & Low Power
   */
  temperature = SHTC3.getTemperature(PRECISION_HIGH_CLKSTRETCH_ON);
  /**
   *    Mode  For configuring sensor working mode 
   *    SHTC3
   *       PRECISION_HIGH_CLKSTRETCH_ON Clock Stretching Enabled 
   *       PRECISION_HIGH_CLKSTRETCH_OFF Clock Stretching Disabled 
   *       PRECISION_LOW_CLKSTRETCH_ON Clock Stretching Enabled & Low Power
   *       PRECISION_LOW_CLKSTRETCH_OFF Clock Stretching Disabled & Low Power
   */
  humidity = SHTC3.getHumidity(PRECISION_HIGH_CLKSTRETCH_OFF);

}

getSoilMoisture.ino

// Gravity: Analog Soil Moisture Sensor
// Soil Moisture
void isSoilMoisture(){

  // Connect Soil Moisture Sensor to Analog 0
  zz = analogRead( iSoilMoisture );

  // iSoilMoistureVal => 0~900 Soil Moisture
  iSoilMoistureVal = map( zz, 0, 4095, 0, 900);

  // Threshold
  if (iSoilMoistureVal > Threshold)

    // 300~950 - Humid Soil
    SM = "Humid Soil";
    
  else {
    
    // 0-300 Dry Soil
    SM = "Dry Soil";

  }

}

setup.ino

// Setup
void setup()
{
  
  // Give display time to power on
  delay(100);

  // EEPROM Size
  EEPROM.begin(EEPROM_SIZE);
  
  // EEPROM Unique ID
  isUID();
  
  // Delay
  delay( 100 );

  // Wire
  Wire.begin();

  // Delay
  delay( 100 );
  
  // DFRobot Display 240x320
  screen.begin();

  // Delay
  delay(100);

  // Fermion: SHTC3 Temperature & Humidity Sensor
  SHTC3.begin();
  /*SHTC3 is set to sleep mode by default. Please wake it up before use. 
  Use SHTC3.sleep() to let SHTC3 enter sleep mode; SHTC3 
  stops working in sleep mode*/
  SHTC3.wakeup();
  
  // Delay
  delay(100);

  // Initialize the LED Green
  pinMode(iLEDGreen, OUTPUT);

  // iLEDGreen HIGH
  digitalWrite(iLEDGreen, HIGH );

  // DFRobot Display 240x320 - UID
  // Don Luc Electronics
  // Version
  // EEPROM
  isDisplayUID();

  // Delay 5 Second
  delay( 5000 );

}

——

People can contact us: https://www.donluc.com/?page_id=1927

Electronics, IoT, Teacher, Instructor, R&D and Consulting

  • Programming Language
  • Single-Board Microcontrollers (PIC, Arduino, Raspberry Pi, Arm, Silicon Labs, Espressif, Etc…)
  • IoT
  • Wireless (Radio Frequency, Bluetooth, WiFi, Etc…)
  • Robotics
  • Automation
  • Camera and Video Capture Receiver Stationary, Wheel/Tank and Underwater Vehicle
  • Unmanned Vehicles Terrestrial and Marine
  • Machine Learning
  • Artificial Intelligence (AI)
  • RTOS
  • Sensors, eHealth Sensors, Biosensor, and Biometric
  • Research & Development (R & D)
  • Consulting

Follow Us

Luc Paquin – Curriculum Vitae – 2024
https://www.donluc.com/luc/

Web: https://www.donluc.com/
Facebook: https://www.facebook.com/neosteam.labs.9/
YouTube: https://www.youtube.com/@thesass2063
Twitter: https://twitter.com/labs_steam
Pinterest: https://www.pinterest.com/NeoSteamLabs/
Instagram: https://www.instagram.com/neosteamlabs/
DFRobot Luc.Paquin: https://edu.dfrobot.com/dashboard/makelogs
Hackster.io: https://www.hackster.io/neosteam-labs
ELECROW: https://www.elecrow.com/share/sharepj/center/no/760816d385ebb1edc0732fd873bfbf13
TikTok: www.tiktok.com/@luc.paquin8
LinkedIn: https://www.linkedin.com/in/jlucpaquin/

Don Luc
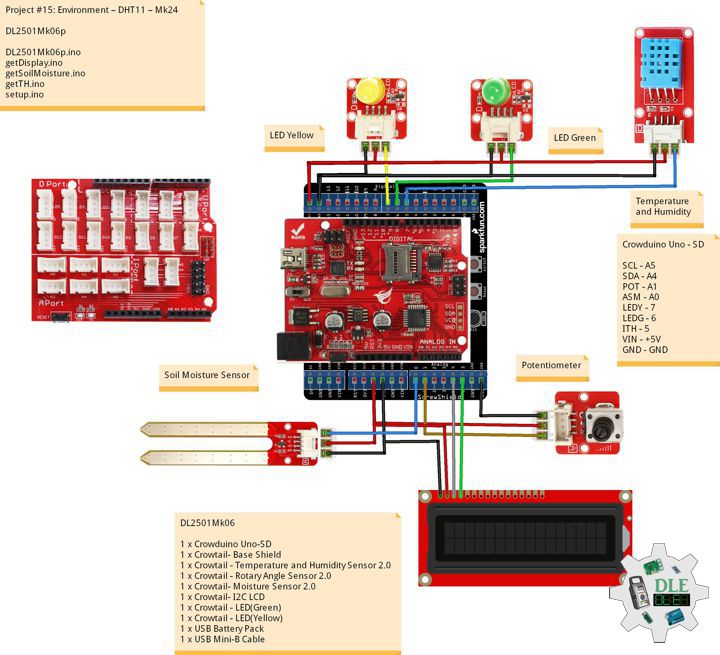
Project #30 – UNIHIKER – MEMS VOC – Mk05

——

#DonLucElectronics #DonLuc #UNIHIKER #VOC #Display #IoT #Project #Debian #Python #Thonny #DFRobot #Fritzing #Programming #Electronics #Microcontrollers #Consultant

——

MEMS VOC

——

MEMS VOC

——

MEMS VOC

——

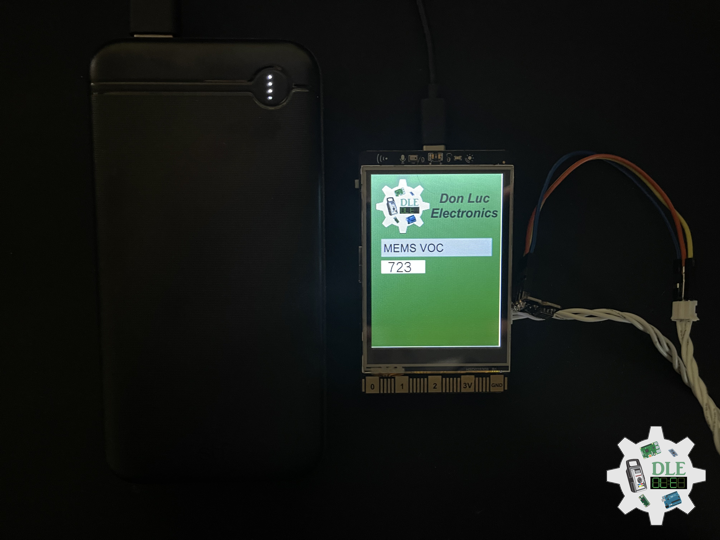
Fermion: MEMS Volatile Organic Compounds VOC Gas Detection Sensor

Fermion: MEMS Volatile Organic Compounds VOC Gas Sensor employs state-of-the-art microelectromechanical system (MEMS) technology, endowing the sensor with compact dimensions, low power consumption, minimal heat generation, short preheating time, and swift response recovery. The sensor can qualitatively measure VOC gas concentration and is suitable for indoor air quality detection, fresh air system, air purifier and other application scenarios. Kindly remove the protective film before usage. Gas detected: ethanol, formaldehyde, toluene, etc. Detection range: 1-500 ppm. It is advisable to preheat the module for at least 24 hours.

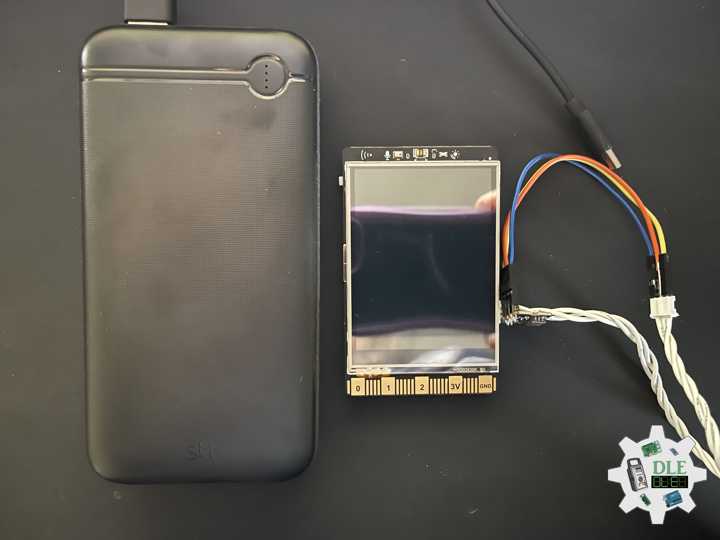
DL2409Mk05

1 x UNIHIKER
1 x Fermion: MEMS VOC Gas Detection Sensor
1 x USB Battery Pack
1 x USB 3.1 Cable A to C

UNIHIKER

ADC – 21
VIN – +5V
GND – GND

DL2409Mk05p

DL2409Mk05p.py

"""
****** Don Luc Electronics © ******
Software Version Information
Project #30 - UNIHIKER - Fermion: MEMS VOC - Mk05
30-05
DL2409Mk05.py
DL2409Mk05
1 x UNIHIKER
1 x Fermion: MEMS VOC Gas Detection Sensor
1 x USB Battery Pack
1 x USB 3.1 Cable A to C

-*- coding: utf-8 -*-
"""
# Import the unihiker library
from unihiker import GUI

# Import the time library
import time

# Import the Board module from the pinpong.board package 
from pinpong.board import Board

# Import all modules from the pinpong.extension.unihiker package
from pinpong.extension.unihiker import *

# Initialize the board by selecting the board type and port number;
# if not specified, the program will automatically detect it
Board().begin()

# Initialize pin 21 as analog input mode
# Fermion: MEMS VOC Gas Detection Sensor
adc0 = Pin(Pin.P21, Pin.ANALOG)

# Instantiate the GUI class and create a gui object
gui = GUI()

# Display the initial background image 'DL2409Mk05p'
img = gui.draw_image(x=0, y=0, w=240, h=320, image='DL2409Mk05p.png')

# MEMS VOC
# Display the initial Fermion: MEMS VOC Gas Detection Sensor valueVOC
valueVOC = gui.draw_text(x=30, y=151, text='0', font_size=18)

while True:

    # Fermion: MEMS VOC Gas Detection Sensor
    # Read analog value
    VOCSensor = adc0.read_analog()
    valueVOC.config(text=VOCSensor)
    
    # Delay for 1 second to keep the screen content displayed for a longer time
    time.sleep(1)

——

People can contact us: https://www.donluc.com/?page_id=1927

Electronics, IoT, Teacher, Instructor, R&D and Consulting

  • Programming Language
  • Single-Board Microcontrollers (PIC, Arduino, Raspberry Pi, Arm, Silicon Labs, Espressif, Etc…)
  • IoT
  • Wireless (Radio Frequency, Bluetooth, WiFi, Etc…)
  • Robotics
  • Automation
  • Camera and Video Capture Receiver Stationary, Wheel/Tank and Underwater Vehicle
  • Unmanned Vehicles Terrestrial and Marine
  • Machine Learning
  • Artificial Intelligence (AI)
  • RTOS
  • Sensors, eHealth Sensors, Biosensor, and Biometric
  • Research & Development (R & D)
  • Consulting

Follow Us

Luc Paquin – Curriculum Vitae – 2024
https://www.donluc.com/luc/

Web: https://www.donluc.com/
Facebook: https://www.facebook.com/neosteam.labs.9/
YouTube: https://www.youtube.com/@thesass2063
Twitter: https://twitter.com/labs_steam
Pinterest: https://www.pinterest.com/NeoSteamLabs/
Instagram: https://www.instagram.com/neosteamlabs/
DFRobot Luc.Paquin: https://edu.dfrobot.com/dashboard/makelogs
Hackster.io: https://www.hackster.io/neosteam-labs
ELECROW: https://www.elecrow.com/share/sharepj/center/no/760816d385ebb1edc0732fd873bfbf13
TikTok: www.tiktok.com/@luc.paquin8
LinkedIn: https://www.linkedin.com/in/jlucpaquin/

Don Luc
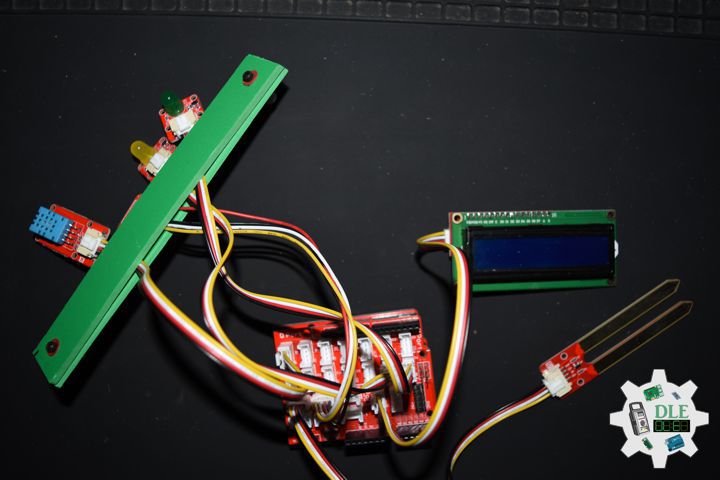
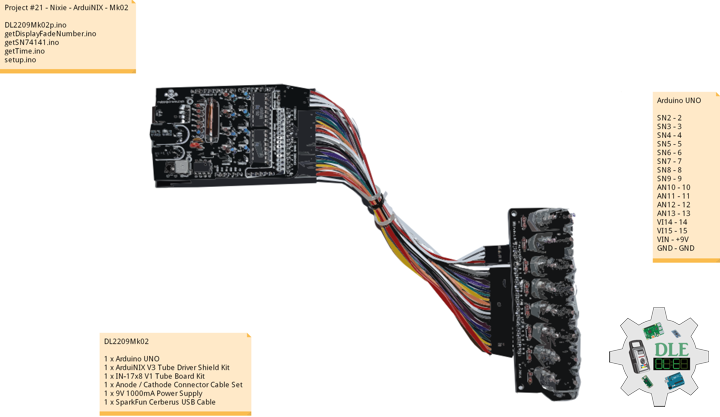
Project #21 – Nixie – ArduiNIX – Mk02

——

#DonLucElectronics #DonLuc #NixieTube #Nixie #ArduiNIX #ArduinoUNO #Arduino #Project #Fritzing #Programming #Electronics #Microcontrollers #Consultant

——

ArduiNIX

——

ArduiNIX

——

ArduiNIX

——

ArduiNIX

——

ArduiNIX

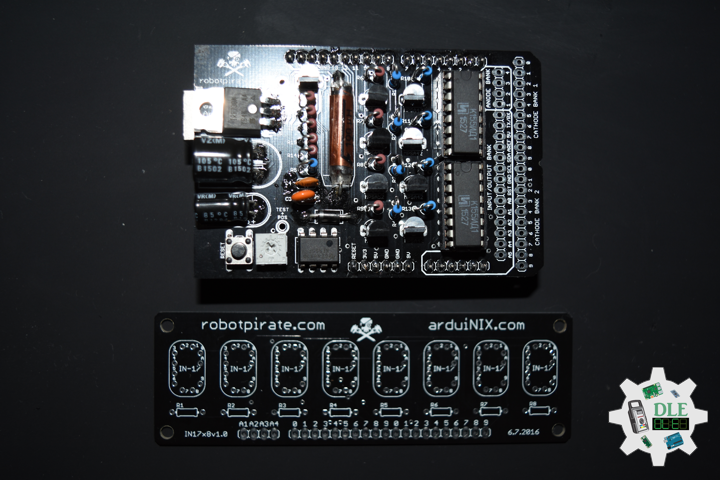
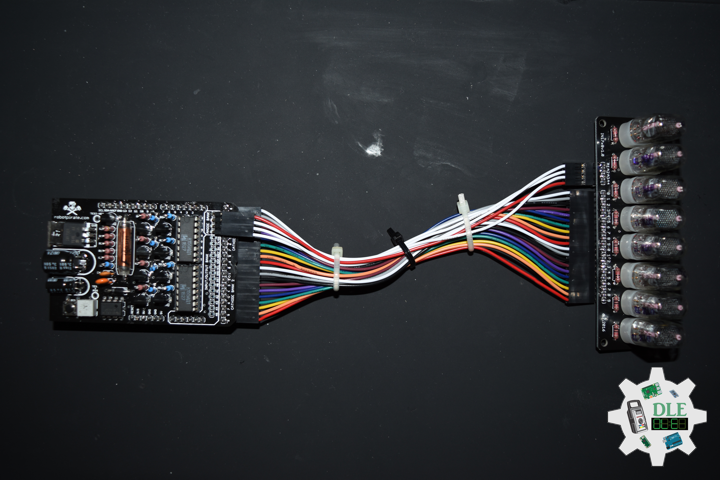
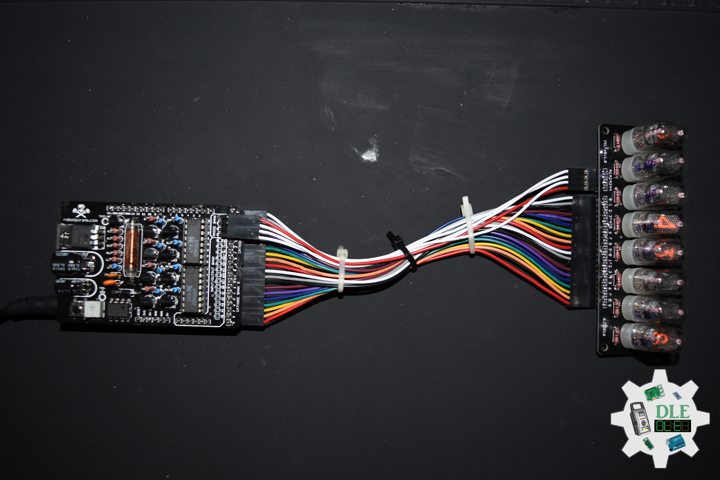
The ArduiNIX is an Arduino compatible shield which plugs right onto the top of the Arduino UNO board. ArduiNIX takes care of stepping power from 9 VDC wall adapter power supply up to a maximum of approximately 250 VDC to drive any and all Nixie tubes. ArduiNIX also provides Multiplexed display for up to 80 elements by using 4 anode channels and 20 cathode channels. Multiplexing increases the life expectancy of your Nixie tube investment.

Not only does the ArduiNIX provide a Nixie tube platform for standard clock functions, but it is also user programmable, meaning if you can program it using the arduino environment, you can make it happen on your Nixie display. Take special care when working with the ArduiNIX. The ArduiNIX Shield operates at high voltages. Be careful when handling it while it’s powered up. Normally the Arduino is safe to handle, but when used in conjunction with the ArduiNIX, voltages in excess of 200 volts may be achieved. Use caution. An IN-17 x 8 display board, and 8 x Russian IN-17 Nixie tubes.

DL2209Mk02

1 x Arduino UNO
1 x ArduiNIX V3 Tube Driver Shield Kit
1 x IN-17×8 V1 Tube Board Kit
1 x Anode / Cathode Connector Cable Set
1 x 9V 1000mA Power Supply
1 x SparkFun Cerberus USB Cable

Arduino UNO

SN2 – 2
SN3 – 3
SN4 – 4
SN5 – 5
SN6 – 6
SN7 – 7
SN8 – 8
SN9 – 9
AN10 – 10
AN11 – 11
AN12 – 12
AN13 – 13
VI14 – 14
VI15 – 15
VIN – +9V
GND – GND

DL2209Mk02p.ino

/* ***** Don Luc Electronics © *****
Software Version Information
Project #21 - Nixie - ArduiNIX - Mk02
21-02
DL2209Mk02p.ino
1 x Arduino UNO
1 x ArduiNIX V3 Tube Driver Shield Kit
1 x IN-17x8 V1 Tube Board Kit
1 x Anode / Cathode Connector Cable Set
1 x 9V 1000mA Power Supply
1 x SparkFun Cerberus USB Cable
*/

// Include the Library Code

// SN74141 (1)
int ledPin_0_a = 2;                
int ledPin_0_b = 3;
int ledPin_0_c = 4;
int ledPin_0_d = 5;

// SN74141 (2)
int ledPin_1_a = 6;                
int ledPin_1_b = 7;
int ledPin_1_c = 8;
int ledPin_1_d = 9;

// Anode pins
int ledPin_a_1 = 10;
int ledPin_a_2 = 11;
int ledPin_a_3 = 12;
int ledPin_a_4 = 13;

// NOTE: Grounding on virtual pins 14 and 15 
// (analog pins 0 and 1) will set the Hour and Mins.
int iVirtual14 = 14;
int iVirtual15 = 15;

// Fade
float fadeMax = 0.1f;
float fadeStep = 0.1f;
// Number Array
int NumberArray[8]={0,0,0,0,0,0,0,0};
int currNumberArray[8]={0,0,0,0,0,0,0,0};
float NumberArrayFadeInValue[8]={0.0f,0.0f,0.0f,0.0f,0.0f,0.0f,0.0f,0.0f};
float NumberArrayFadeOutValue[8]={5.0f,5.0f,5.0f,5.0f,5.0f,5.0f,5.0f,5.0f};

// Defines
// Sub seconds
long SSECS = 100;
// Milliseconds in a Sec
long SECS = 60;
// 60 Seconds in a Min.
long MINS = 60;
// 60 Mins in an hour
long HOURS = 60 * MINS;
// 24 Hours in a day. > Note: change the 24 to a 12 for non military time.
long DAYS = 12 * HOURS; 

// Time from when we started
long runTime = 0;

// Default time sets. clock will start at 12:34:00.
// This is so we can count the correct order of tubes.
long clockHourSet;
long clockMinSet;
long clockSecSet;
//long clockSSecSet;

int HourButtonPressed = false;
int MinButtonPressed = false;

// Software Version Information
String sver = "21-02";

void loop() {

  // Time
  isTime();
  
}

getDisplayFadeNumber.ino

// Display Fade Number
void DisplayFadeNumberString()
{
 
  // Anode channel 1 - numerals 0,4
  SetSN74141Chips(currNumberArray[0],currNumberArray[4]);   
  digitalWrite(ledPin_a_1, HIGH);   
  delay(NumberArrayFadeOutValue[0]);
  SetSN74141Chips(NumberArray[0],NumberArray[4]);   
  delay(NumberArrayFadeInValue[0]);
  digitalWrite(ledPin_a_1, LOW);
  
    // Anode channel 2 - numerals 1,5
  SetSN74141Chips(currNumberArray[1],currNumberArray[5]);   
  digitalWrite(ledPin_a_2, HIGH);   
  delay(NumberArrayFadeOutValue[1]);
  SetSN74141Chips(NumberArray[1],NumberArray[5]);   
  delay(NumberArrayFadeInValue[1]);
  digitalWrite(ledPin_a_2, LOW);
  
   // Anode channel 3 - numerals 2,6
  SetSN74141Chips(currNumberArray[2],currNumberArray[6]);   
  digitalWrite(ledPin_a_3, HIGH);   
  delay(NumberArrayFadeOutValue[2]);
  SetSN74141Chips(NumberArray[2],NumberArray[6]);   
  delay(NumberArrayFadeInValue[2]);
  digitalWrite(ledPin_a_3, LOW);
  
     // Anode channel 4 - numerals 3,7
  SetSN74141Chips(currNumberArray[3],currNumberArray[7]);   
  digitalWrite(ledPin_a_4, HIGH);   
  delay(NumberArrayFadeOutValue[3]);
  SetSN74141Chips(NumberArray[3],NumberArray[7]);   
  delay(NumberArrayFadeInValue[3]);
  digitalWrite(ledPin_a_4, LOW);
  
  // Loop thru and update all the arrays, and fades.
  for( int i = 0 ; i < 8 ; i ++ ) //equal to & of digits
  {
    if( NumberArray[i] != currNumberArray[i] )
    {
      NumberArrayFadeInValue[i] += fadeStep;
      NumberArrayFadeOutValue[i] -= fadeStep;
  
      if( NumberArrayFadeInValue[i] >= fadeMax )
      {
        NumberArrayFadeInValue[i] = 2.0f;
        NumberArrayFadeOutValue[i] = 4.0f; //affects the refresh cycle
        currNumberArray[i] = NumberArray[i];
      }
    }
  }
  
}

getSN74141.ino

// SN74141
// SN74141 : Truth Table
//D C B A #
//L,L,L,L 0
//L,L,L,H 1
//L,L,H,L 2
//L,L,H,H 3
//L,H,L,L 4
//L,H,L,H 5
//L,H,H,L 6
//L,H,H,H 7
//H,L,L,L 8
//H,L,L,H 9
// isSetupSN74141
void isSetupSN74141(){

  pinMode(ledPin_0_a, OUTPUT);      
  pinMode(ledPin_0_b, OUTPUT);      
  pinMode(ledPin_0_c, OUTPUT);      
  pinMode(ledPin_0_d, OUTPUT);    
  
  pinMode(ledPin_1_a, OUTPUT);      
  pinMode(ledPin_1_b, OUTPUT);      
  pinMode(ledPin_1_c, OUTPUT);      
  pinMode(ledPin_1_d, OUTPUT);      
  
  pinMode(ledPin_a_1, OUTPUT);      
  pinMode(ledPin_a_2, OUTPUT);      
  pinMode(ledPin_a_3, OUTPUT);   
  pinMode(ledPin_a_4, OUTPUT);    
 
  // NOTE: Grounding on virtual pins 14 and 15 
  // (analog pins 0 and 1) will set the Hour and Mins.
  // Set the vertual pin 14 (pin 0 on the analog inputs )
  pinMode( iVirtual14, INPUT );
  // Set pin 14 as a pull up resistor.
  digitalWrite(iVirtual14, HIGH);
  // Set the vertual pin 15 (pin 1 on the analog inputs )
  pinMode( iVirtual15, INPUT );
  // Set pin 15 as a pull up resistor.
  digitalWrite(iVirtual15, HIGH);
  
}
// SetSN74141Chips
void SetSN74141Chips( int num2, int num1 )
{
  
  // Set defaults
  // Will display a zero.
  int a = 0;
  int b = 0;
  int c = 0;
  int d = 0;
  
  // Load the a,b,c,d.. to send to the SN74141 IC (1)
  switch( num1 )
  {
    case 0:
      a=0;
      b=0;
      c=0;
      d=0;
      break;
    case 1:
      a=1;
      b=0;
      c=0;
      d=0;
      break;
    case 2:
      a=0;
      b=1;
      c=0;
      d=0;
      break;
    case 3:
      a=1;
      b=1;
      c=0;
      d=0;
      break;
    case 4:
      a=0;
      b=0;
      c=1;
      d=0;
      break;
    case 5:
      a=1;
      b=0;
      c=1;
      d=0;
      break;
    case 6: 
      a=0;
      b=1;
      c=1;
      d=0;
      break;
    case 7:
      a=1;
      b=1;
      c=1;
      d=0;
      break;
    case 8:
      a=0;
      b=0;
      c=0;
      d=1;
      break;
    case 9:
      a=1;
      b=0;
      c=0;
      d=1;
      break;
    default:
      a=1;
      b=1;
      c=1;
      d=1;
      break;
  }  
  
  // Write to output pins.
  digitalWrite(ledPin_0_d, d);
  digitalWrite(ledPin_0_c, c);
  digitalWrite(ledPin_0_b, b);
  digitalWrite(ledPin_0_a, a);

  // Load the a,b,c,d.. to send to the SN74141 IC (2)
  switch( num2 )
  {
    case 0:
      a=0;
      b=0;
      c=0;
      d=0;
      break;
    case 1:
      a=1;
      b=0;
      c=0;
      d=0;
      break;
    case 2:
      a=0;
      b=1;
      c=0;
      d=0;
      break;
    case 3:
      a=1;
      b=1;
      c=0;
      d=0;
      break;
    case 4:
      a=0;
      b=0;
      c=1;
      d=0;
      break;
    case 5:
      a=1;
      b=0;
      c=1;
      d=0;
      break;
    case 6:
      a=0;
      b=1;
      c=1;
      d=0;
      break;
    case 7:
      a=1;
      b=1;
      c=1;
      d=0;
      break;
    case 8:
      a=0;
      b=0;
      c=0;
      d=1;
      break;
    case 9:
      a=1;
      b=0;
      c=0;
      d=1;
      break;
    default:
      a=1;
      b=1;
      c=1;
      d=1;
      break;
  }
  
  // Write to output pins
  digitalWrite(ledPin_1_d, d);
  digitalWrite(ledPin_1_c, c);
  digitalWrite(ledPin_1_b, b);
  digitalWrite(ledPin_1_a, a);
  
}

getTime.ino

// Time
void isTime(){

  // Get milliseconds.
  runTime = millis();
  //int ssTime = millis();
  
  int hourInput = digitalRead(iVirtual14);  
  int minInput  = digitalRead(iVirtual15);

  if( hourInput == 0 )
    HourButtonPressed = true;
  if( minInput == 0 )
    MinButtonPressed = true;
  if( HourButtonPressed == true && hourInput == 1 )
  {
    clockHourSet++;
    HourButtonPressed = false;
  }
  if( MinButtonPressed == true && minInput == 1 )
  {
    clockMinSet++;
    MinButtonPressed = false;
  }

  // Get time in seconds.
  // Change this value to speed up or
  // slow down the clock, set to smaller number such as 10, 1, or 100 for debugging
  long time = (runTime) / 1000;
  int sstime = (runTime) / 10;
  // Set time based on offset..
  // long hbump = 60*60*clockHourSet;
  //long sbump = 60*60*60*clockHourSet; //change hourset to secondset
  long hbump = 60*60*clockHourSet;
  long mbump = 60*clockMinSet;
  time += mbump + hbump;

  // Convert time to days,hours,mins,seconds
  long days  = time / DAYS;    time -= days  * DAYS; 
  long hours = time / HOURS;   time -= hours * HOURS; 
  long minutes  = time / MINS;    time -= minutes  * MINS; 
  long seconds  = time;      
//  long sseconds  = 76;// time -= seconds  * SECS;
  long sseconds  = runTime / SECS; time -= sseconds  * SECS; 

  // Get the high and low order values for hours,min,seconds. 
  int lowerHours = hours % 10;
  int upperHours = hours - lowerHours;
  int lowerMins = minutes % 10;
  int upperMins = minutes - lowerMins;
  int lowerSeconds = seconds % 10;
  int upperSeconds = seconds - lowerSeconds;
  int lowerSSeconds = sseconds % 10;
  //- lowerSSeconds;
  int upperSSeconds = lowerSSeconds % 10; upperSSeconds = upperSSeconds /10;
  
  if( upperSSeconds >= 10 )  upperSSeconds = upperSSeconds / 10;
  if( upperSeconds >= 10 )   upperSeconds = upperSeconds / 10;
  if( upperMins >= 10 )      upperMins = upperMins / 10;
  if( upperHours >= 10 )     upperHours = upperHours / 10;
 
  if( upperHours == 0 && lowerHours == 0 )
  {
    upperHours = 1;
    lowerHours = 2;
  }
  
  // Fill in the Number array used to display on the tubes.
  
  NumberArray[7] = upperHours;
  NumberArray[6] = lowerHours;
  NumberArray[5] = upperMins;
  NumberArray[4] = lowerMins;
  NumberArray[3] = upperSeconds;  
  NumberArray[2] = lowerSeconds;
  NumberArray[1] = lowerSSeconds; //upperSSeconds;  
  NumberArray[0] = lowerSSeconds; //lowerSSeconds;
  
  Serial.print(lowerSSeconds);
  Serial.println();
  // Display.
  //DisplayFadeNumberString();
  // Display.
  DisplayFadeNumberString();
  
}

setup.ino

// Setup
void setup() {

  // isSetupSN74141
  isSetupSN74141();

  // Open serial communications
 Serial.begin(9600);

}

——

People can contact us: https://www.donluc.com/?page_id=1927

Technology Experience

  • Single-Board Microcontrollers (PIC, Arduino, Raspberry Pi,Espressif, etc…)
  • IoT
  • Robotics
  • Camera and Video Capture Receiver Stationary, Wheel/Tank and Underwater Vehicle
  • Unmanned Vehicles Terrestrial and Marine
  • Research & Development (R & D)

Instructor and E-Mentor

  • IoT
  • PIC Microcontrollers
  • Arduino
  • Raspberry Pi
  • Espressif
  • Robotics

Follow Us

J. Luc Paquin – Curriculum Vitae – 2022 English & Español
https://www.jlpconsultants.com/luc/

Web: https://www.donluc.com/
Web: https://www.jlpconsultants.com/
Facebook: https://www.facebook.com/neosteam.labs.9/
YouTube: https://www.youtube.com/channel/UC5eRjrGn1CqkkGfZy0jxEdA
Twitter: https://twitter.com/labs_steam
Pinterest: https://www.pinterest.com/NeoSteamLabs/
Instagram: https://www.instagram.com/neosteamlabs/

Don Luc