——
#DonLucElectronics #DonLuc #SparkFunRedBoard #Movement #Accelerometer #Arduino #Project #Fritzing #Programming #Electronics #Microcontrollers #Consultant
——
——
——
——
Accelerometer
An accelerometer is a tool that measures proper acceleration. Proper acceleration is the acceleration of a body in its own instantaneous rest frame, this is different from coordinate acceleration, which is acceleration in a fixed coordinate system. For example, an accelerometer at rest on the surface of the Earth will measure an acceleration due to Earth’s gravity, straight upwards 9.81 m/s2. By contrast, accelerometers in free fall, falling toward the center of the Earth at a rate of about 9.81 m/s2, will measure zero.
Accelerometers have many uses in industry and science. Highly sensitive accelerometers are used in inertial navigation systems for aircraft and missiles. Vibration in rotating machines is monitored by accelerometers. They are used in tablet computers and digital cameras so that images on screens are always displayed upright. In unmanned aerial vehicles, accelerometers help to stabilise flight. Micromachined microelectromechanical systems accelerometers are increasingly present in portable electronic devices and video-game controllers, to detect changes in the positions of these devices.
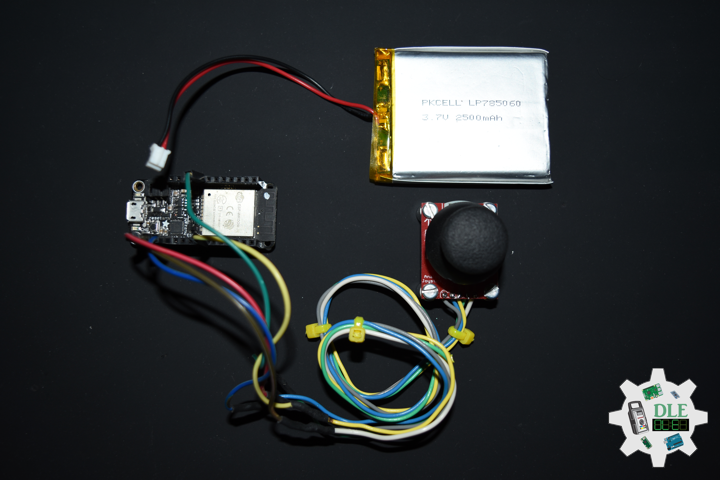
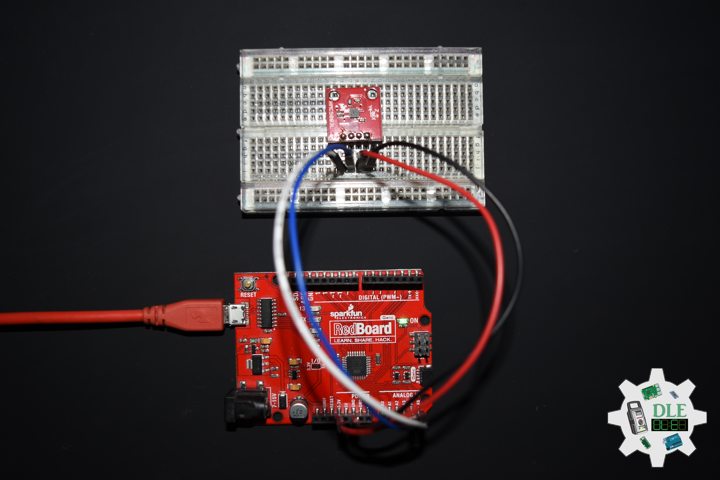
SparkFun Triple Axis Accelerometer Breakout – ADXL335
Breakout board for the 3 axis ADXL335 from Analog Devices. This is the latest in a long, proven line of analog sensors, the holy grail of accelerometers. The ADXL335 is a triple axis MEMS accelerometer with extremely low noise and power consumption, only 320uA. The sensor has a full sensing range of +/-3g. There is no on-board regulation, provided power should be between 1.8 and 3.6VDC. Board comes fully assembled and tested with external components installed. The included 0.1uF capacitors set the bandwidth of each axis to 50Hz.
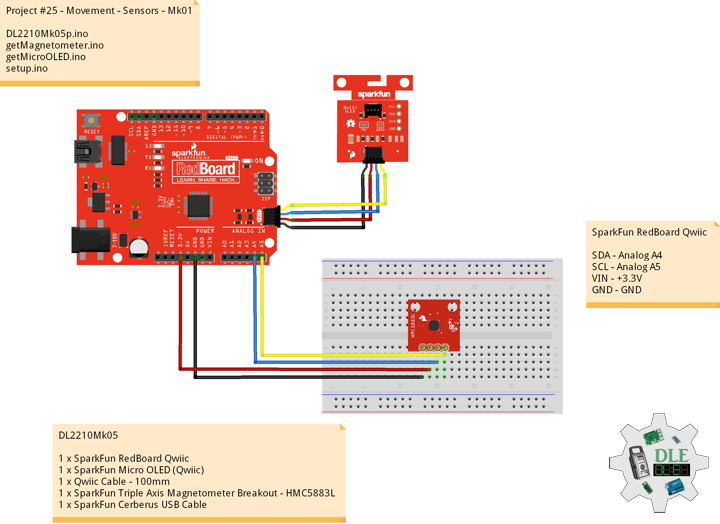
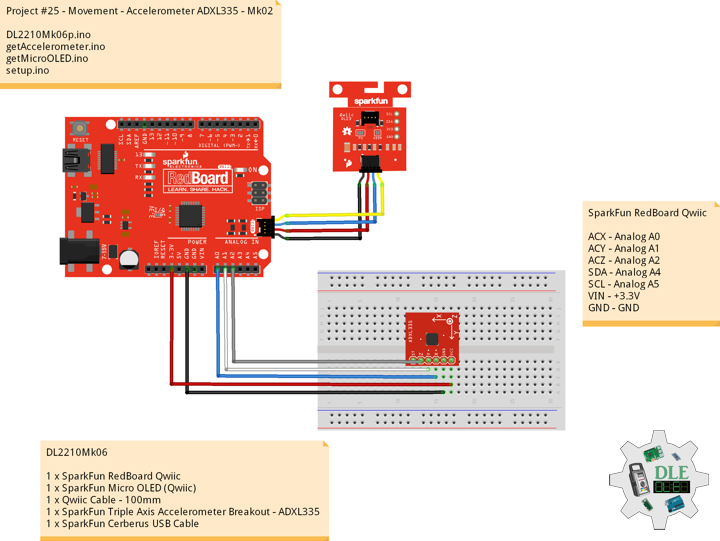
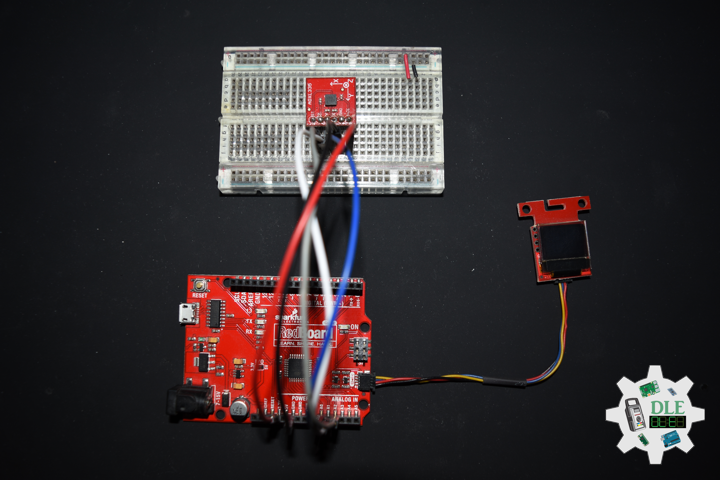
DL2210Mk06
1 x SparkFun RedBoard Qwiic
1 x SparkFun Micro OLED (Qwiic)
1 x Qwiic Cable – 100mm
1 x SparkFun Triple Axis Accelerometer Breakout – ADXL335
1 x SparkFun Cerberus USB Cable
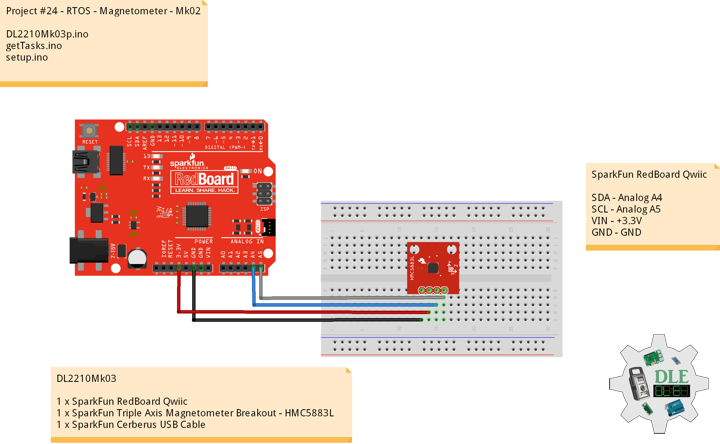
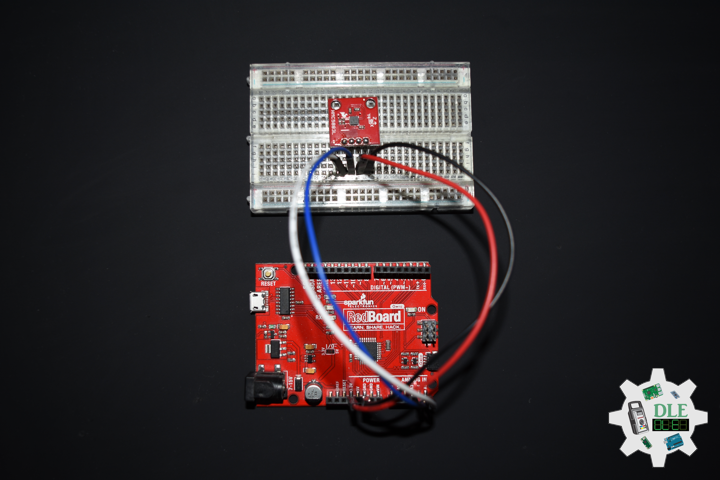
SparkFun RedBoard Qwiic
ACX – Analog A0
ACY – Analog A1
ACZ – Analog A2
SDA – Analog A4
SCL – Analog A5
VIN – +3.3V
GND – GND
——
DL2210Mk06p.ino
/* ***** Don Luc Electronics © *****
Software Version Information
Project #25 - Movement - Accelerometer ADXL335 - Mk02
25-02
DL2210Mk06p.ino
1 x SparkFun RedBoard Qwiic
1 x SparkFun Micro OLED (Qwiic)
1 x Qwiic Cable - 100mm
1 x SparkFun Triple Axis Accelerometer Breakout - ADXL335
1 x SparkFun Cerberus USB Cable
*/

// Include the Library Code
// Two Wire Interface (TWI/I2C)
#include <Wire.h>
// SparkFun Micro OLED
#include <SFE_MicroOLED.h>

// Accelerometer
int iX = A0;
int iY = A1;
int iZ = A2;
// Accelerometer
int X = 0;
int Y = 0;
int Z = 0;

// SparkFun Micro OLED
#define PIN_RESET 9
#define DC_JUMPER 1
// I2C declaration
MicroOLED oled(PIN_RESET, DC_JUMPER);

// Software Version Information
String sver = "25-02";

void loop() {

  // Accelerometer
  isAccelerometer(),

  // Micro OLED
  isMicroOLED();

  // One delay in between reads
  delay(1000);

}
getAccelerometer.ino
// Accelerometer
// Accelerometer
void isAccelerometer(){

  // Accelerometer X, Y, Z
  // X
  X = analogRead(iX);
  // Y
  Y = analogRead(iY);
  // Z
  Z = analogRead(iZ);

}
getMicroOLED.ino
// SparkFun Micro OLED
// Setup Micro OLED
void isSetupMicroOLED() {
// Initialize the OLED
oled.begin();
// Clear the display's internal memory
oled.clear(ALL);
// Display what's in the buffer (splashscreen)
oled.display();
// Delay 1000 ms
delay(1000);
// Clear the buffer.
oled.clear(PAGE);
}
// Micro OLED
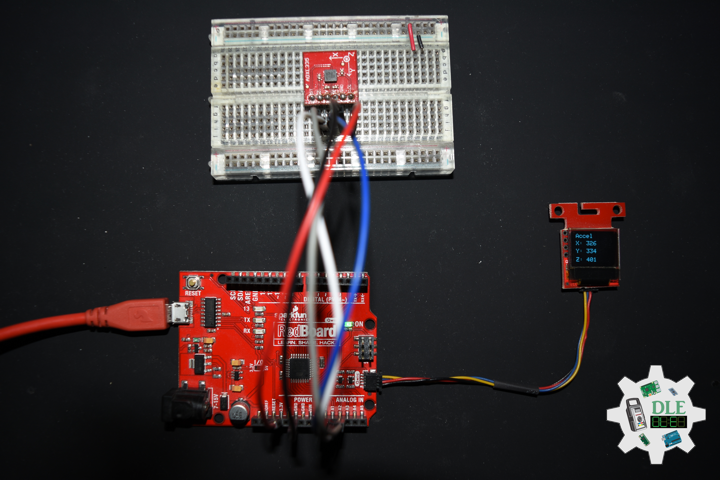
void isMicroOLED() {
// Text Display Accelerometer
// Clear the display
oled.clear(PAGE);
// Set cursor to top-left
oled.setCursor(0, 0);
// Set font to type 0
oled.setFontType(0);
// Magnetometer
oled.print("Accel");
oled.setCursor(0, 12);
// X
oled.print("X: ");
oled.print(X);
oled.setCursor(0, 25);
// Y
oled.print("Y: ");
oled.print(Y);
oled.setCursor(0, 39);
// Z
oled.print("Z: ");
oled.print(Z);
oled.display();
}
setup.ino
// Setup
void setup() {

  // Give display time to power on
  delay(100);

  // Set up I2C bus
  Wire.begin();

  // Setup Micro OLED
  isSetupMicroOLED();

}
——
People can contact us: https://www.donluc.com/?page_id=1927
Technology Experience
- Single-Board Microcontrollers (PIC, Arduino, Raspberry Pi,Espressif, etc…)
- IoT
- Wireless (Radio Frequency, Bluetooth, WiFi, Etc…)
- Robotics
- Camera and Video Capture Receiver Stationary, Wheel/Tank and Underwater Vehicle
- Unmanned Vehicles Terrestrial and Marine
- Machine Learning
- RTOS
- Research & Development (R & D)
Instructor and E-Mentor
- IoT
- PIC Microcontrollers
- Arduino
- Raspberry Pi
- Espressif
- Robotics
Follow Us
Luc Paquin – Curriculum Vitae – 2022
https://www.donluc.com/luc/
Web: https://www.donluc.com/
Facebook: https://www.facebook.com/neosteam.labs.9/
YouTube: https://www.youtube.com/channel/UC5eRjrGn1CqkkGfZy0jxEdA
Twitter: https://twitter.com/labs_steam
Pinterest: https://www.pinterest.com/NeoSteamLabs/
Instagram: https://www.instagram.com/neosteamlabs/
Don Luc