——
#DonLucElectronics #DonLuc #SoundSensor #FireBeetle2ESP32E #ESP32 #DFRobot #Display #IoT #Project #Fritzing #Programming #Electronics #Microcontrollers #Consultant
——
——
——
——
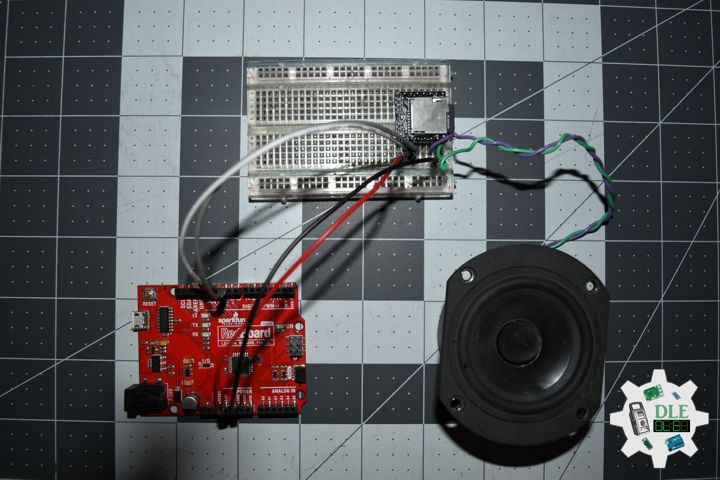
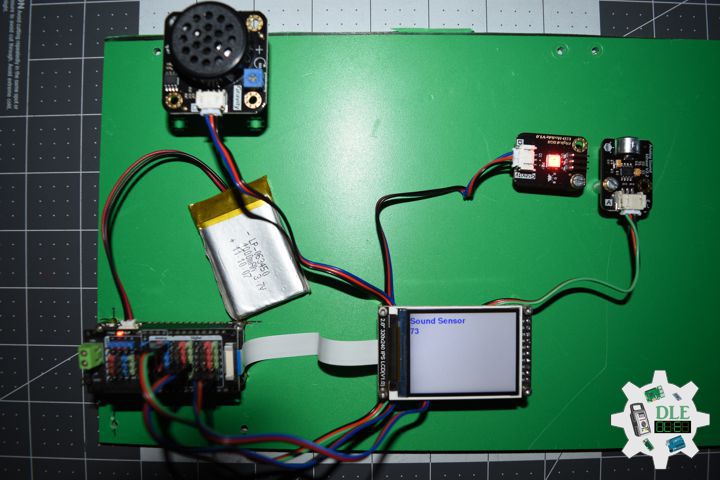
Gravity: Analog Sound Sensor
This Analog Sound Sensor is compatible with Arduino, detects sound intensity, and features improved voltage range and interfaces. Suitable for DIY projects. Sound Sensor is typically used in detecting the loudness in ambient, the Arduino can collect its output signal and actuate accordingly. You may use it to make some funny interactive works such as a “Clap and Buzz” to find your lost keys.
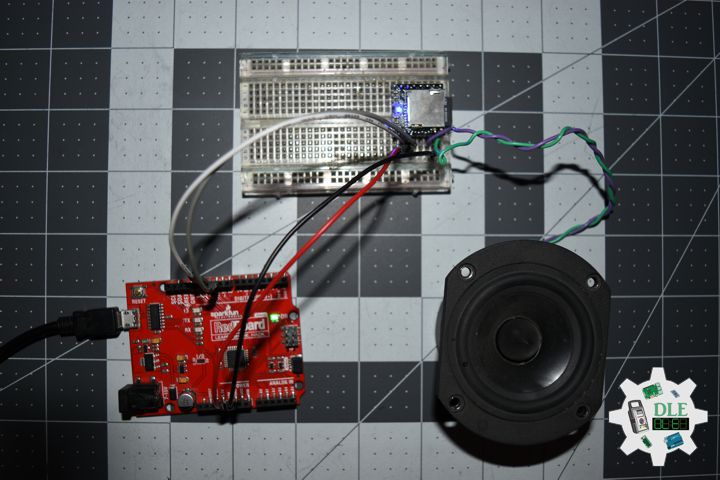
Gravity: Digital Speaker Module
This speaker module features an 8002 amplifier IC, adjustable volume, digital interface, and compact design, suitable for Arduino projects with voltage range 2.0-5.5 Volt.
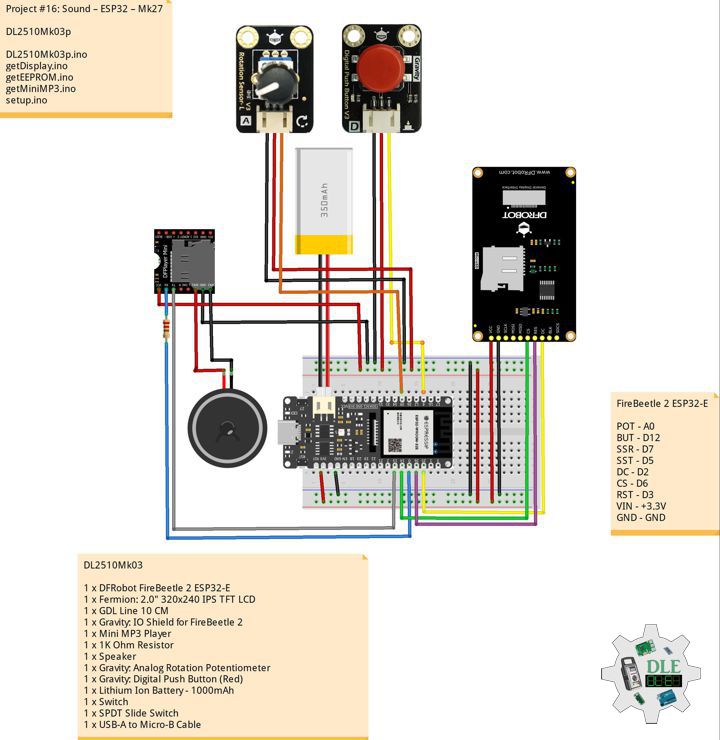
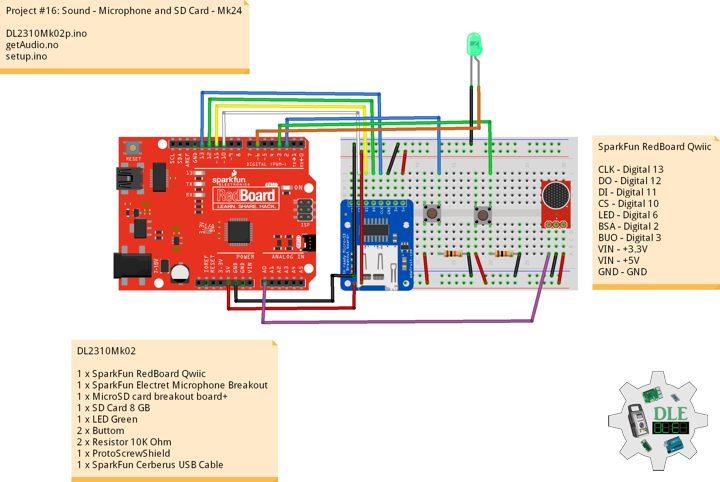
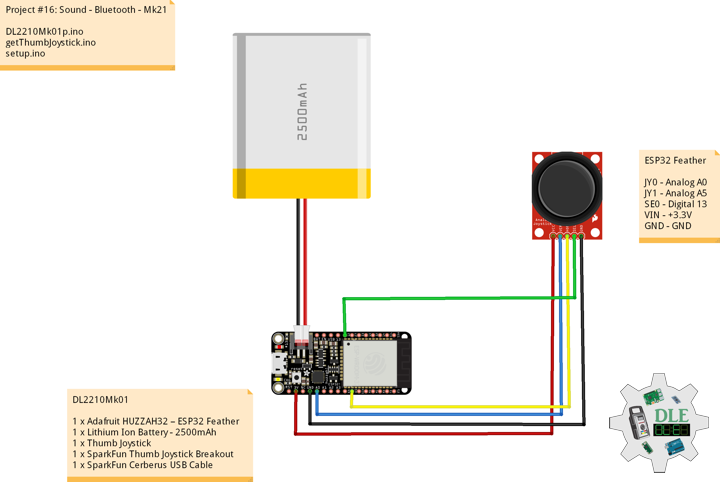
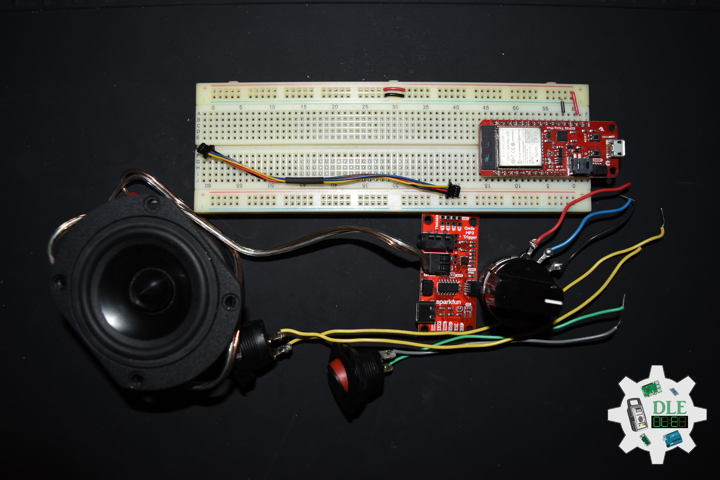
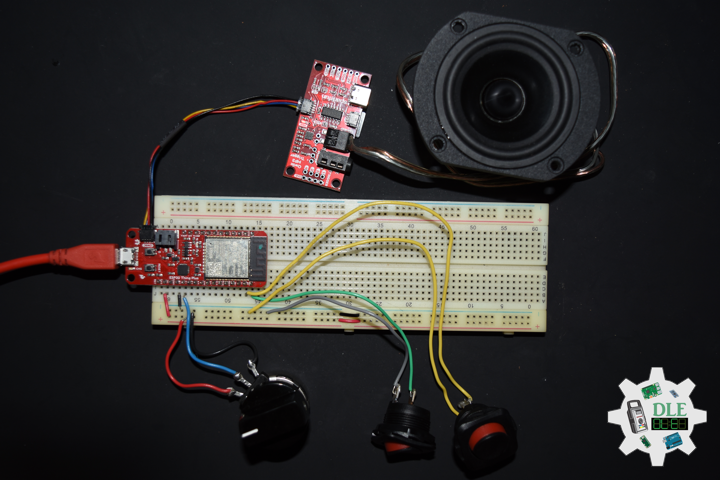
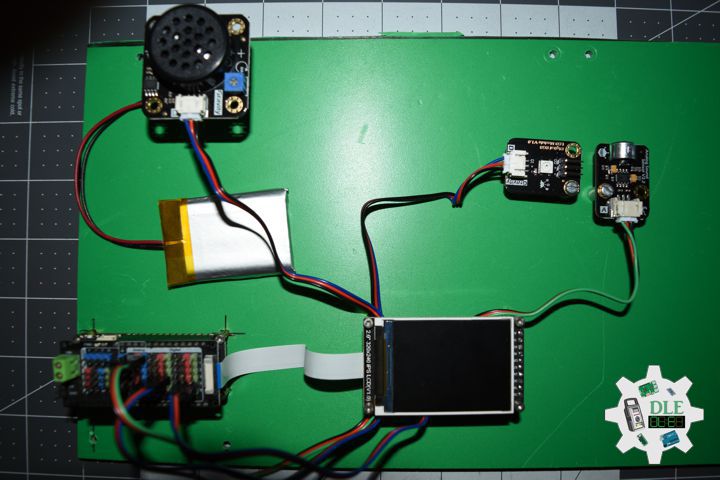
DL2511Mk02
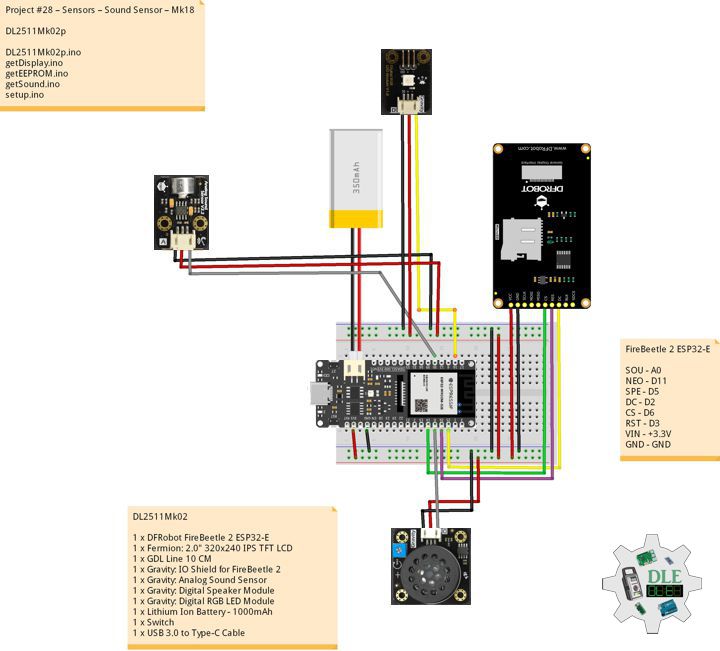
1 x DFRobot FireBeetle 2 ESP32-E
1 x Fermion: 2.0″ 320×240 IPS TFT LCD
1 x GDL Line 10 CM
1 x Gravity: IO Shield for FireBeetle 2
1 x Gravity: Analog Sound Sensor
1 x Gravity: Digital Speaker Module
1 x Gravity: Digital RGB LED Module
1 x Lithium Ion Battery – 1000mAh
1 x Switch
1 x USB 3.0 to Type-C Cable
DL2511Mk02p
DL2511Mk02p.ino
/****** Don Luc Electronics © ******
Software Version Information
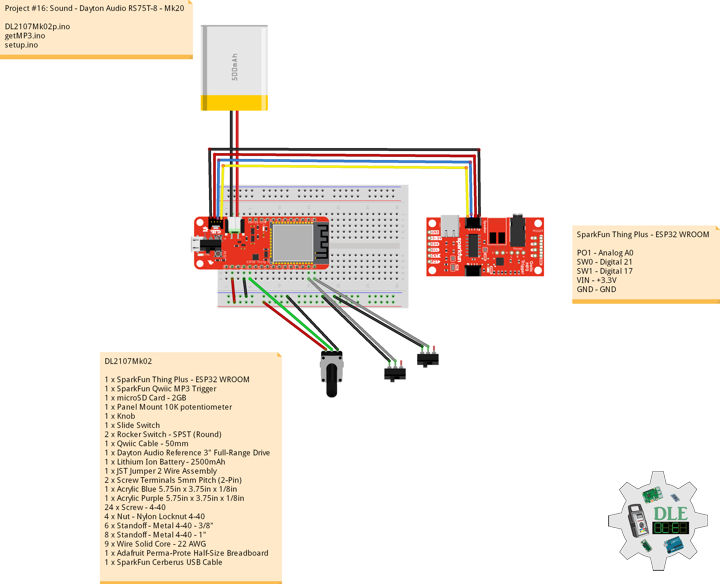
Project #16: Sound – Sound Sensor – Mk28
16-28
DL2511Mk02p.ino
DL2511Mk02
1 x DFRobot FireBeetle 2 ESP32-E
1 x Fermion: 2.0" 320x240 IPS TFT LCD
1 x GDL Line 10 CM
1 x Gravity: IO Shield for FireBeetle 2
1 x Gravity: Analog Sound Sensor
1 x Gravity: Digital Speaker Module
1 x Gravity: Digital RGB LED Module
1 x Lithium Ion Battery - 1000mAh
1 x Switch
1 x USB 3.0 to Type-C Cable
*/
// Include the Library Code
// EEPROM Library to Read and Write EEPROM
// with Unique ID for Unit
#include "EEPROM.h"
// Arduino
#include "Arduino.h"
// DFRobot Display GDL API
#include <DFRobot_GDL.h>
// Adafruit NeoPixel
#include <Adafruit_NeoPixel.h>
// Sound Sensor
int iSound = A0;
int iVal = 0;
// Speaker
int iSpeaker = D5;
// Note
#define NOTE_A4 440
#define NOTE_A6 1760
// Which pin on the Arduino is connected to the NeoPixels?
#define iNeo D11
// How many NeoPixels are attached to the Arduino?
#define NUMPIXELS 1
// When setting up the NeoPixel library.
Adafruit_NeoPixel pixels(NUMPIXELS, iNeo, NEO_GRB + NEO_KHZ800);
// Defined ESP32
#define TFT_DC D2
#define TFT_CS D6
#define TFT_RST D3
/*dc=*/ /*cs=*/ /*rst=*/
// DFRobot Display 240x320
DFRobot_ST7789_240x320_HW_SPI screen(TFT_DC, TFT_CS, TFT_RST);
// EEPROM Unique ID Information
#define EEPROM_SIZE 64
String uid = "";
// Software Version Information
String sver = "16-28";
void loop() {
// Sound Sensor
// isSound
isSound();
// isDisplaySound
isDisplaySound();
// Delay
delay( 1000 );
}
getDisplay.ino
// DFRobot Display 240x320
// DFRobot Display 240x320 - UID
void isDisplayUID(){

  // DFRobot Display 240x320
  // Text Display
  // Text Wrap
  screen.setTextWrap(false);
  // Rotation
  screen.setRotation(3);
  // Fill Screen => black
  screen.fillScreen(0x0000);
  // Text Color => white
  screen.setTextColor(0xffff);
  // Font => Free Sans Bold 12pt
  screen.setFont(&FreeSansBold12pt7b);
  // TextSize => 1.5
  screen.setTextSize(1.5);
  // Don Luc Electronics
  screen.setCursor(0, 30);
  screen.println("Don Luc Electronics");
  // SD
  screen.setCursor(0, 60);
  screen.println("Sound Sensor");
  // Version
  screen.setCursor(0, 90);
  screen.println("Version");
  screen.setCursor(0, 120);
  screen.println( sver );
  // EEPROM
  screen.setCursor(0, 150);
  screen.println("EEPROM");
  screen.setCursor(0, 180);
  screen.println( uid );

}
// isDisplaySound
void isDisplaySound(){

  // DFRobot Display 240x320
  // Text Display
  // Text Wrap
  screen.setTextWrap(false);
  // Rotation
  screen.setRotation(3);
  // Fill Screen => white
  screen.fillScreen(0xffff);
  // Text Color => blue
  screen.setTextColor(0x001F);
  // Font => Free Sans Bold 12pt
  screen.setFont(&FreeSansBold12pt7b);
  // TextSize => 1.5
  screen.setTextSize(1.5);
  // Sound Sensor
  screen.setCursor(0, 30);
  screen.println("Sound Sensor");
  // Val
  screen.setCursor(0, 60);
  screen.println( iVal );


}
getEEPROM.ino
// EEPROM
// isUID EEPROM Unique ID
void isUID() {

  // Is Unit ID
  uid = "";
  for (int x = 0; x < 7; x++)
  {
    uid = uid + char(EEPROM.read(x));
  }

}
getSound.ino
// Sound Sensor
// isSound
void isSound(){

  // Set all pixel colors to 'Off'
  pixels.clear();

  // Read the value from the sensor:
  iVal = analogRead(iSound);

  // Sound Sensor
  if( iVal < 20) {

       // The first NeoPixel in a strand is #0, second is 1, all the way up
       // to the count of pixels minus one. // For each pixel...
       for(int i=0; i<NUMPIXELS; i++) {

          // pixels.Color() takes RGB values, from 0,0,0 up to 255,255,255
          // Green
          pixels.setPixelColor(i, pixels.Color(0, 255, 0));

          // Send the updated pixel colors to the hardware.
          pixels.show();

        }

    // Tone
    tone(iSpeaker, NOTE_A4);

  }
   else{

      // The first NeoPixel in a strand is #0, second is 1, all the way up
       // to the count of pixels minus one. // For each pixel...
       for(int i=0; i<NUMPIXELS; i++) {

          // pixels.Color() takes RGB values, from 0,0,0 up to 255,255,255
          // Red
          pixels.setPixelColor(i, pixels.Color(255, 0, 0));

          // Send the updated pixel colors to the hardware.
          pixels.show();

      }

    // Tone
    tone(iSpeaker, NOTE_A6);

  }

}
setup.ino
// Setup
void setup()
{

  // Delay
  delay( 100 );

  // EEPROM Size
  EEPROM.begin(EEPROM_SIZE);

  // EEPROM Unique ID
  isUID();

  // Delay
  delay( 100 );

  // INITIALIZE NeoPixel strip object
  pixels.begin();

  // Delay
  delay(100);

  // DFRobot Display 240x320
  screen.begin();

  // Delay
  delay(100);

  // DFRobot Display 240x320 - UID
  // Don Luc Electronics
  // Version
  // EEPROM
  isDisplayUID();

  // Delay 5 Second
  delay( 5000 );

}
——
People can contact us: https://www.donluc.com/?page_id=1927
Consultant, R&D, Electronics, IoT, Teacher and Instructor
- Programming Language
- Single-Board Microcontrollers (PIC, Arduino, Raspberry Pi, Arm, Silicon Labs, Espressif, Etc…)
- IoT
- Wireless (Radio Frequency, Bluetooth, WiFi, Etc…)
- Robotics
- Automation
- Camera and Video Capture Receiver Stationary, Wheel/Tank , Underwater and UAV Vehicle
- Unmanned Vehicles Terrestrial, Marine and UAV
- Machine Learning
- Artificial Intelligence (AI)
- RTOS
- Sensors, eHealth Sensors, Biosensor, and Biometric
- Research & Development (R & D)
- Consulting
Follow Us
Luc Paquin – Curriculum Vitae – 2024
https://www.donluc.com/luc/
Web: https://www.donluc.com/
Facebook: https://www.facebook.com/neosteam.labs.9/
YouTube: https://www.youtube.com/@thesass2063
Twitter: https://twitter.com/labs_steam
Pinterest: https://www.pinterest.com/NeoSteamLabs/
Instagram: https://www.instagram.com/neosteamlabs/
DFRobot: https://learn.dfrobot.com/user-10186.html
Elecrow: https://www.elecrow.com/share/sharepj/center/no/760816d385ebb1edc0732fd873bfbf13
TikTok: https://www.tiktok.com/@luc.paquin8
Hackster: https://www.hackster.io/luc-paquin
LinkedIn: https://www.linkedin.com/in/jlucpaquin/
Don Luc