——

——
——
——
——
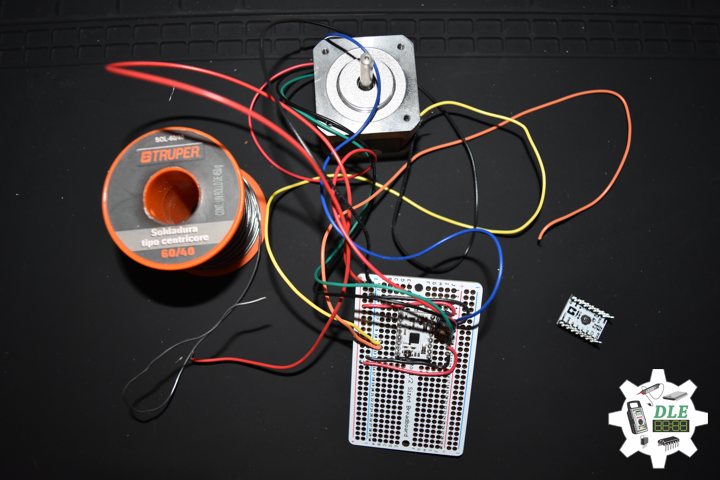
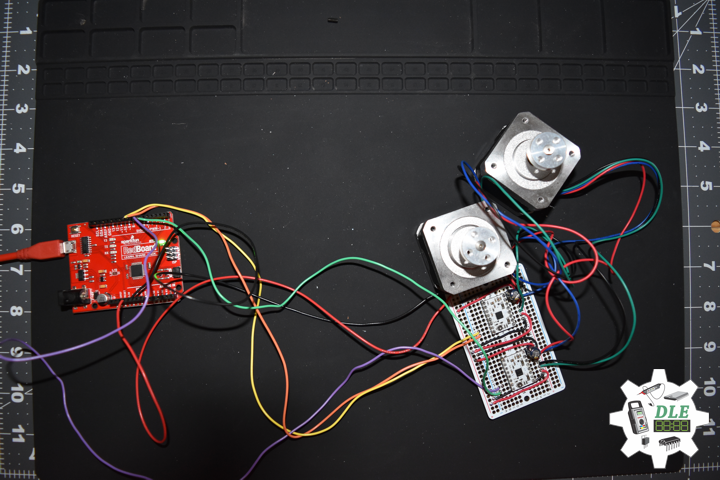
Pololu Stepper Motor Bipolar, 200 Steps/Rev, 2.8V, 1.7 A/Phase
This hybrid bipolar stepping motor has a 1.8° step angle (200 steps/revolution). Each phase draws 1.7 A at 2.8 V, allowing for a holding torque of 3.7 kg-cm. The motor has four color-coded wires terminated with bare leads: black and green connect to one coil; red and blue connect to the other.
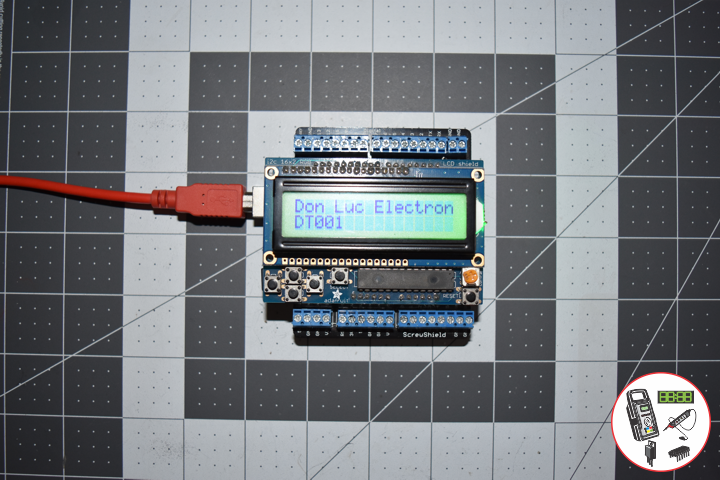
DL2003Mk05
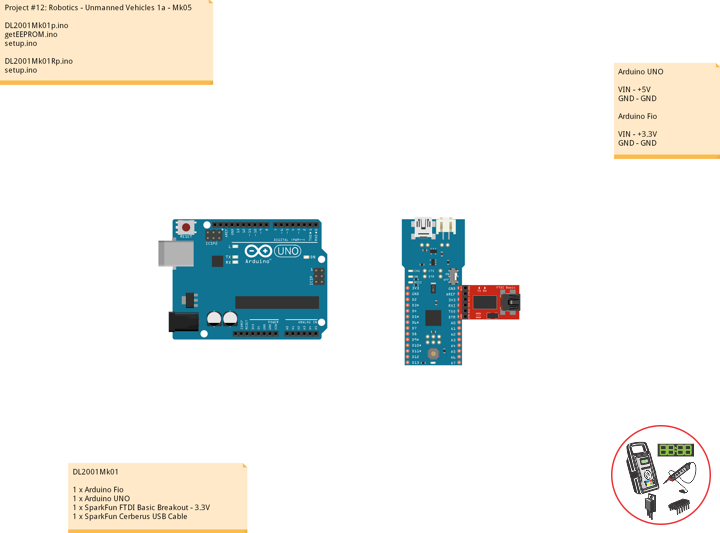
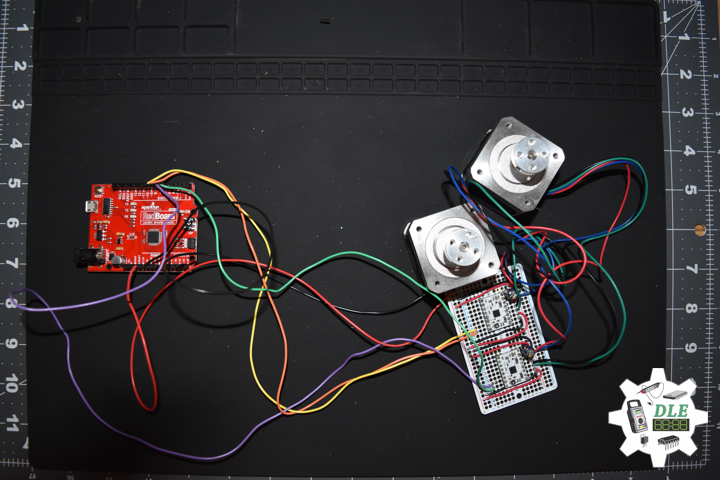
1 x SparkFun RedBoard Qwiic
2 x Pololu DRV8834 Low-Voltage Stepper Motor Driver Carrier
2 x Electrolytic Decoupling Capacitors – 100uF/25V
2 x Pololu Stepper Motor Bipolar, 2.8V, 1.7 A/Phase
2 x Pololu Universal Aluminum Mounting Hub for 5mm Shaft, M3 Holes
1 x Adafruit Perma-Proto Half-sized Breadboard PCB
14 x Wire Solid Core – 22 AWG
1 x SparkFun Cerberus USB Cable
SparkFun RedBoard Qwiic
SP1 – Digital 9
DI1 – Digital 8
SP2 – Digital 7
DI2 – Digital 6
VIN – 3.3V
GND – GND
DL2003Mk05Rp.ino
// ***** Don Luc Electronics © *****
// Software Version Information
// Project #12: Robotics - Unmanned Vehicles 1h - Mk12
// 03-05
// DL2003Mk05Rp.ino 12-12
// Receiver
// 1 x SparkFun RedBoard Qwiic
// 2 x Pololu DRV8834 Low-Voltage Stepper Motor Driver Carrier
// 2 x Electrolytic Decoupling Capacitors - 100uF/25V
// 2 x Pololu Stepper Motor Bipolar, 2.8V, 1.7 A/Phase
// 2 x Pololu Universal Aluminum Mounting Hub for 5mm Shaft, M3 Holes
// 1 x Adafruit Perma-Proto Half-sized Breadboard PCB

// Include the library code:
// DRV8834 Stepper Motor Driver
#include <BasicStepperDriver.h>
#include <MultiDriver.h>

// DRV8834 Stepper Motor Driver
// Stepper motor steps per revolution. Most steppers are 200 steps or 1.8 degrees/step
#define MOTOR_STEPS 200
// Target RPM for X axis stepper motor
#define MOTOR_X_RPM 800
// Target RPM for Y axis stepper motor
#define MOTOR_Y_RPM 800
// Since microstepping is set externally, make sure this matches the selected mode
// If it doesn't, the motor will move at a different RPM than chosen
// 1=full step, 2=half step etc.
#define MICROSTEPS 1
// X Stepper motor
#define DIR_X 8
#define STEP_X 9
// Y Stepper motor
#define DIR_Y 6
#define STEP_Y 7
// BasicStepperDriver
BasicStepperDriver stepperX(MOTOR_STEPS, DIR_X, STEP_X);
BasicStepperDriver stepperY(MOTOR_STEPS, DIR_Y, STEP_Y);
// Pick one of the two controllers below each motor moves independently
MultiDriver controller(stepperX, stepperY);

// Software Version Information
String sver = "12-12";
// Unit ID information
String uid = "";

void loop() {

   controller.rotate(360, 360);

}
getStepper.ino
// Stepper
// isStepperSetup
void isStepperSetup() {

  // Set stepper target motors RPM.
  stepperX.begin(MOTOR_X_RPM, MICROSTEPS);
  stepperY.begin(MOTOR_Y_RPM, MICROSTEPS);

}
setup.ino
// Setup
void setup() {

  // DRV8834 Stepper Motor Driver
  isStepperSetup();

}
Technology Experience
- Research & Development (R & D)
- Desktop Applications (Windows, OSX, Linux, Multi-OS, Multi-Tier, etc…)
- Mobile Applications (Android, iOS, Blackberry, Windows Mobile, Windows CE, etc…)
- Web Applications (LAMP, Scripting, Java, ASP, ASP.NET, RoR, Wakanda, etc…)
- Social Media Programming & Integration (Facebook, Twitter, YouTube, Pinterest, etc…)
- Content Management Systems (WordPress, Drupal, Joomla, Moodle, etc…)
- Bulletin Boards (phpBB, SMF, Vanilla, jobberBase, etc…)
- eCommerce (WooCommerce, OSCommerce, ZenCart, PayPal Shopping Cart, etc…)
Instructor
- DOS, Windows, OSX, Linux, iOS, Android, Multi-OS
- Linux-Apache-PHP-MySQL
- Robotics
- Arduino
- Raspberry Pi
- Espressif
Follow Us
The Alpha Geek
Aphasia
J. Luc Paquin – Curriculum Vitae
https://www.donluc.com/DLHackster/LucPaquinCVEngMk2020a.pdf
Web: https://www.donluc.com/
Web: http://www.jlpconsultants.com/
Web: https://www.donluc.com/DLHackster/
Web: https://www.hackster.io/neosteam-labs
Facebook: https://www.facebook.com/neosteam.labs.9/
YouTube: https://www.youtube.com/channel/UC5eRjrGn1CqkkGfZy0jxEdA
Twitter: https://twitter.com/labs_steam
Pinterest: https://www.pinterest.com/NeoSteamLabs/
Don Luc