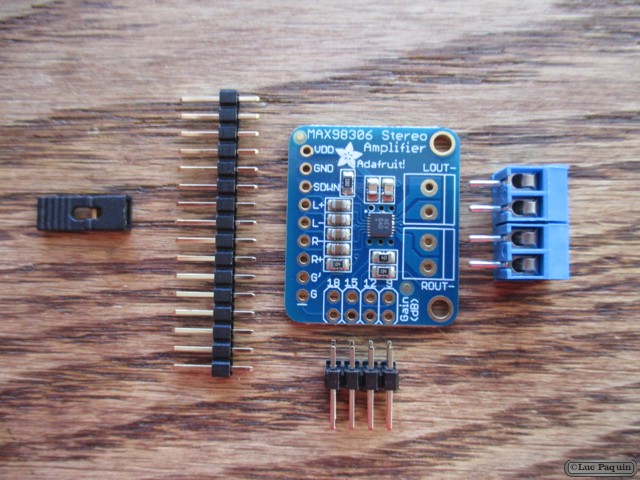
The Alpha Geek – Geeking Out

Synth

Synth

1 8 9 10

Adafruit – USB Mini-B Breakout Board

Adafruit 1764 Mk01

Adafruit 1764 Mk02

Adafruit 1764 Mk03

Adafruit: 1764

Description

Simple but effective – this breakout board has a USB Mini-B connector, with all 5 pins broken out. Great for pairing with a microcontroller with USB support, or adding USB 5V power to a project.

Comes with one fully assembled and tested mini B breakout PCB and a small stick of 0.1″ header so you can solder it on and plug into a breadboard.

Technical Details

Dimensions (without 0.1″ header or terminal blocks):

  • Length: 21mm/0.8″
  • Width: 13mm/0.5″
  • Height: 2mm/0.1″
  • Weight: 1.6g

Don Luc

SparkFun – Arduino Uno – R3

SparkFun DEV-11021 Mk01

SparkFun DEV-11021 Mk02

SparkFun DEV-11021 Mk03

SparkFun: DEV-11021

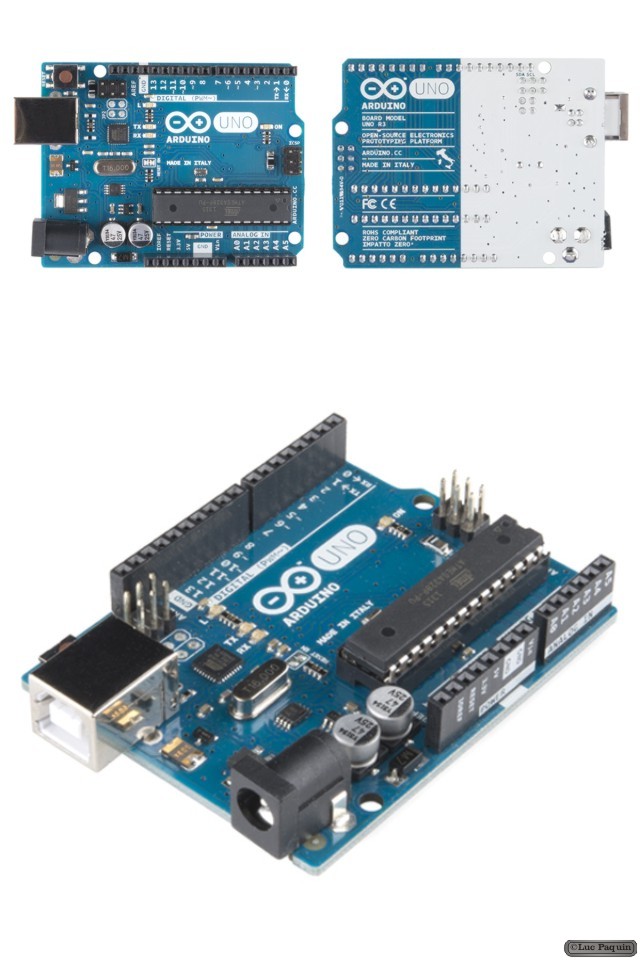
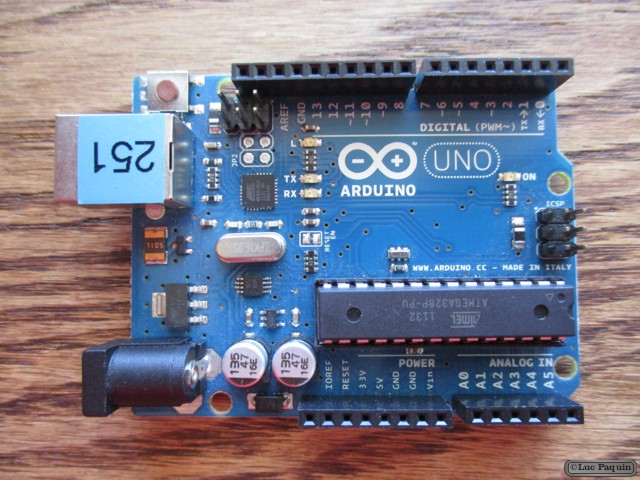
Description: This is the new Arduino Uno R3. In addition to all the features of the previous board, the Uno now uses an ATmega16U2 instead of the 8U2 found on the Uno (or the FTDI found on previous generations). This allows for faster transfer rates and more memory. No drivers needed for Linux or Mac (inf file for Windows is needed and included in the Arduino IDE), and the ability to have the Uno show up as a keyboard, mouse, joystick, etc.

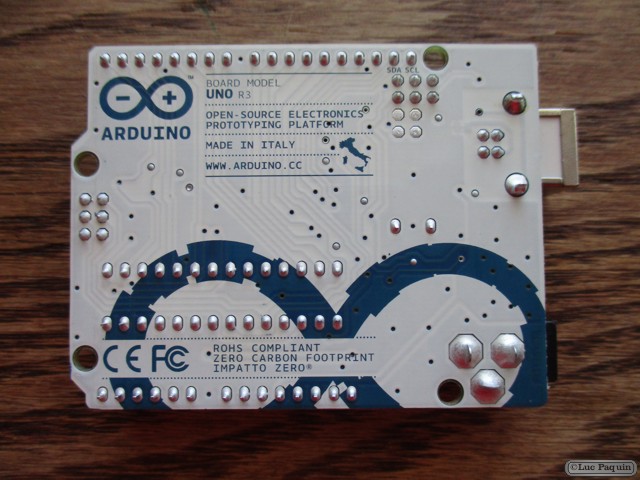
The Uno R3 also adds SDA and SCL pins next to the AREF. In addition, there are two new pins placed near the RESET pin. One is the IOREF that allow the shields to adapt to the voltage provided from the board. The other is a not connected and is reserved for future purposes. The Uno R3 works with all existing shields but can adapt to new shields which use these additional pins.

Arduino is an open-source physical computing platform based on a simple i/o board and a development environment that implements the Processing/Wiring language. Arduino can be used to develop stand-alone interactive objects or can be connected to software on your computer (e.g. Flash, Processing, MaxMSP). The open-source IDE can be downloaded for free (currently for Mac OS X, Windows, and Linux).

Note: The Arduino Uno R3 requires the Arduino 1.0 drivers folder in order to install properly on some computers. We have tested and confirmed that the R3 can be programmed in older versions of the IDE. However, the first time using the R3 on a new computer, you will need to have Arduino 1.0 installed on that machine. If you are interested in reading more about the changes to the IDE, check out the official Arduino 1.0 Release notes!

Features:

  • ATmega328 microcontroller
  • Input voltage – 7-12V
  • 14 Digital I/O Pins (6 PWM outputs)
  • 6 Analog Inputs
  • 32k Flash Memory
  • 16Mhz Clock Speed

Don Luc

Adafruit – Stereo 3.7W Class D Audio Amplifier – MAX98306

Adafruit 987 Mk01

Adafruit 987 Mk02

Adafruit 987 Mk03

Adafruit 987 Mk04

Adafruit: 987

Description

This incredibly small stereo amplifier is surprisingly powerful – able to deliver 2 x 3.7W channels into 3 ohm impedance speakers. Inside the miniature chip is a class D controller, able to run from 2.7V-5.5VDC. Since the amp is a class D, its incredibly efficient (over 90% efficient when driving an speaker at over a Watt) – making it perfect for portable and battery-powered projects. It has built in thermal and over-current protection but we could barely tell it got hot. This board is a welcome upgrade to basic “LM386” amps!

The inputs of the amplifier go through 1.0uF capacitors, so they are fully ‘differential’ – if you don’t have differential outputs, simply tie the R- and L- to ground. The outputs are “Bridge Tied” – that means they connect directly to the outputs, no connection to ground. The output is a 360KHz square wave PWM that is then ‘averaged out’ by the speaker coil – the high frequencies are not heard. All the above means that you can’t connect the output into another amplifier, it should drive the speakers directly.

Comes with a fully assembled and tested breakout board with 1.0uF input capacitors. We also include header to plug it into a breadboard, 3.5mm screw-terminal blocks so you can easily attach/detach your speakers, and a 2×4 header + jumper to change the amplifier gain on the fly. You will be ready to rock in 15 minutes!

  • Output Power: 3.7W at 3O, 10% THD, 1.7W at 8O, 10% THD, with 5V Supply
  • Passes EMI limit unfiltered with up to 12 inches (30 cm) of speaker cable
  • High 83dB PSRR at 217Hz
  • Spread-Spectrum Modulation and Active Emissions Limiting
  • Five pin-selectable gains: 6dB, 9dB, 12dB, 15dB and 18dB. Select with a jumper or by setting the G and G’ breakout pins
  • Excellent click-and-pop suppression
  • Thermal and short-circuit/over-current protection
  • Low current draw: 2mA quiescent and 10uA in shutdown mode

Technical Details

Dimensions (without 0.1″ header):

  • Length: 28.25mm/1.11in
  • Width: 24.15mm/0.95in
  • Height: 3.03mm/0.12in
  • Weight: 2.33g

Don Luc

SparkFun – 555 Timer

SparkFun COM-09273 Mk01

SparkFun COM-09273 Mk02

SparkFun COM-09273 Mk03

SparkFun COM-09273 Mk04

SparkFun: COM-09273

Description: This is a common 555 timer/oscillator from TI. A classic for all of those first year circuits projects where you need to blink an LED, generate tone, and thousands of other great beginning projects. Google around for a huge list of resources and example projects.

Features:

  • 4.5V to 16V supply
  • 8-pin DIP package
  • Timing from microseconds to hours
  • Astable or monostable operation
  • Adjustable duty cycle
  • TTL compatible output
  • Sink or source up to 200mA

Don Luc

Project #1 – The AcceleroSynth – Mk1

Apr 3, 2012 @ 15:03


We are finally ready for our first electronics project, The AcceleroSynth. It is an microcontroller-based (Arduino) music synth that is controller by a 3 axis analog accelerometer. It will be both a hardware and a software synth. This is the announcement for the project and in the coming days I will post the BOM (Bill of Material), schematics and Arduino code with the first assembly video. The project will first be assembled on a protoboard, then a soldered version will be built either on a perfboard or on an Arduino ProtoShield. If there is enough demand either a PCB or an Arduino Shield will be built for the project and sold here. More on that later. The first installment on the building of the project should be up on a few days.

Don Luc

1 8 9 10
Categories
Archives