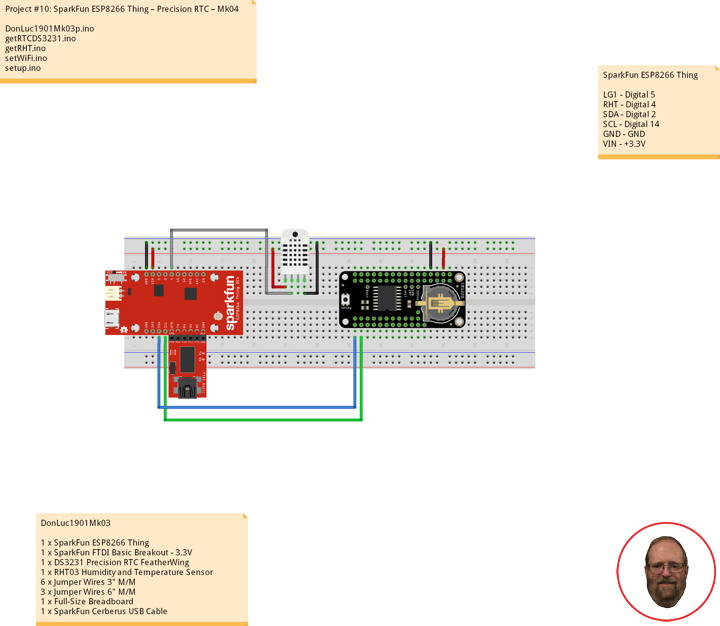
DS3231 Precision RTC FeatherWing
A Feather board without ambition is a Feather board without FeatherWings! This is the DS3231 Precision RTC FeatherWing: it adds an extremely accurate I2C-integrated Real Time Clock (RTC) with a Temperature Compensated Crystal Oscillator to any Feather main board. This RTC is the most precise you can get in a small, low power package. Most RTCs use an external 32kHz timing crystal that is used to keep time with low current draw.
With a CR1220 12mm lithium battery plugged into the top of the FeatherWing, you can get years of precision timekeeping, even when main power is lost. Great for datalogging and clocks, or anything where you need to really know the time.
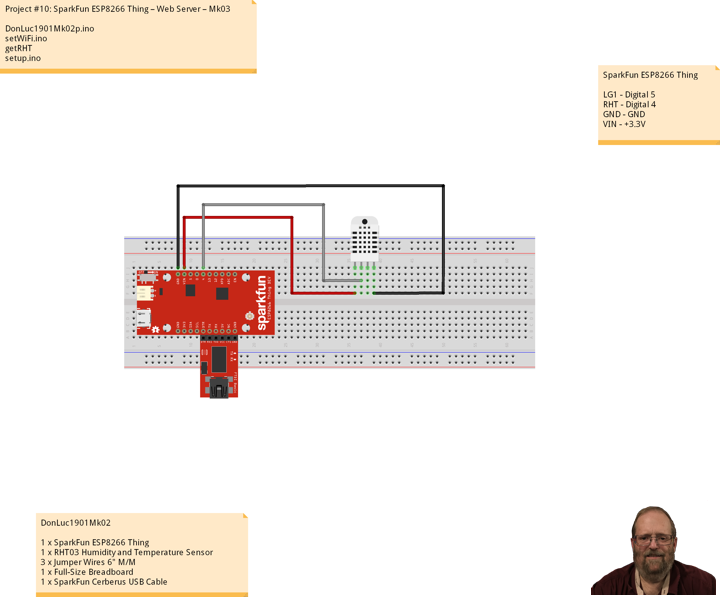
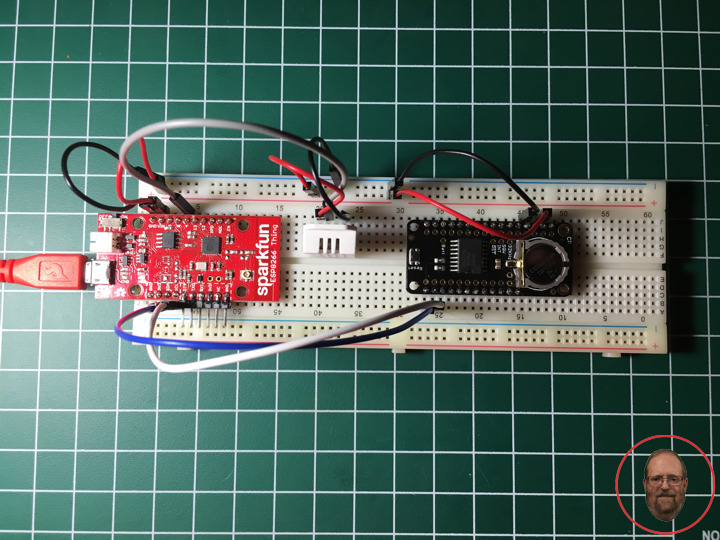
DonLuc1901Mk03
1 x SparkFun ESP8266 Thing
1 x SparkFun FTDI Basic Breakout – 3.3V
1 x DS3231 Precision RTC FeatherWing
1 x RHT03 Humidity and Temperature Sensor
6 x Jumper Wires 3″ M/M
3 x Jumper Wires 6″ M/M
1 x Full-Size Breadboard
1 x SparkFun Cerberus USB Cable
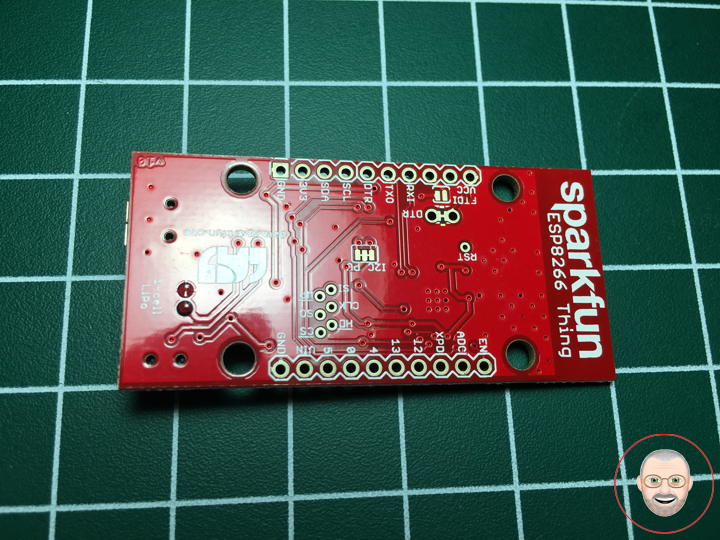
SparkFun ESP8266 Thing
LG1 – Digital 5
RHT – Digital 4
SDA – Digital 2
SCL – Digital 14
GND – GND
VIN – +3.3V
DonLuc1901Mk03p.ino
// ***** Don Luc Electronics *****
// Software Version Information
// Project #10: SparkFun ESP8266 Thing – DS3231 Precision RTC - Mk04
// 01-03
// DonLuc1901Mk03p.ino 01-03
// SparkFun ESP8266 Thing
// DS3231 Precision RTC
// RHT03 Humidity and Temperature Sensor
// Include Library Code
// WiFi
#include <ESP8266WiFi.h>
// RHT Humidity and Temperature Sensor
#include <SparkFun_RHT03.h>
// DS3231 Precision RTC
#include <RTClib.h>
#include <Wire.h>
// WiFi Definitions
const char WiFiAPPSK[] = "donlucmk01";
// Pin Definitions
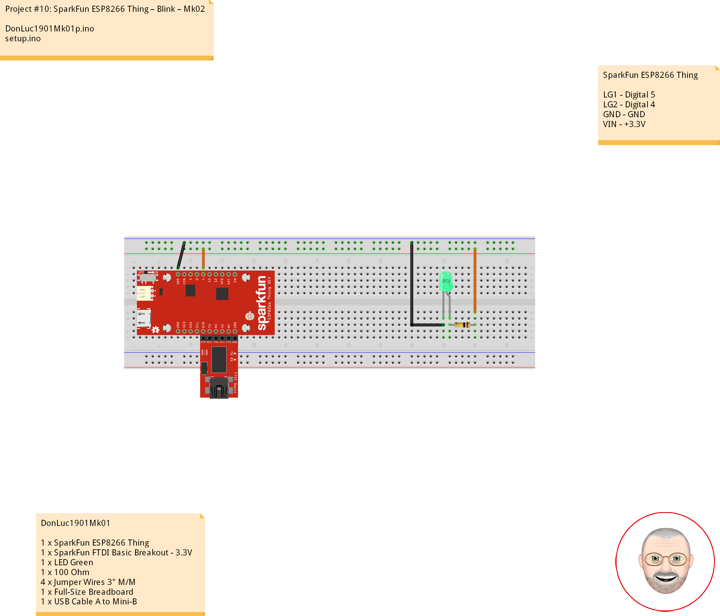
const int LED_PIN = 5; // Thing's onboard, green LED
const int ANALOG_PIN = A0; // The only analog pin on the Thing
const int DIGITAL_PIN = 12; // Digital pin to be read
// WiFi
WiFiServer server(80);
// RHT Humidity and Temperature Sensor
const int RHT03_DATA_PIN = 4; // RHT03 data pin Digital 4
RHT03 rht; // This creates a RTH03 object, which we'll use to interact with the sensor
float latestHumidity;
float latestTempC;
float latestTempF;
// DS3231 Precision RTC
RTC_DS3231 RTC;
String sDate;
String sTime;
void loop()
{
// RHT03 Humidity and Temperature Sensor
isRHT03();
// DS3231 Precision RTC
timeRTC();
// Check if a client has connected
WiFiClient client = server.available();
if (!client) {
return;
}
// Read the first line of the request
String req = client.readStringUntil('\r');
Serial.println(req);
client.flush();
// Match the request
int val = -1; // We'll use 'val' to keep track of both the request type (read/set) and value if set.
if (req.indexOf("/led/0") != -1)
val = 0; // Will write LED low
else if (req.indexOf("/led/1") != -1)
val = 1; // Will write LED high
else if (req.indexOf("/read") != -1)
val = -2; // Will print pin reads
// Otherwise request will be invalid. We'll say as much in HTML
// Set GPIO5 according to the request
if (val >= 0)
digitalWrite(LED_PIN, val);
client.flush();
// Prepare the response. Start with the common header:
String s = "HTTP/1.1 200 OK\r\n";
s += "Content-Type: text/html\r\n\r\n";
s += "<!DOCTYPE HTML>\r\n<html>\r\n";
// If we're setting the LED, print out a message saying we did
if (val >= 0)
{
s += "LED is now ";
s += (val)?"on":"off";
}
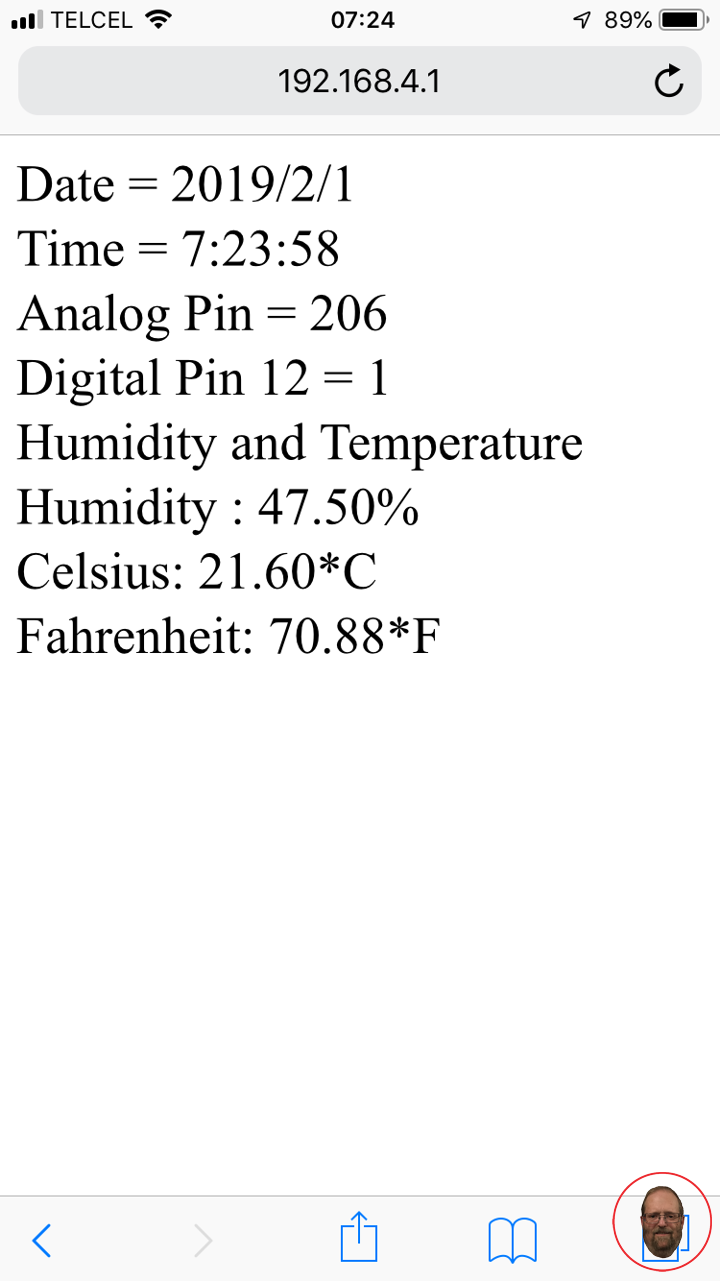
else if (val == -2)
{ // If we're reading pins, print out those values:
s += "Date = ";
s += sDate;
s += "<br>";
s += "Time = ";
s += sTime;
s += "<br>";
s += "Analog Pin = ";
s += String(analogRead(ANALOG_PIN));
s += "<br>"; // Go to the next line.
s += "Digital Pin 12 = ";
s += String(digitalRead(DIGITAL_PIN));
s += "<br>"; // Go to the next line.
s += "Humidity and Temperature";
s += "<br>"; // Go to the next line.
s += "Humidity : ";
s += String(latestHumidity); // Humidity
s += "%";
s += "<br>"; // Go to the next line.
s += "Celsius: ";
s += String(latestTempC); // Temperature *C
s += "*C";
s += "<br>"; // Go to the next line.
s += "Fahrenheit: ";
s += String(latestTempF); // Temperature *F
s += "*F";
}
else
{
s += "Invalid Request.<br> Try /led/1, /led/0, or /read.";
}
s += "</html>\n";
// Send the response to the client
client.print(s);
delay(1);
Serial.println("Client disonnected");
// The client will actually be disconnected when the function returns and 'client' object is detroyed
}
getRHT.ino
// RHT03 Humidity and Temperature Sensor
void isRHT03(){

  // Call rht.update() to get new humidity and temperature values from the sensor.
  int updateRet = rht.update();

  // The humidity(), tempC(), and tempF() functions can be called -- after
  // a successful update() -- to get the last humidity and temperature value
  latestHumidity = rht.humidity();
  latestTempC = rht.tempC();
  latestTempF = rht.tempF();

}
getRTCDS3231.ino
// DS3231 Precision RTC
void setupRTC() {

  // DS3231 Precision RTC
  RTC.begin();
  if (! RTC.begin()) {
    while (1);
  }

  DateTime now = RTC.now();

  if (RTC.lostPower()) {
    // Following line sets the RTC to the date & time this sketch was compiled
    RTC.adjust(DateTime(F(__DATE__), F(__TIME__)));
  }

}
// timeRTC
void timeRTC() {

    // DS3231 Precision RTC
    sDate = "";
    sTime = "";

    DateTime now = RTC.now();

    // sData
    sDate += String(now.year(), DEC);
    sDate += "/";
    sDate += String(now.month(), DEC);
    sDate += "/";
    sDate += String(now.day(), DEC);

    // sTime
    sTime += String(now.hour(), DEC);
    sTime += ":";
    sTime += String(now.minute(), DEC);
    sTime += ":";
    sTime += String(now.second(), DEC);

}
setWiFi.ino
// WiFi
void setupWiFi()
{

  // WiFi mode WIFI_AP
  WiFi.mode(WIFI_AP);

  // Append the last two bytes of the MAC (HEX'd) to "Thing-":
  uint8_t mac[WL_MAC_ADDR_LENGTH];
  WiFi.softAPmacAddress(mac);
  String macID = String(mac[WL_MAC_ADDR_LENGTH - 2], HEX) +
                 String(mac[WL_MAC_ADDR_LENGTH - 1], HEX);
  macID.toUpperCase();
  String AP_NameString = "ESP8266 Thing " + macID;

  char AP_NameChar[AP_NameString.length() + 1];
  memset(AP_NameChar, 0, AP_NameString.length() + 1);

  for (int i=0; i<AP_NameString.length(); i++)
    AP_NameChar[i] = AP_NameString.charAt(i);

  WiFi.softAP(AP_NameChar, WiFiAPPSK);

}
// init Hardware
void initHardware()
{

  // Serial
  Serial.begin(115200);
  // LED Green
  pinMode(DIGITAL_PIN, INPUT_PULLUP);
  pinMode(LED_PIN, OUTPUT);
  digitalWrite(LED_PIN, LOW);
  // RHT03 Humidity and Temperature Sensor
  // Call rht.begin() to initialize the sensor and our data pin
  rht.begin(RHT03_DATA_PIN);
  // DS3231 Precision RTC
  setupRTC();

}
setup.ino
// Setup
void setup()
{

  // Hardware
  initHardware();
  // WiFi
  setupWiFi();
  server.begin();

}
Don Luc