
Soldering
Plated through-hole soldering (PTH), flux-core solder alloys commonly used for electrical soldering are 60/40 Sn-Pb used principally in electrical/electronic work and TENMA soldering station temperature controlled digital.
Hardware Assembly
We’re getting ahead of ourselves. To connect the FTDI programmer to your Thing you’ll need to solder something to the Thing. What, exactly, you solder to the board depends both on how you’ll use it in your project, and how you’ll interface it with the programmer. When it comes to selecting a header (or wire) to solder, there are a variety of options. We’ve tried a lot of them with the Thing:
Or you can mix and match headers to best fit your needs. Right-angle male headers may help to interface between the FTDI and the Thing. Straight male headers are a good choice for low-profile connections. Straight female headers may help with connecting to I2C sensors. And, of course, wire can be soldered to any of the pins that have a long way to connect to something.
10 pin – Break Away Headers – Straight
4 pin – Break Away Headers – Straight
6 pin – Break Away Male Headers – Right Angle
Once you’ve soldered up at least the programming port, you’re ready to load some code onto the Thing.
Programming the Thing
The ESP8266 has a built-in serial bootloader, which allows for easy programming and re-programming. You don’t need a specialized, expensive programmer – just a simple, USB-to-Serial converter. The FTDI Basic’s 6-pin header matches up exactly to the Thing’s 6-pin serial port header. To set up for programming, simply connect the FTDI directly to this port – take care to match up the DTR and GND pins.
Blink
Let’s blink some LEDs and IoT (Internet our Thing). To verify that everything works Blink: toggle pin 5, which is attached to the onboard LED Green, toggle pin 4 which is LED Green.
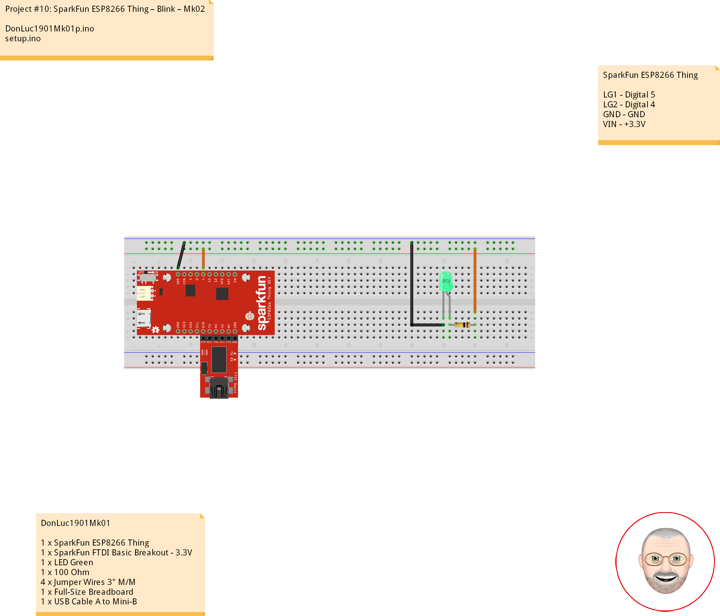
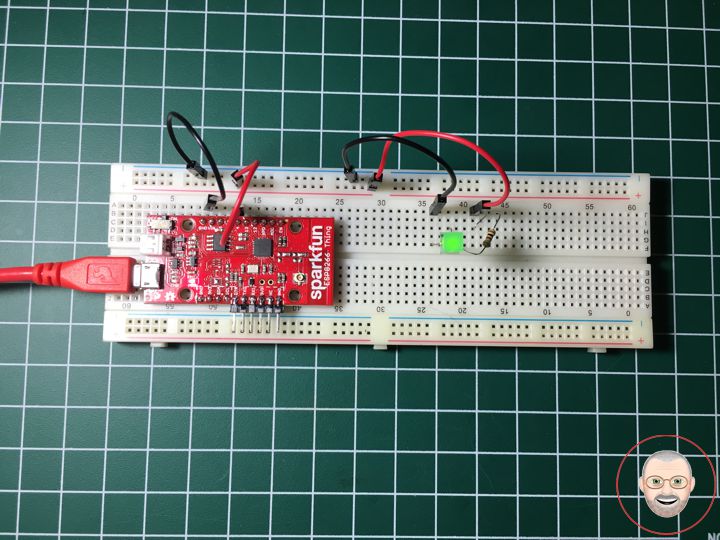
DonLuc1901Mk01
1 x SparkFun ESP8266 Thing
1 x SparkFun FTDI Basic Breakout – 3.3V
1 x LED Green
1 x 100 Ohm
4 x Jumper Wires 3″ M/M
1 x Full-Size Breadboard
1 x USB Cable A to Mini-B
SparkFun ESP8266 Thing
LG1 – Digital 5
LG2 – Digital 4
GND – GND
VIN – +3.3V
DonLuc1901Mk01p.ino
// ***** Don Luc Electronics *****
// Software Version Information
// Project #10: SparkFun ESP8266 Thing – Blink - Mk02
// 01-01
// DonLuc1901Mk01p.ino 01-01
// SparkFun ESP8266 Thing
// Blink

// Include Library Code

#define ESP8266_LED 5      // LED Green
int iLEDGreen = 4;         // LED Green

void loop()
{

  // ESP8266_LED, iLEDGreen
  digitalWrite(ESP8266_LED, LOW);
  digitalWrite(iLEDGreen, LOW);
  delay(2000);
  digitalWrite(ESP8266_LED, HIGH);
  delay(2000);
  digitalWrite(ESP8266_LED, LOW);
  delay(2000);
  digitalWrite(iLEDGreen, HIGH);
  delay(2000);

}
setup.ino
// Setup
void setup()
{

  // LED
  pinMode(ESP8266_LED, OUTPUT);                 // ESP8266_LED Green
  pinMode(iLEDGreen, OUTPUT);                   // LED Green

}
Don Luc