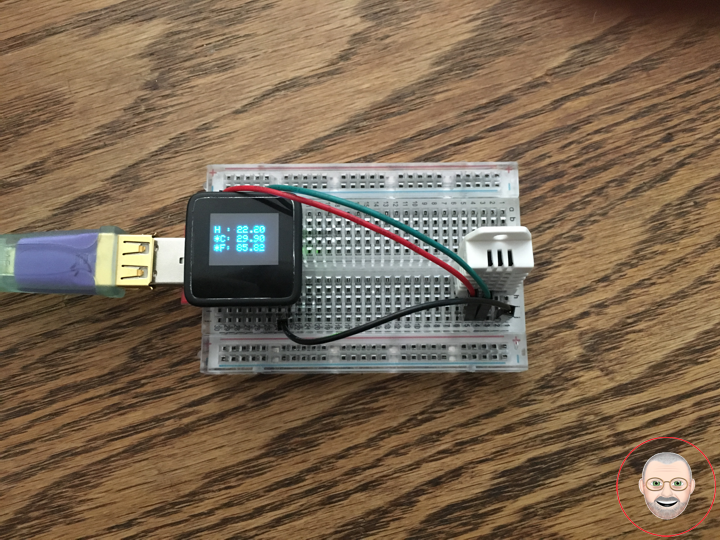
PIR Motion Sensor
This is a simple to use motion sensor. Power it up and wait 1-2 seconds for the sensor to get a snapshot of the still room. If anything moves after that period, the ‘alarm’ pin will go low.
This unit works great from 5 to 12V (datasheet shows 12V). You can also install a jumper wire past the 5V regulator on board to make this unit work at 3.3V. Sensor uses 1.6mA@3.3V.
The alarm pin is an open collector meaning you will need a pull up resistor on the alarm pin. The open drain setup allows multiple motion sensors to be connected on a single input pin. If any of the motion sensors go off, the input pin will be pulled low.
We’ve finally updated the connector! Gone is the old “odd” connector, now you will find a common 3-pin JST! This makes the PIR Sensor much more accessible for whatever your project may need. Red = Power, White = Ground, and Black = Alarm.
Buzzer
This is a small 12mm round speaker that operates around the audible 2kHz range. You can use these speakers to create simple music or user interfaces.
This is not a true piezoelectric speaker but behaves similarly. Instead of a piezoelectric crystal that vibrates with an electric current, this tiny speaker uses an electromagnet to drive a thin metal sheet. That means you need to use some form of alternating current to get sound. The good news is that this speaker is tuned to respond best with a square wave (e.g. from a microcontroller).
LED
LED Yellow
LED Green
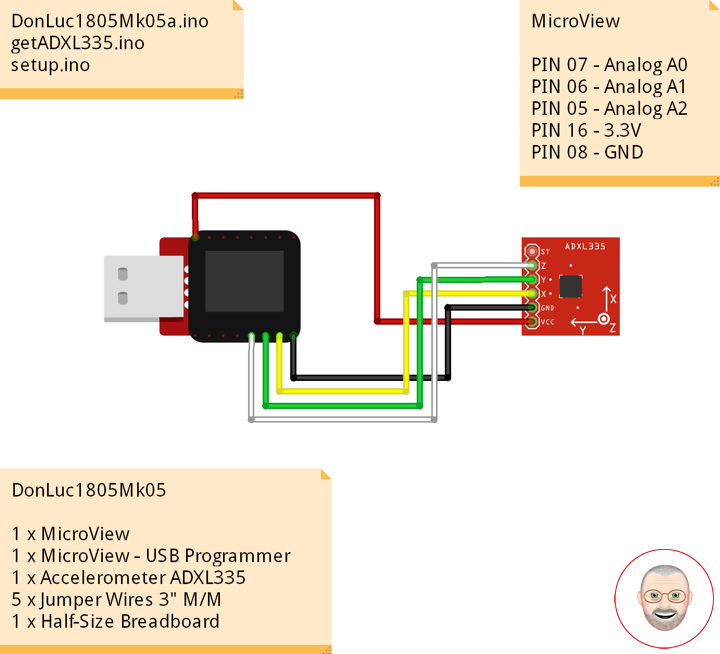
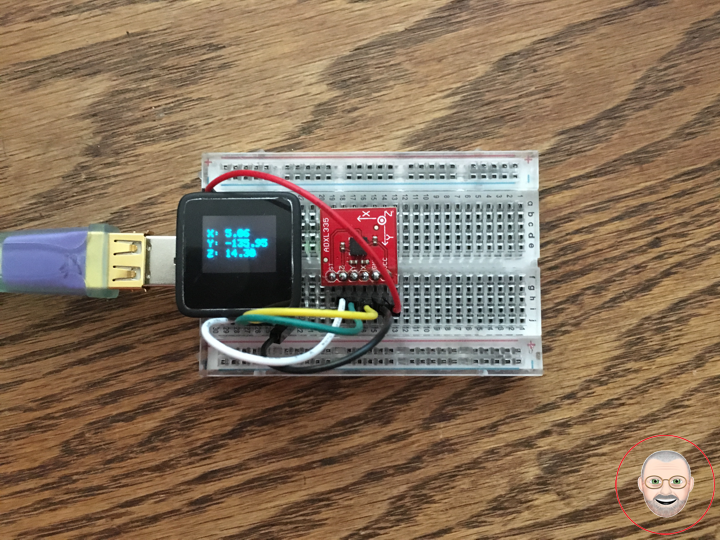
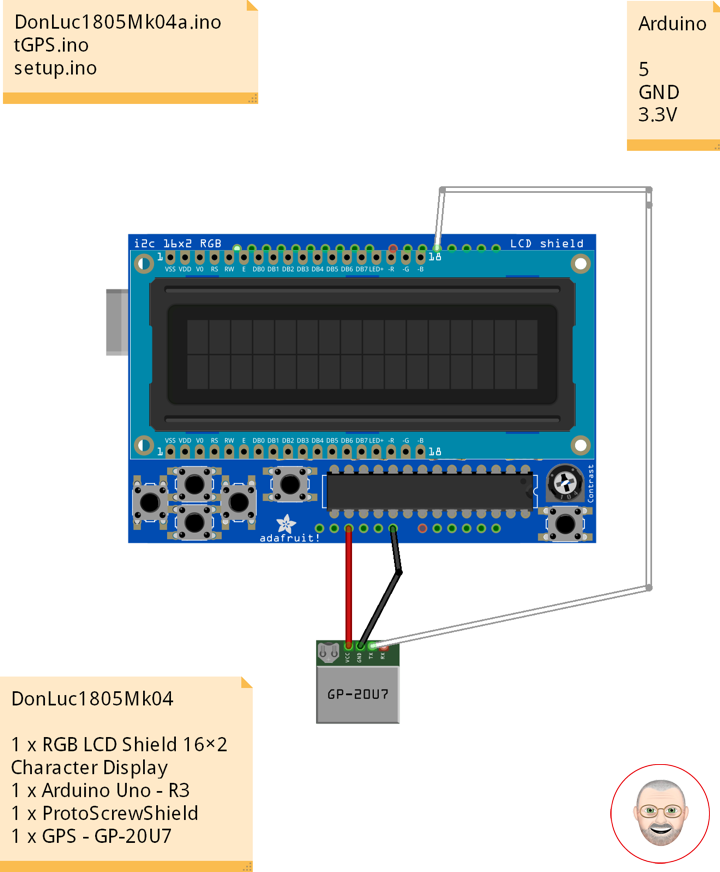
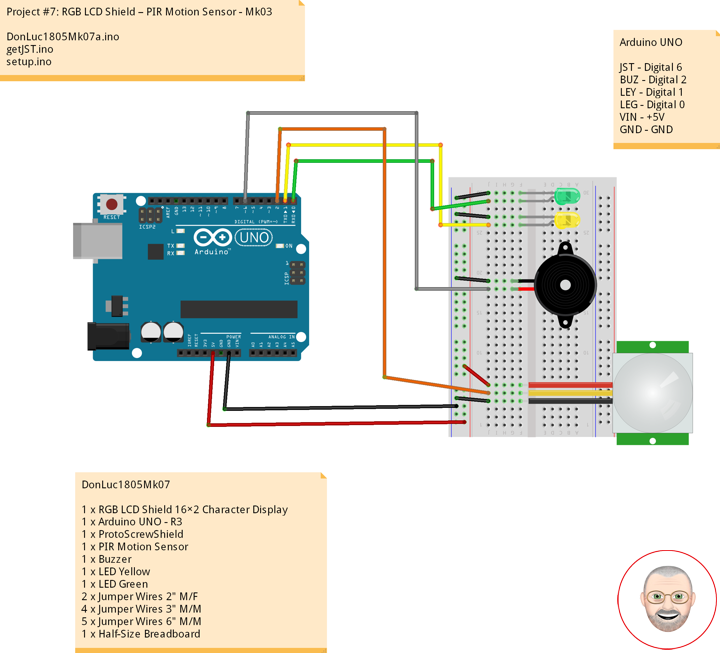
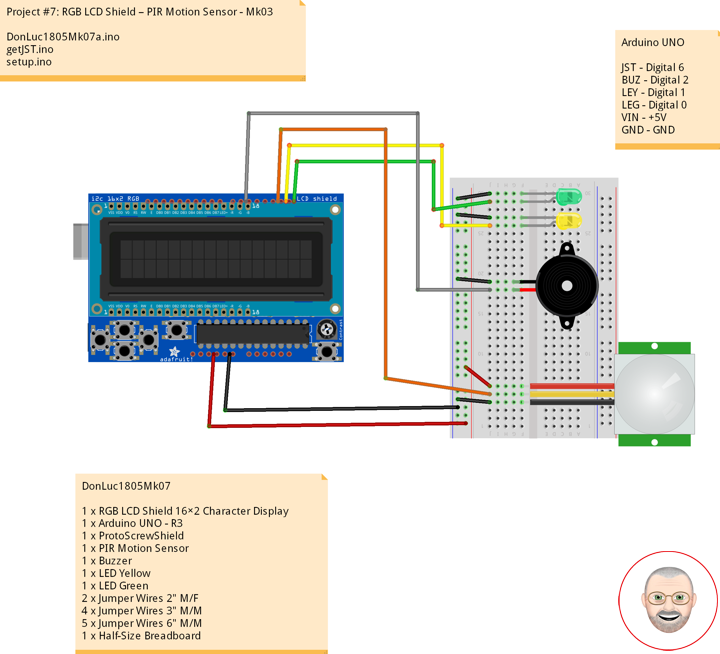
DonLuc1805Mk07
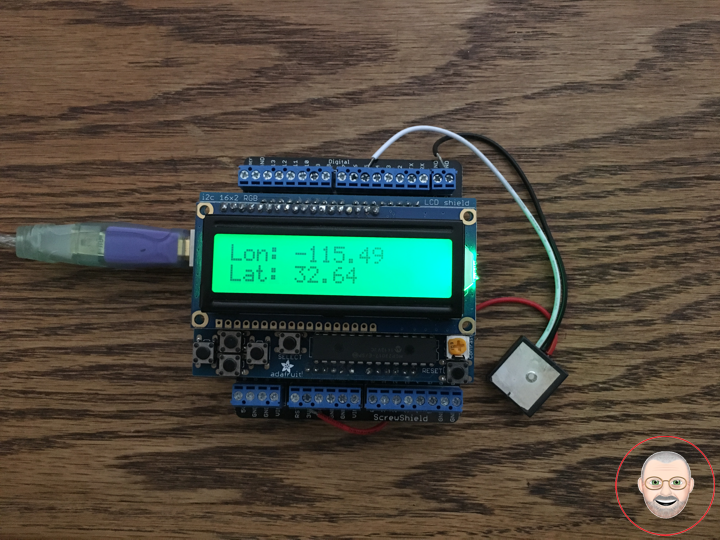
1 x RGB LCD Shield 16×2 Character Display
1 x Arduino UNO – R3
1 x ProtoScrewShield
1 x PIR Motion Sensor
1 x Buzzer
1 x LED Yellow
1 x LED Green
2 x Jumper Wires 2″ M/F
4 x Jumper Wires 3″ M/M
5 x Jumper Wires 6″ M/M
1 x Half-Size Breadboard
Arduino UNO
JST – Digital 6
BUZ – Digital 2
LEY – Digital 1
LEG – Digital 0
VIN – +5V
GND – GND
DonLuc1805Mk07a.ino
// ***** Don Luc *****
// Software Version Information
// Project #7: RGB LCD Shield – PIR Motion Sensor - Mk03
// 5-3.01
// DonLuc1804Mk07 5-3.01
// RGB LCD Shield
// PIR Motion Sensor (JST}

// include the library code:
#include <Adafruit_MCP23017.h>
#include <Adafruit_RGBLCDShield.h>

Adafruit_RGBLCDShield RGBLCDShield = Adafruit_RGBLCDShield();
#define GREEN 0x2

// PIR Motion Sensor (JST}
const int buz = 6;          // Buzzer
const int MOTION_PIN = 2;   // Pin connected to motion detector
const int LED_Yellow = 1;   // LED Yellow
const int LED_Green = 0;    // LED Green

void loop() {

  // PIR Motion Sensor (JST}
  isJST();

  delay(1000);

  // Clear
  RGBLCDShield.clear();

}
getJST.ino
void isJST(){
int proximity = digitalRead(MOTION_PIN); // PIR Motion Sensor
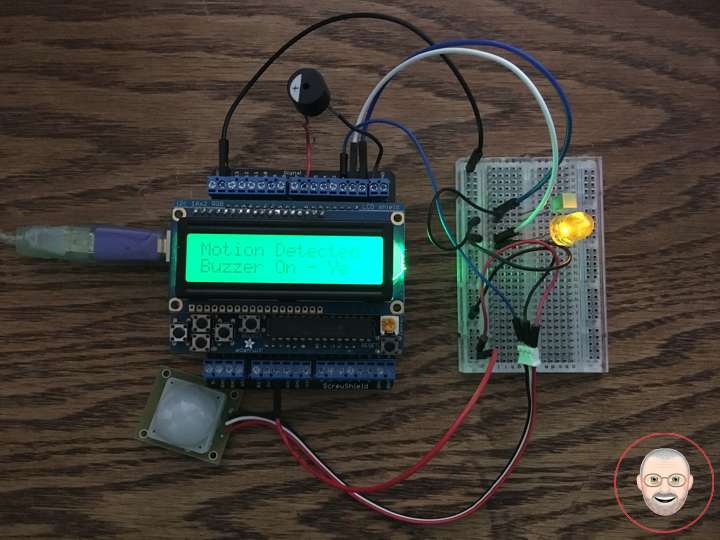
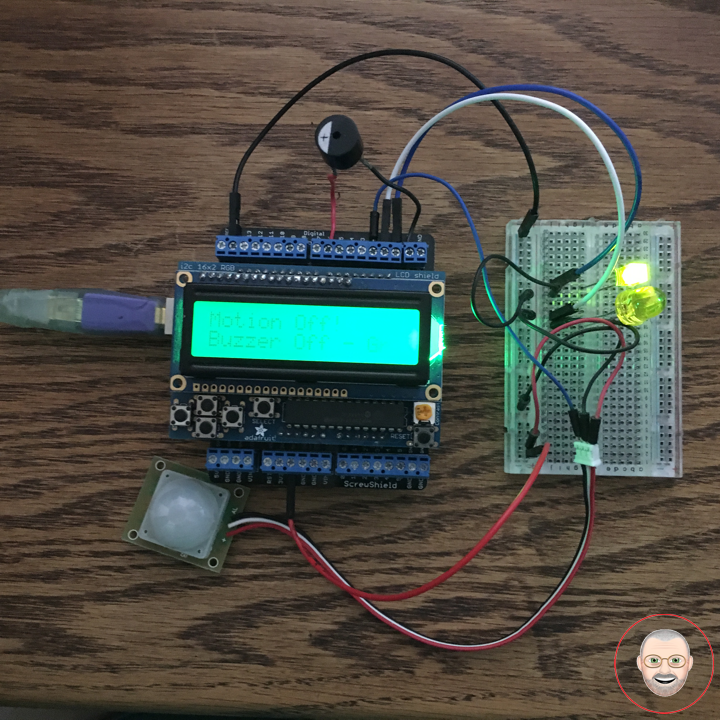
if (proximity == LOW) // If the sensor's output goes low, motion is detected
{
// Motion Detected
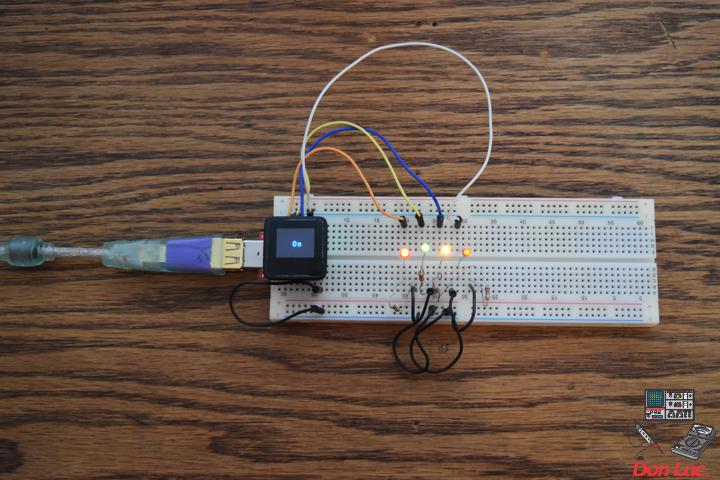
digitalWrite(buz, HIGH); // Buzzer High
digitalWrite(LED_Yellow, HIGH); // LED Yellow High
digitalWrite(LED_Green, LOW); // LED Green Low
// Display
// Set the cursor to column 0, line 0
RGBLCDShield.setCursor(0,0);
RGBLCDShield.print("Motion Detected!"); // Motion Detected!
// Set the cursor to column 0, line 1
RGBLCDShield.setCursor(0, 1);
RGBLCDShield.print("Buzzer On - Yel"); // Buzzer On
}
else
{
// Motion Off
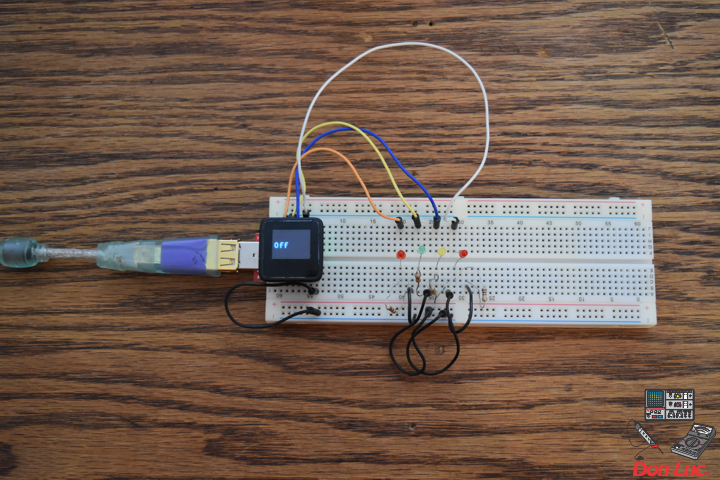
digitalWrite(buz, LOW); // Buzzer Low
digitalWrite(LED_Yellow, LOW); // LED Yellow Low
digitalWrite(LED_Green, HIGH); // LED Green High
// Display
// Set the cursor to column 0, line 0
RGBLCDShield.setCursor(0,0);
RGBLCDShield.print("Motion Off!"); // Motion Off!
// Set the cursor to column 0, line 1
RGBLCDShield.setCursor(0, 1);
RGBLCDShield.print("Buzzer Off - Gr"); // "Buzzer Off
}
}
setup.ino
void setup() {
// set up the LCD's number of columns and rows:
RGBLCDShield.begin(16, 2);
RGBLCDShield.setBacklight(GREEN);
// Display
// Set the cursor to column 0, line 0
RGBLCDShield.setCursor(0,0);
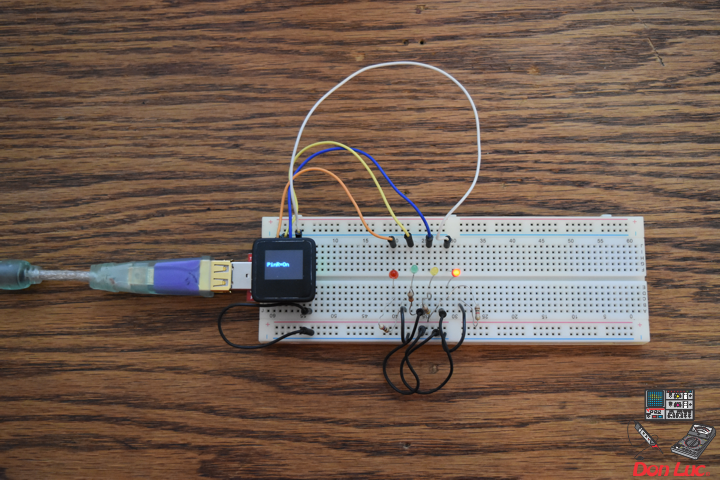
RGBLCDShield.print("Don Luc"); // Don luc
// Set the cursor to column 0, line 1
RGBLCDShield.setCursor(0, 1);
RGBLCDShield.print("Motion Sensor"); // Motion Sensor
delay(5000);
// Clear
RGBLCDShield.clear();
// PIR Motion Sensor (JST}
pinMode(buz, OUTPUT); // Buzzer
pinMode(MOTION_PIN, INPUT_PULLUP); // PIR Motion Sensor
pinMode(LED_Yellow, OUTPUT); // LED Yellow
pinMode(LED_Green, OUTPUT); // LED Green
}
Don Luc