EasyDriver – Hook-Up
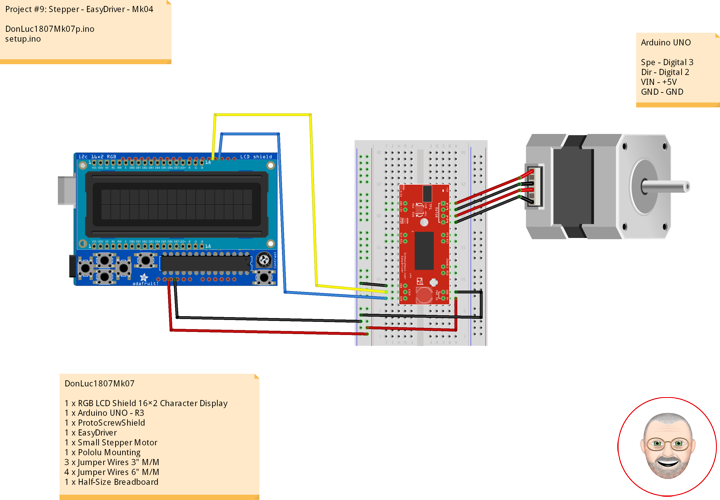
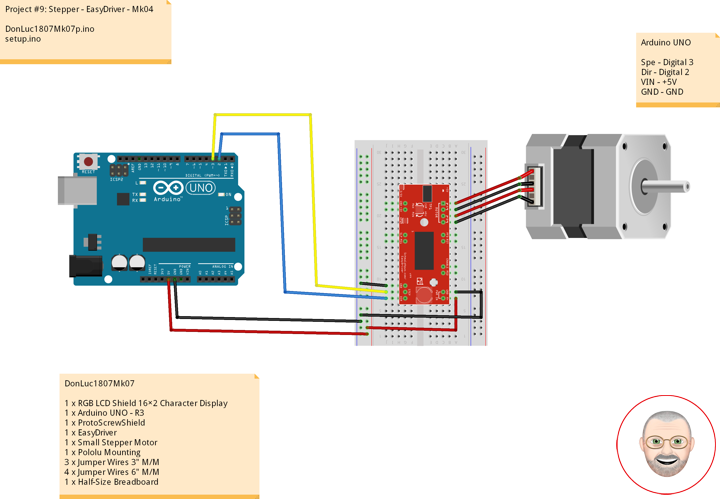
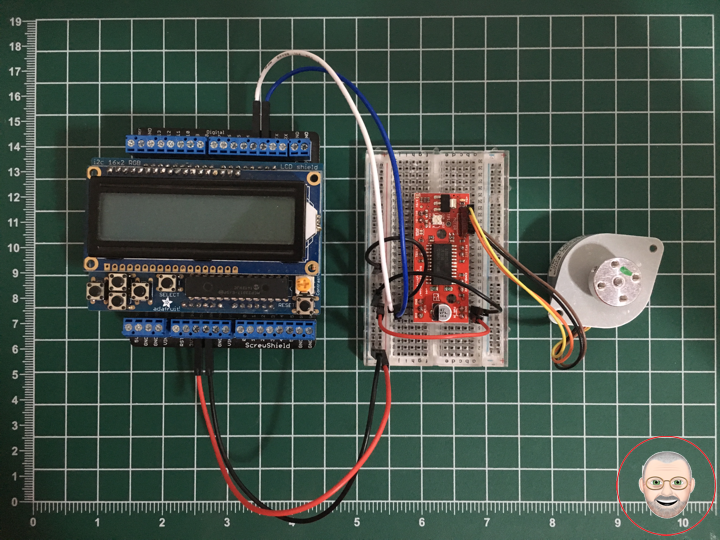
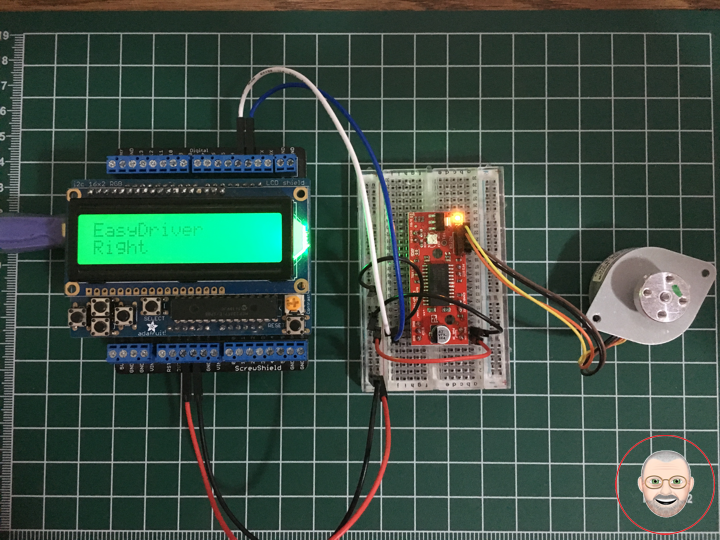
Once you have all the headers soldered on, it’s time to hook up the EasyDriver to your Arduino. Using the picture below, make all the necessary connections.
Note: The small stepper motor looks different than the one pictured. It should have a 4-pin connector on the end. This will be attached to the 4-pin male header facing upward. Because of the nature of this particular stepper, you can hook up the connector in either orientation, i.e. either the black wire on the left or the yellow wire on the left. It will work either way. If you are using a different motor, consult its documentation to find out which wires should go where.
IMPORTANT: Stepper motors require more power than can be supplied by the Arduino. In this example we will be powering the Uno with a 12V external supply. Notice that the power input (M+) on the EasyDriver is attached to the Vin pin on the Arduino. This will allow you to power both the Arduino and the motor with the same power supply.
DonLuc1807Mk07
1 x RGB LCD Shield 16×2 Character Display
1 x Arduino UNO – R3
1 x ProtoScrewShield
1 x EasyDriver
1 x Small Stepper Motor
1 x Pololu Mounting
3 x Jumper Wires 3″ M/M
4 x Jumper Wires 6″ M/M
1 x Half-Size Breadboard
Arduino UNO
Spe – Digital 3
Dir – Digital 2
VIN – +5V
GND – GND
DonLuc1807Mk07p.ino
// ***** Don Luc *****
// Software Version Information
// Project #9: Stepper - EasyDriver - Mk04
// 7-7
// DonLuc1807Mk07p 7-7
// Stepper
// EasyDriver

// include the library code:
#include <Adafruit_MCP23017.h>
#include <Adafruit_RGBLCDShield.h>

Adafruit_RGBLCDShield RGBLCDShield = Adafruit_RGBLCDShield();
#define GREEN 0x2

// EasyDriver
int dirPin = 2;                           // EasyDriver
int stepPin = 3;                          // stepPin

void loop() {

  // Display
  // Set the cursor to column 0, line 0
  RGBLCDShield.setCursor(0,0);
  RGBLCDShield.print("EasyDriver");       // EasyDriver

  // EasyDriver
  int i;

  // Set the cursor to column 0, line 1
  RGBLCDShield.setCursor(0, 1);
  RGBLCDShield.print("Left");             // Left

  digitalWrite(dirPin, LOW);              // Set the direction.
  delay(100);

  for (i = 0; i<4000; i++)                // Iterate for 4000 microsteps.
  {
    digitalWrite(stepPin, LOW);           // This LOW to HIGH change is what creates the
    digitalWrite(stepPin, HIGH);          // "Rising Edge" so the easydriver knows to when to step.
    delayMicroseconds(500);               // This delay time is close to top speed for this
  }                                       // particular motor. Any faster the motor stalls.

  // Set the cursor to column 0, line 1
  RGBLCDShield.setCursor(0, 1);
  RGBLCDShield.print("Right");            // Right

  digitalWrite(dirPin, HIGH);             // Change direction.
  delay(2000);

  for (i = 0; i<4000; i++)                // Iterate for 4000 microsteps
  {
    digitalWrite(stepPin, LOW);           // This LOW to HIGH change is what creates the
    digitalWrite(stepPin, HIGH);          // "Rising Edge" so the easydriver knows to when to step.
    delayMicroseconds(500);               // This delay time is close to top speed for this
  }                                       // particular motor. Any faster the motor stalls.

  delay(2000);

  // Clear
  RGBLCDShield.clear();

}
setup.ino
// Setup
void setup() {

  // set up the LCD's number of columns and rows:
  RGBLCDShield.begin(16, 2);
  RGBLCDShield.setBacklight(GREEN);

  // Display
  // Set the cursor to column 0, line 0
  RGBLCDShield.setCursor(0,0);
  RGBLCDShield.print("Don Luc");         // Don luc
  // Set the cursor to column 0, line 1
  RGBLCDShield.setCursor(0, 1);
  RGBLCDShield.print("EasyDriver");      // EasyDriver

  delay(5000);

  // Clear
  RGBLCDShield.clear();

  // EasyDriver
  pinMode(dirPin, OUTPUT);
  pinMode(stepPin, OUTPUT);

}
Don Luc


