SparkFun: PRT-10739
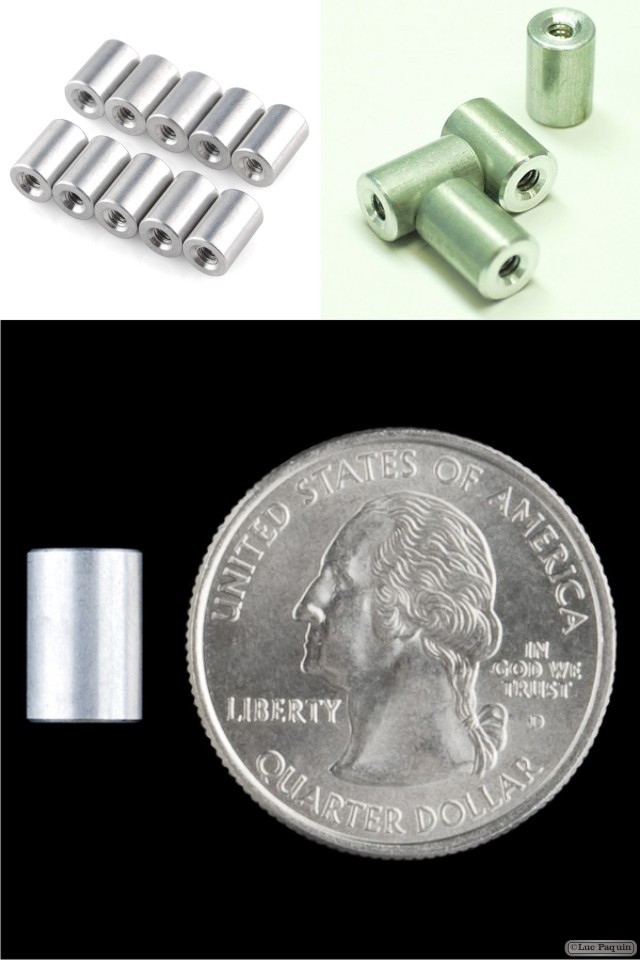
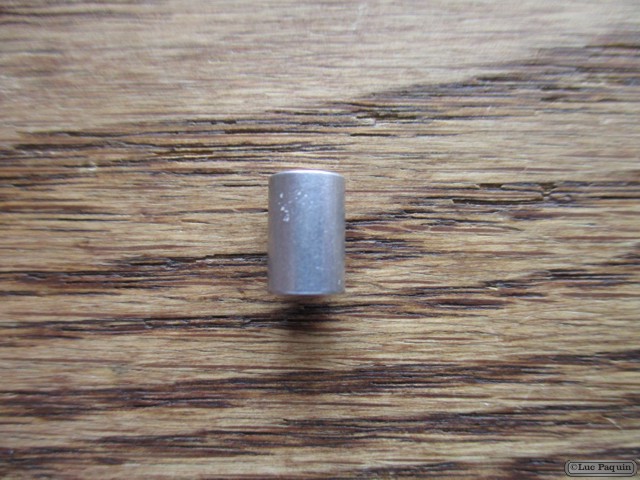
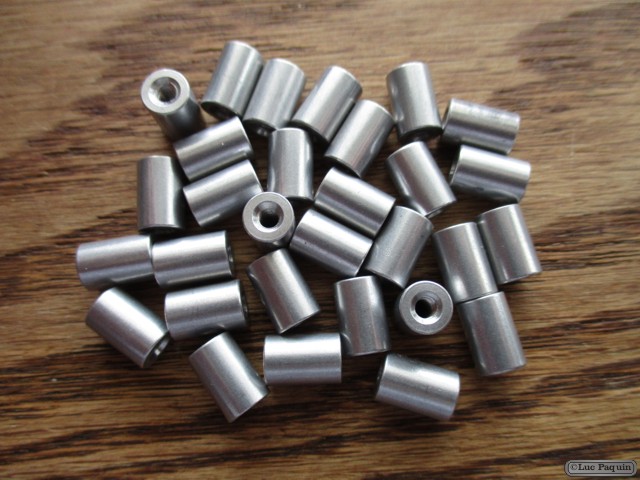
Description: Metal short standoffs: 3/8″ long x ¼”OD. Used to get your proto board up off the table. #4-40 thread. Fits all development boards with available holes. Don’t forget the screws!
Set of ten
Don Luc
The Alpha Geek – Geeking Out
SparkFun: PRT-10739
Description: Metal short standoffs: 3/8″ long x ¼”OD. Used to get your proto board up off the table. #4-40 thread. Fits all development boards with available holes. Don’t forget the screws!
Set of ten
Don Luc
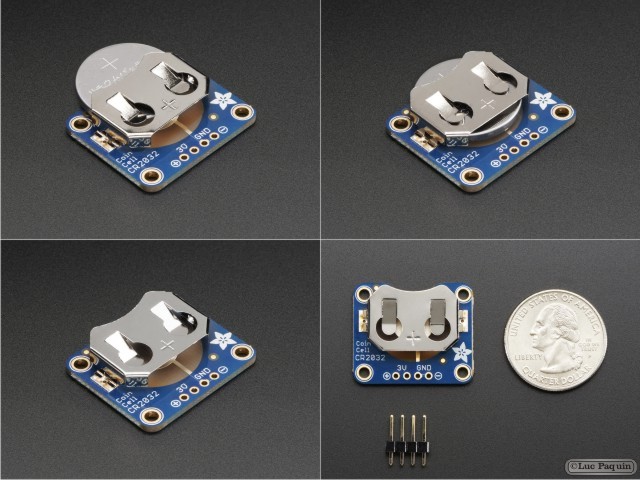
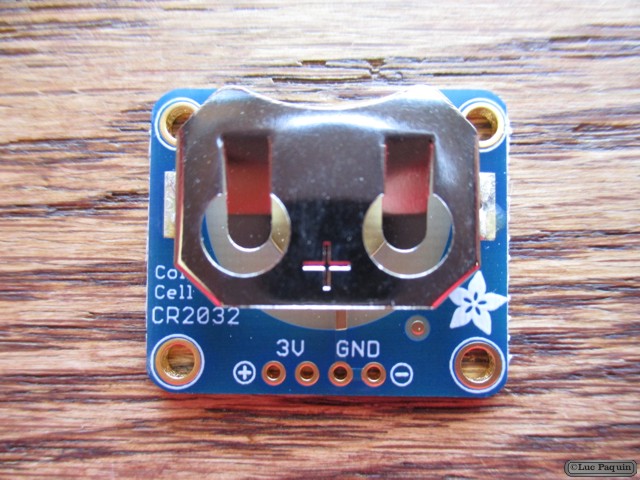
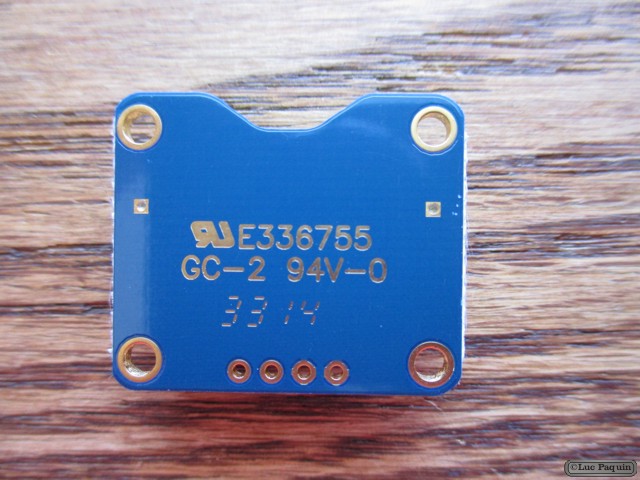
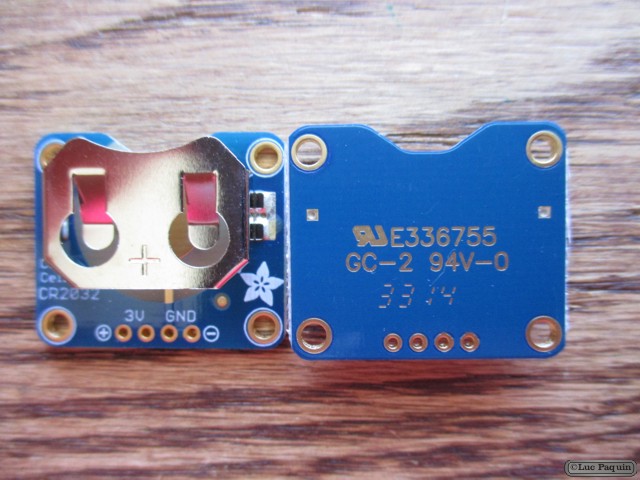
Adafruit: 1870
Description
Simple but effective – this breakout board has a CR2032 coin cell battery holder soldered on and 0.1″ pitch breakout pins for easy connecting. Great for powering very low-current projects, or adding a battery backup circuit to a real-time-clock or similar.
Comes with one fully assembled and tested coin cell battery holder and a small stick of 0.1″ header so you can solder it on and plug into a breadboard. Coin cell battery is not included.
Technical Details
Dimensions:
Don Luc
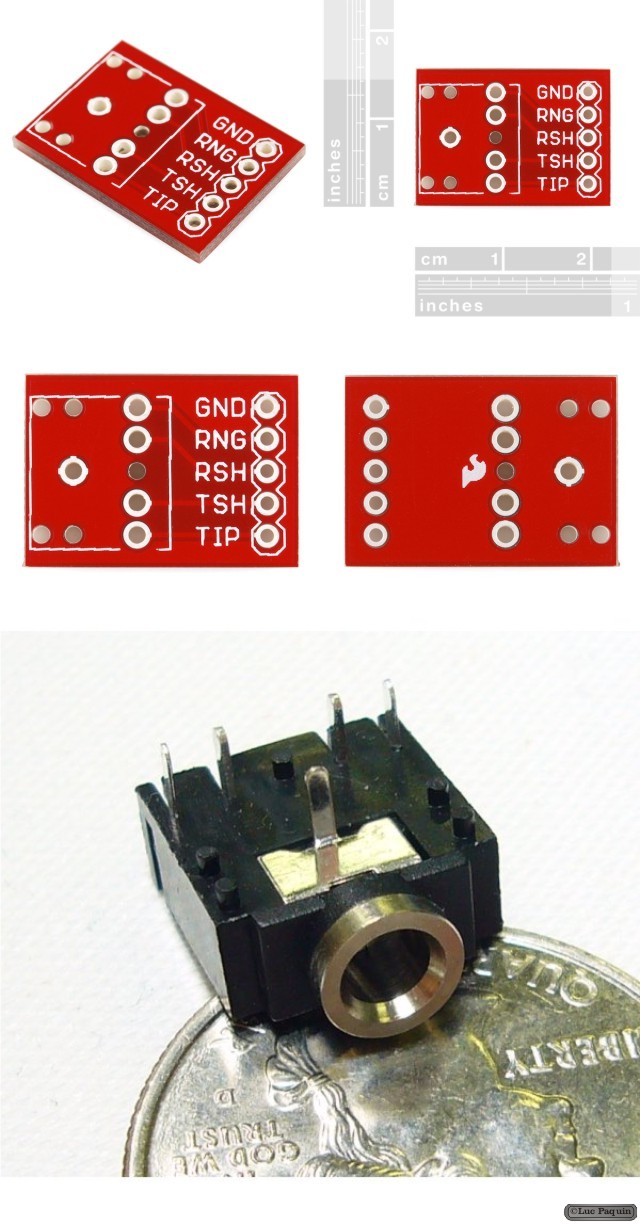
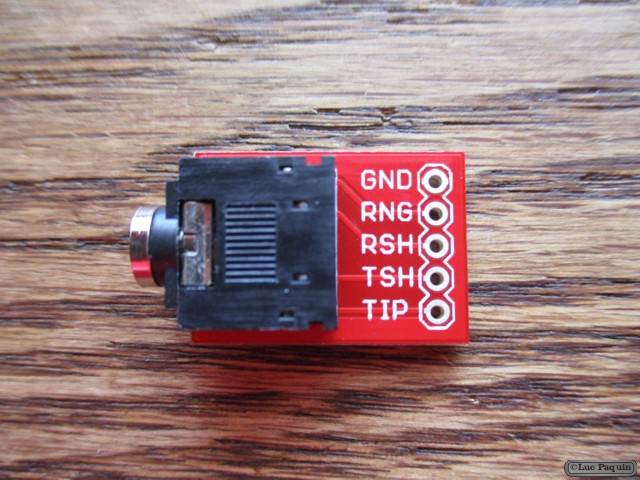
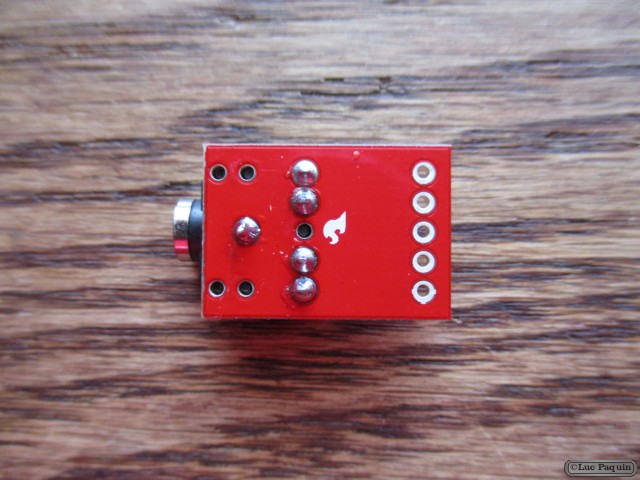
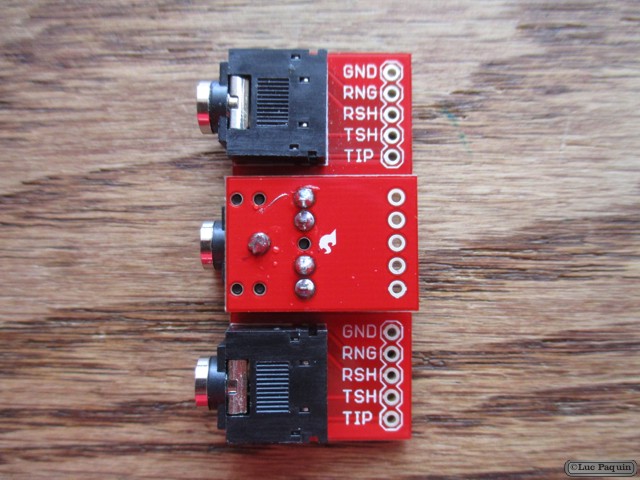
SparkFun: PRT-10588
Description: Simple breakout board for the 3.5mm audio jack. Use this breakout (shipped bare) to allow breadboard or SIP access to the super-common 3.5mm audio jack. All five pins are broken out.
Note: You get the bare PCB only, check below for the Audio Jack.
SparkFun: PRT-08032
Description: Low profile 3.5mm stereo audio jack.
Don Luc
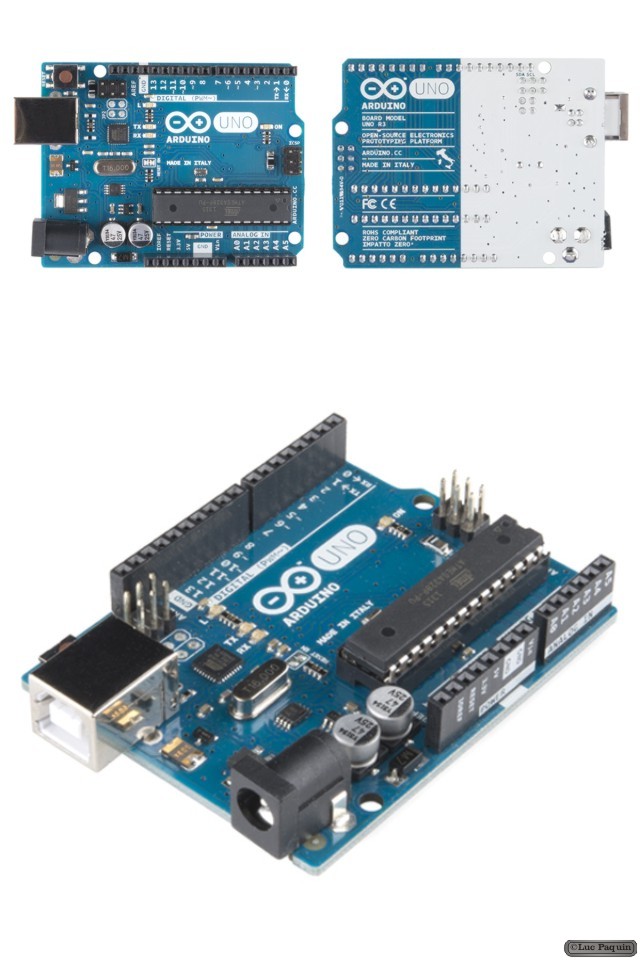
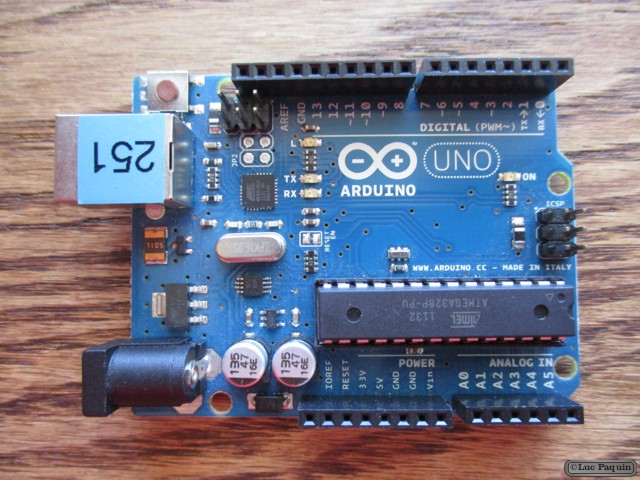
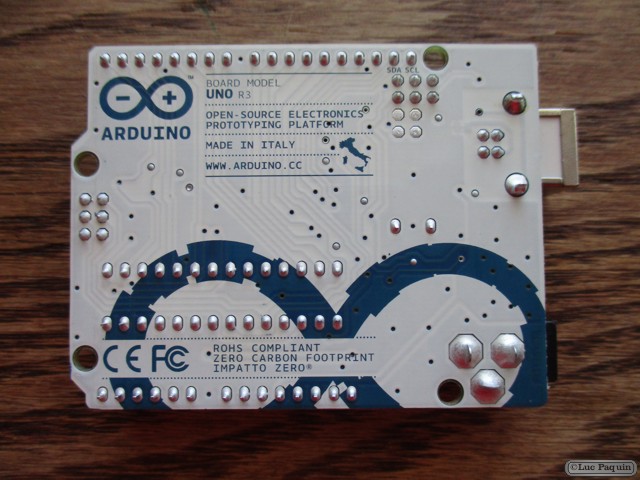
SparkFun: DEV-11021
Description: This is the new Arduino Uno R3. In addition to all the features of the previous board, the Uno now uses an ATmega16U2 instead of the 8U2 found on the Uno (or the FTDI found on previous generations). This allows for faster transfer rates and more memory. No drivers needed for Linux or Mac (inf file for Windows is needed and included in the Arduino IDE), and the ability to have the Uno show up as a keyboard, mouse, joystick, etc.
The Uno R3 also adds SDA and SCL pins next to the AREF. In addition, there are two new pins placed near the RESET pin. One is the IOREF that allow the shields to adapt to the voltage provided from the board. The other is a not connected and is reserved for future purposes. The Uno R3 works with all existing shields but can adapt to new shields which use these additional pins.
Arduino is an open-source physical computing platform based on a simple i/o board and a development environment that implements the Processing/Wiring language. Arduino can be used to develop stand-alone interactive objects or can be connected to software on your computer (e.g. Flash, Processing, MaxMSP). The open-source IDE can be downloaded for free (currently for Mac OS X, Windows, and Linux).
Note: The Arduino Uno R3 requires the Arduino 1.0 drivers folder in order to install properly on some computers. We have tested and confirmed that the R3 can be programmed in older versions of the IDE. However, the first time using the R3 on a new computer, you will need to have Arduino 1.0 installed on that machine. If you are interested in reading more about the changes to the IDE, check out the official Arduino 1.0 Release notes!
Features:
Don Luc
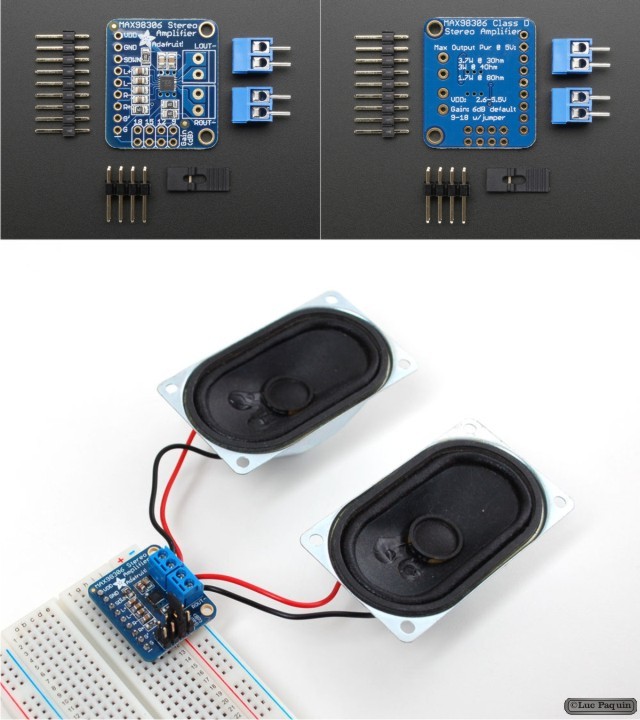
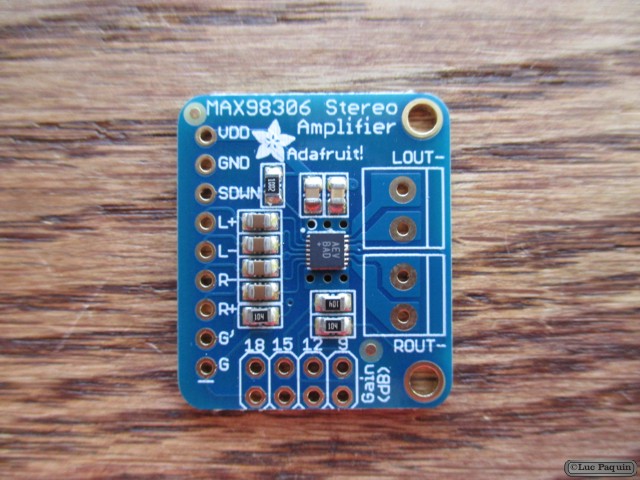
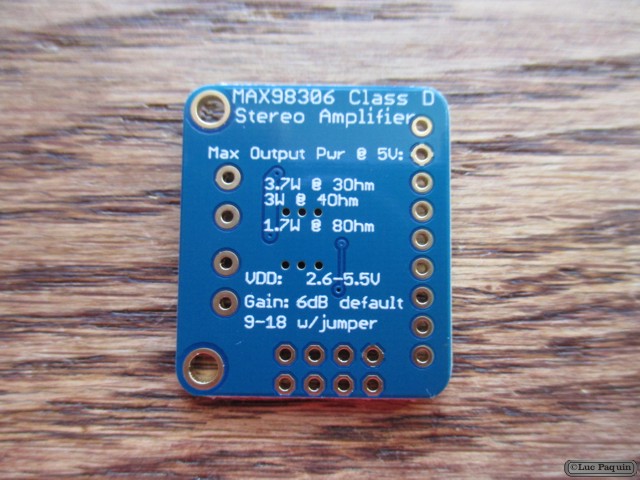
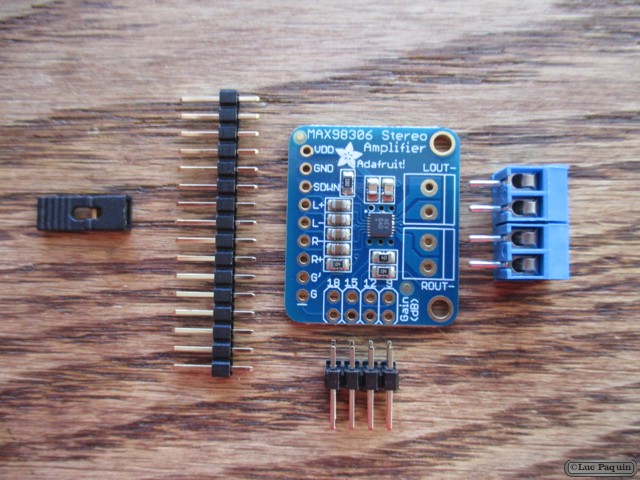
Adafruit: 987
Description
This incredibly small stereo amplifier is surprisingly powerful – able to deliver 2 x 3.7W channels into 3 ohm impedance speakers. Inside the miniature chip is a class D controller, able to run from 2.7V-5.5VDC. Since the amp is a class D, its incredibly efficient (over 90% efficient when driving an speaker at over a Watt) – making it perfect for portable and battery-powered projects. It has built in thermal and over-current protection but we could barely tell it got hot. This board is a welcome upgrade to basic “LM386” amps!
The inputs of the amplifier go through 1.0uF capacitors, so they are fully ‘differential’ – if you don’t have differential outputs, simply tie the R- and L- to ground. The outputs are “Bridge Tied” – that means they connect directly to the outputs, no connection to ground. The output is a 360KHz square wave PWM that is then ‘averaged out’ by the speaker coil – the high frequencies are not heard. All the above means that you can’t connect the output into another amplifier, it should drive the speakers directly.
Comes with a fully assembled and tested breakout board with 1.0uF input capacitors. We also include header to plug it into a breadboard, 3.5mm screw-terminal blocks so you can easily attach/detach your speakers, and a 2×4 header + jumper to change the amplifier gain on the fly. You will be ready to rock in 15 minutes!
Technical Details
Dimensions (without 0.1″ header):
Don Luc
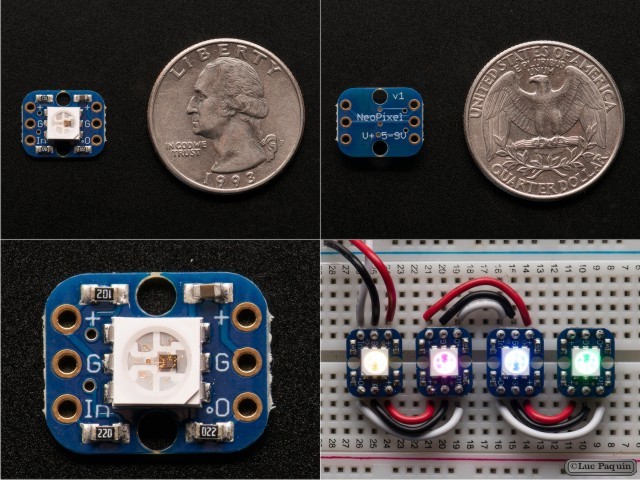
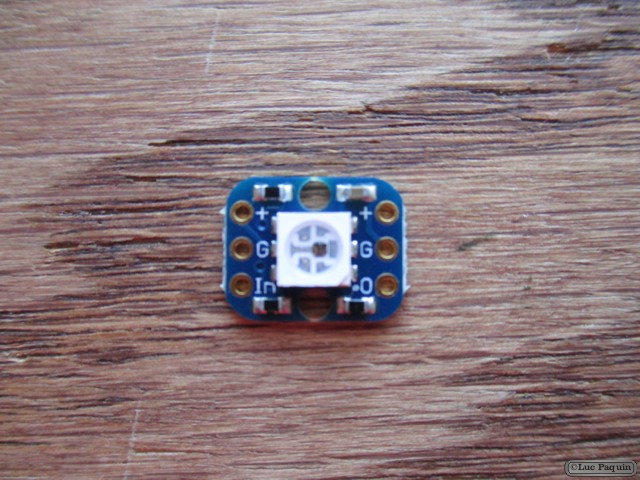
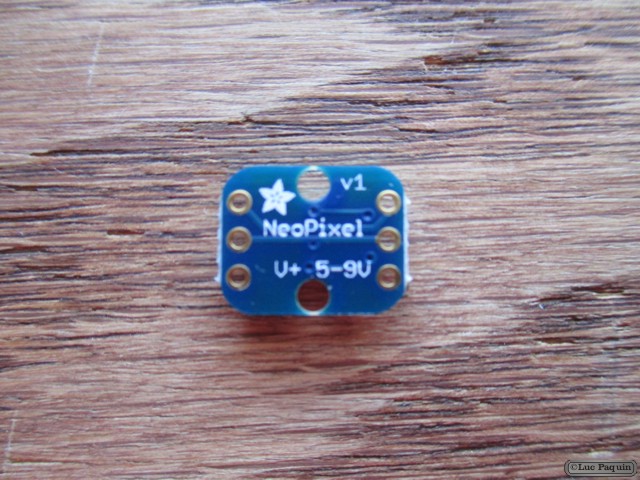
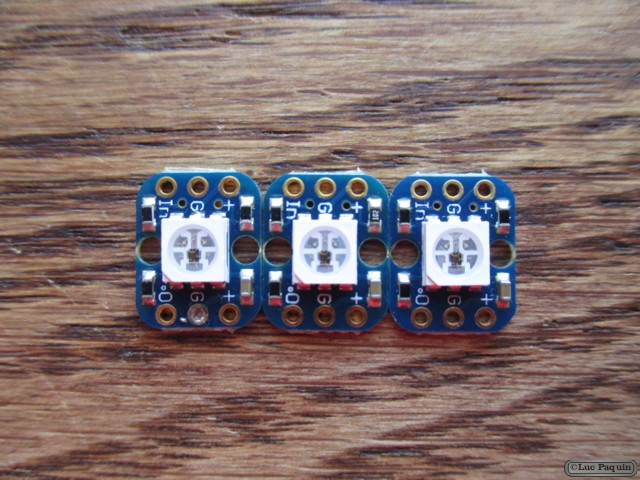
Adafruit: 1312
Description
This is the easiest way possible to add small, bright RGB pixels to your project. We took the same technology from our Flora NeoPixels and made them breadboard friendly, with two rows of 3 x 0.1″ spaced header on each side for easy soldering, chaining and breadboarding. These ultra-bright LEDs have a constant-current driver cooked right into the LED package! The pixels are chainable – so you only need 1 pin/wire to control as many LEDs as you like.
These pixels have full 24-bit color ability with PWM taken care of by the controller chip. Since the LED is so bright, you need less current/power to get the effects you want. The driver is constant current so its OK if your battery power changes or fluctuates a little.
Each pixel draws as much as 60mA (all three RGB LEDs on for full brightness white). An Arduino can drive up to 500 pixels at 30 FPS (it will run out of RAM after that). Using ribbon cable you can string these up to 6″ apart (after that, you might get power droops and data corruption)
Each order comes with 4 individually controllable pixels. In the photos above we show the pixels with headers soldered on, but the pixels do not come with any headers.
Technical Details
Don Luc
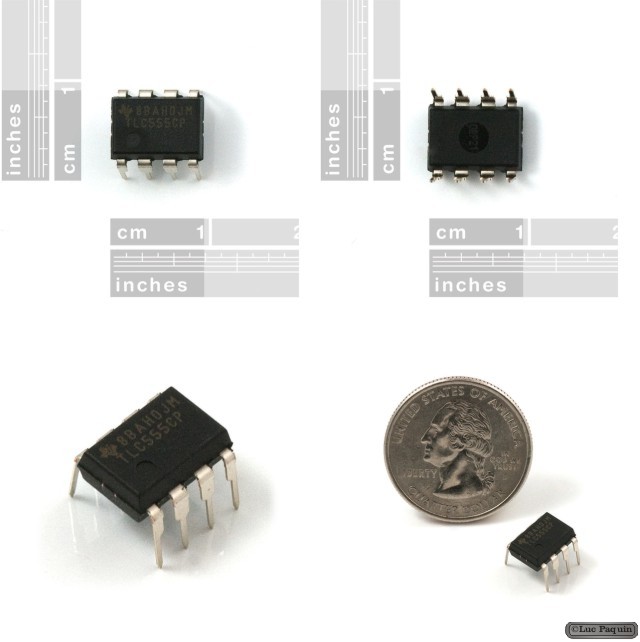
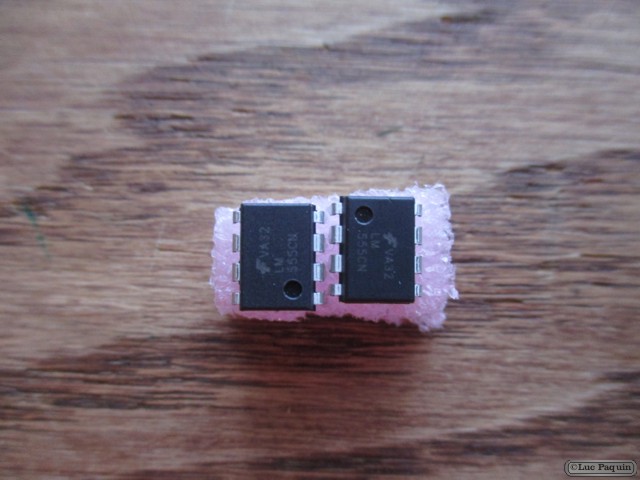
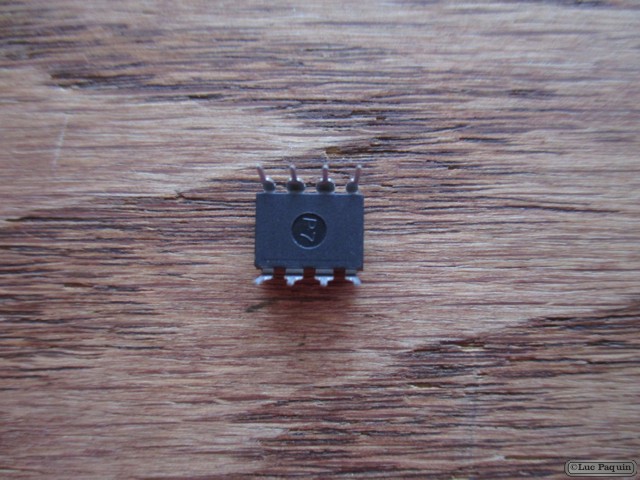
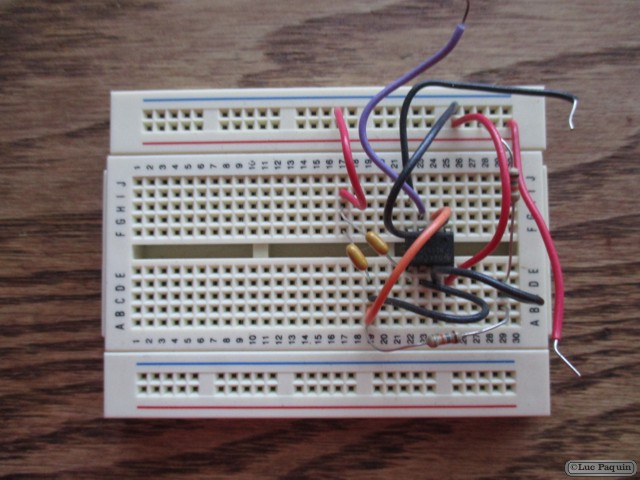
SparkFun: COM-09273
Description: This is a common 555 timer/oscillator from TI. A classic for all of those first year circuits projects where you need to blink an LED, generate tone, and thousands of other great beginning projects. Google around for a huge list of resources and example projects.
Features:
Don Luc
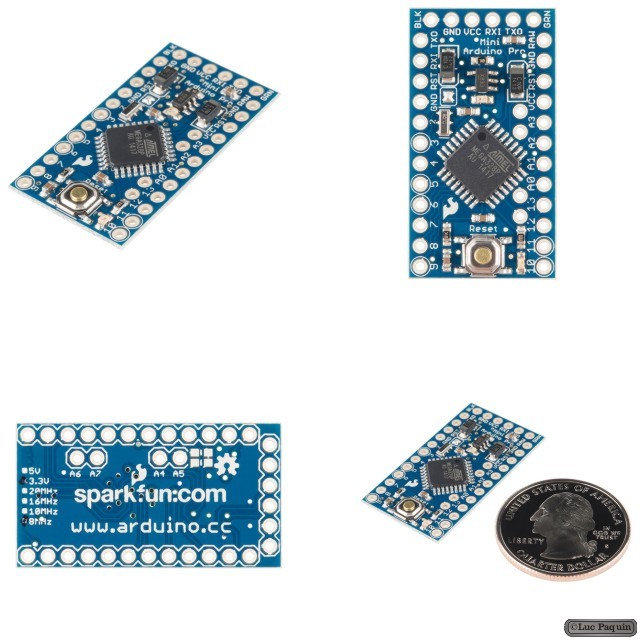
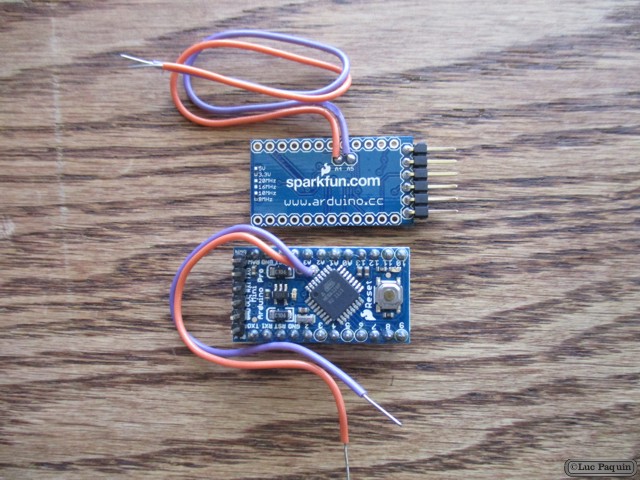
SparkFun: DEV-11114
Description: It’s blue! It’s thin! It’s the Arduino Pro Mini! SparkFun’s minimal design approach to Arduino. This is a 3.3V Arduino running the 8MHz bootloader. Arduino Pro Mini does not come with connectors populated so that you can solder in any connector or wire with any orientation you need. We recommend first time Arduino users start with the Uno R3. It’s a great board that will get you up and running quickly. The Arduino Pro series is meant for users that understand the limitations of system voltage (3.3V), lack of connectors, and USB off board.
We really wanted to minimize the cost of an Arduino. In order to accomplish this we used all SMD components, made it two layer, etc. This board connects directly to the FTDI Basic Breakout board and supports auto-reset. The Arduino Pro Mini also works with the FTDI cable but the FTDI cable does not bring out the DTR pin so the auto-reset feature will not work. There is a voltage regulator on board so it can accept voltage up to 12VDC. If you’re supplying unregulated power to the board, be sure to connect to the “RAW” pin on not VCC.
The latest and greatest version of this board breaks out the ADC6 and ADC7 pins as well as adds footprints for optional I2C pull-up resistors! We also took the opportunity to slap it with the OSHW logo.
Dimensions: 0.7×1.3″ (18x33mm)
Features:
Don Luc
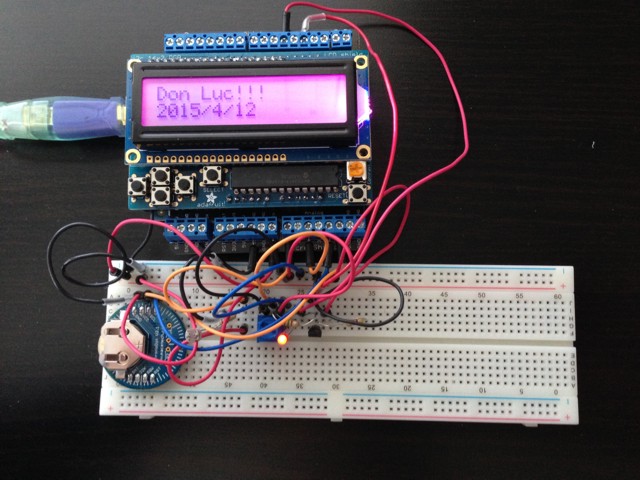
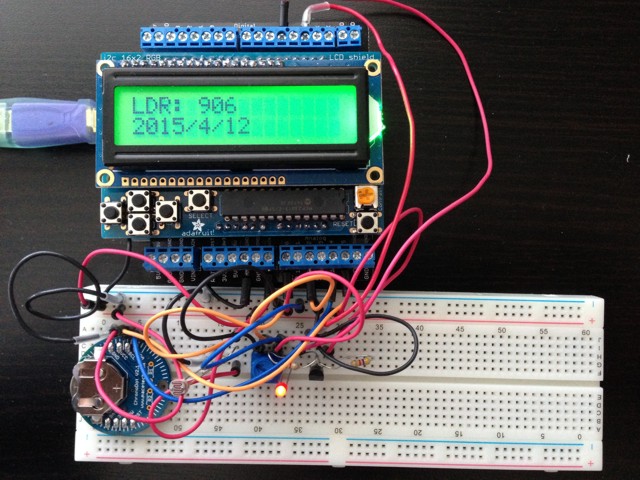
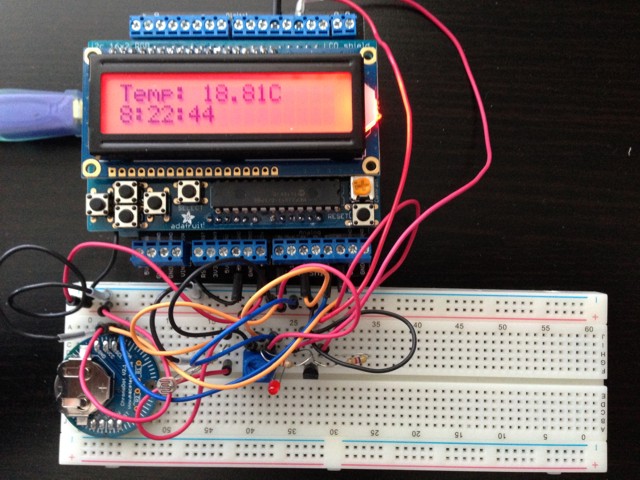
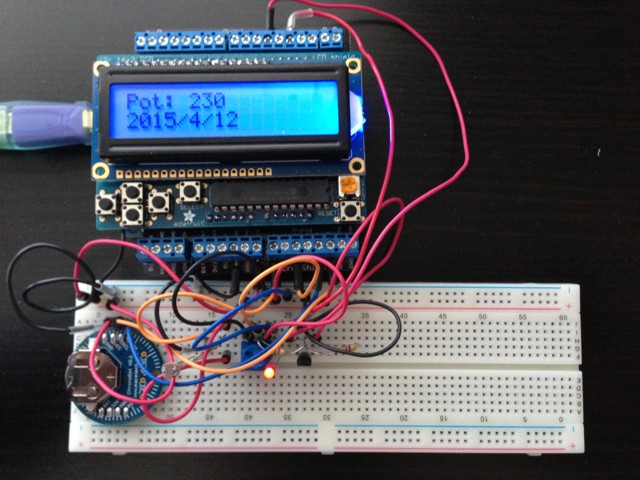
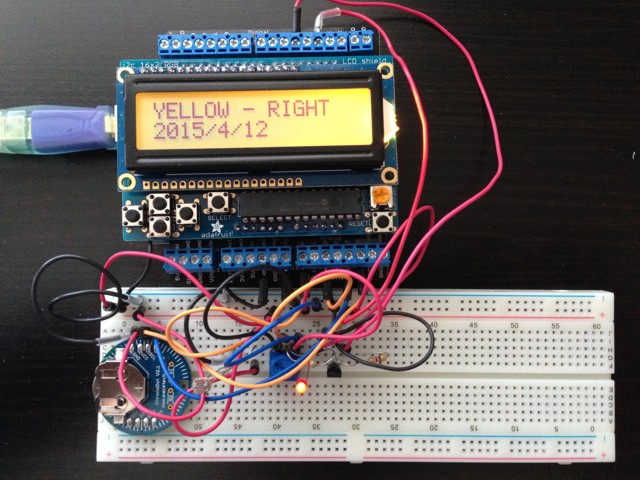
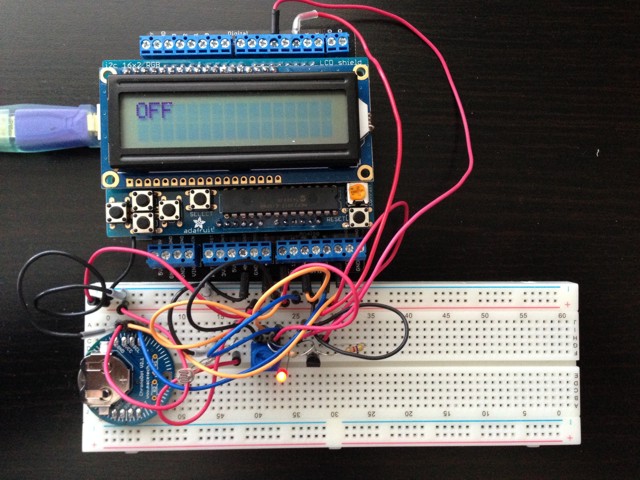
LCDShieldMk5.1.ino
// ***** Don Luc *****
// Software Version Information
// 5.1

// include the library code:
#include <Wire.h>
#include <Adafruit_MCP23017.h>
#include <Adafruit_RGBLCDShield.h>
#include <SPI.h>
#include <RTClib.h>
#include <RTC_DS3231.h>
#include <OneWire.h>

RTC_DS3231 RTC;

#define SQW_FREQ DS3231_SQW_FREQ_1024     //0b00001000   1024Hz

Adafruit_RGBLCDShield RGBLCDShield = Adafruit_RGBLCDShield();

// These #defines make it easy to set the backlight color
#define OFF 0x0
#define RED 0x1
#define YELLOW 0x3
#define GREEN 0x2
#define TEAL 0x6
#define BLUE 0x4
#define VIOLET 0x5
#define WHITE 0x7

int yy = 0;
uint8_t momentaryButton = 0;

// Chorno
boolean isChorno = true;
boolean isChor = false;
char datastr[100];
int zz = 0;
// LDR (light dependent resistor)
int LDR_Pin = A0;
int LDRReading = 0;
String LDR = "";
// Temperature chip i/o
int DS18S20_Pin = 2; //DS18S20 Signal pin on digital 2
OneWire ds(DS18S20_Pin);  // on digital pin 2
float temperature = 0;
String tempZ = "";
// Potentiometer
int potPin = A2;    // select the input pin for the potentiometer
int ledPin = 4;   // select the pin for the LED
boolean isVal = false;
int potPot = 0;
String cap = "";

void loop() {

  RGBLCDShield.clear();

  // ChronoDot
  // set the cursor to column 0, line 1
  RGBLCDShield.setCursor(0, 1);
  timeChrono();
  // LDR (light dependent resistor)
  timeLDR();
  // Temperature chip i/o
  temperatu();
  // Potentiometer
  getPotentio();

  momentaryButton = RGBLCDShield.readButtons();

  // set the cursor to column 0, line 0
  RGBLCDShield.setCursor(0,0);

  switch ( yy ) {
    case 1:
      // LDR (light dependent resistor)
      isLDR();
      break;
    case 2:
      // Temperature chip i/o
      isTe();
      break;
    case 3:
      // Potentiometer
      isCap();
      break;
    case 4:
      // Yellow
      RGBLCDShield.print("YELLOW - RIGHT");
      break;
    case 5:
      // OFF
      RGBLCDShield.print("OFF");
      break;
    default:
      yy = 0;
      RGBLCDShield.print("Don Luc!!!");
   }

  if ( momentaryButton ) {

    if ( momentaryButton & BUTTON_UP ) {
      isChorno = true;
      yy = 1;
      // LDR (light dependent resistor)
      RGBLCDShield.setBacklight(GREEN);
    }

    if ( momentaryButton & BUTTON_DOWN ) {
      isChorno = true;
      yy = 2;
      // Temperature chip i/o
      RGBLCDShield.setBacklight(RED);
    }

    if ( momentaryButton & BUTTON_LEFT ) {
      isChorno = true;
      yy =3;
      // Potentiometer
      RGBLCDShield.setBacklight(BLUE);
    }

    if ( momentaryButton & BUTTON_RIGHT ) {
      isChorno = true;
      yy = 4;
      //RGBLCDShield.print("YELLOW - RIGHT");
      RGBLCDShield.setBacklight(YELLOW);
    }

    if ( momentaryButton & BUTTON_SELECT ) {
      isChorno = false;
      yy = 5;
      //RGBLCDShield.print("OFF");
      RGBLCDShield.setBacklight(OFF);
    }

  }

  delay(5000);

}
setup.ino
void setup() {

  // set up the LCD's number of columns and rows:
  RGBLCDShield.begin(16, 2);
  RGBLCDShield.setBacklight(VIOLET);

  // ChronoDot
  setupChrono();

  // Pot
  pinMode(ledPin, OUTPUT);

}
ChronoDot.ino
void setupChrono() {

  RTC.begin();

  DateTime now = RTC.now();
  DateTime compiled = DateTime(__DATE__, __TIME__);
  RTC.getControlRegisterData( datastr[0] );

}

void timeChrono() {

    DateTime now = RTC.now();
    DateTime isNow (now.unixtime() + 5572 * 86400L + 26980);

    if ( isChorno == true )
    {
      if ( isChor == false )
        {
          isChor = true;
          RGBLCDShield.print(isNow.year(), DEC);
          RGBLCDShield.print('/');
          RGBLCDShield.print(isNow.month(), DEC);
          RGBLCDShield.print('/');
          RGBLCDShield.print(isNow.day(), DEC);
          RGBLCDShield.print(' ');
          RGBLCDShield.print(' ');
        }
        else if ( isChor == true )
        {
          isChor = false;
          RGBLCDShield.print(isNow.hour(), DEC);
          RGBLCDShield.print(':');
          RGBLCDShield.print(isNow.minute(), DEC);
          RGBLCDShield.print(':');
          RGBLCDShield.print(isNow.second(), DEC);
          RGBLCDShield.print(' ');
          RGBLCDShield.print(' ');
        }
    }

}
getLDR.ino
void timeLDR() {

  // LDR
  LDRReading = analogRead(LDR_Pin);

}

void isLDR() {

  LDR = "LDR: ";
  LDR.concat(LDRReading);
  // LDR (light dependent resistor)
  RGBLCDShield.print( LDR );

}
getPot.ino
void getPotentio() {

    if ( isVal == false )
    {
       isVal = true;
       digitalWrite(ledPin, HIGH);  // turn the ledPin on
    }
    else if ( isVal == true )
    {
       isVal = false;
       digitalWrite(ledPin, LOW);  // turn the ledPin off
    }
    potPot = analogRead(potPin);    // read the value from the sensor

}

void isCap(){

    cap = "Pot: ";
    cap.concat(potPot);
    RGBLCDShield.print( cap );

}
getTemperature.ino
float getTemp() {

  //returns the temperature from one DS18S20 in DEG Celsius
  byte data[12];
  byte addr[8];

  if ( !ds.search(addr)) {
      //no more sensors on chain, reset search
      ds.reset_search();
      return -1001;
  }

  if ( OneWire::crc8( addr, 7) != addr[7]) {
      return -1002;
  }

  if ( addr[0] != 0x10 && addr[0] != 0x28) {
      return -1003;
  }

  ds.reset();
  ds.select(addr);
  ds.write(0x44,1); // start conversion, with parasite power on at the end

  byte present = ds.reset();
  ds.select(addr);
  ds.write(0xBE); // Read Scratchpad


  for (int i = 0; i < 9; i++) { // we need 9 bytes
    data[i] = ds.read();
  }

  ds.reset_search();

  byte MSB = data[1];
  byte LSB = data[0];

  float tempRead = ((MSB << 8) | LSB); //using two's compliment
  float TemperatureSum = tempRead / 16;

  return TemperatureSum;

}

void temperatu(){

  temperature = getTemp();

}

void isTe() {

  tempZ = "Temp: ";
  tempZ.concat(temperature);
  tempZ.concat("C");
  RGBLCDShield.print( tempZ );

}
Don Luc
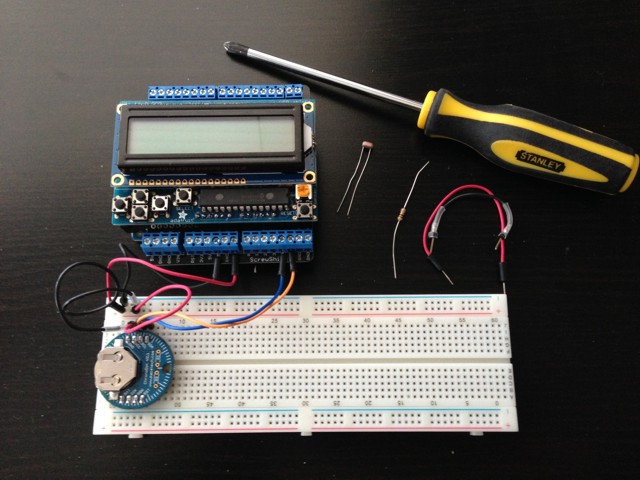
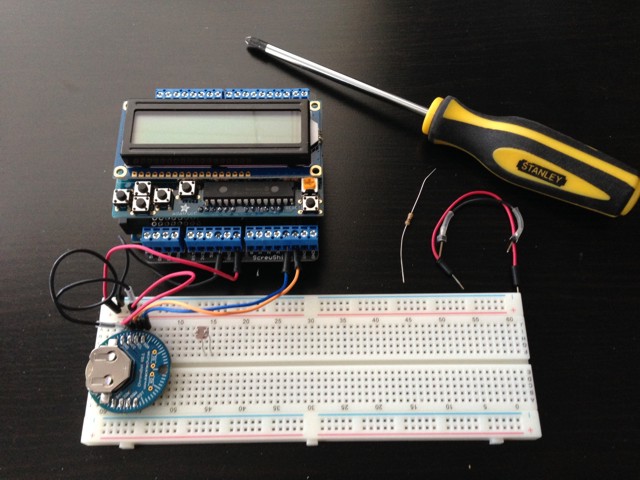
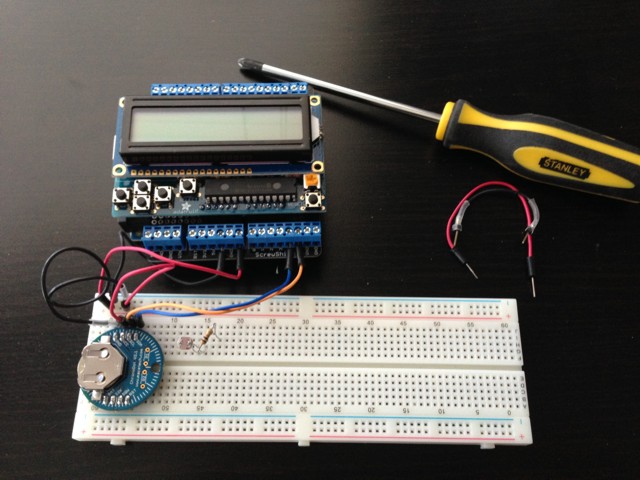
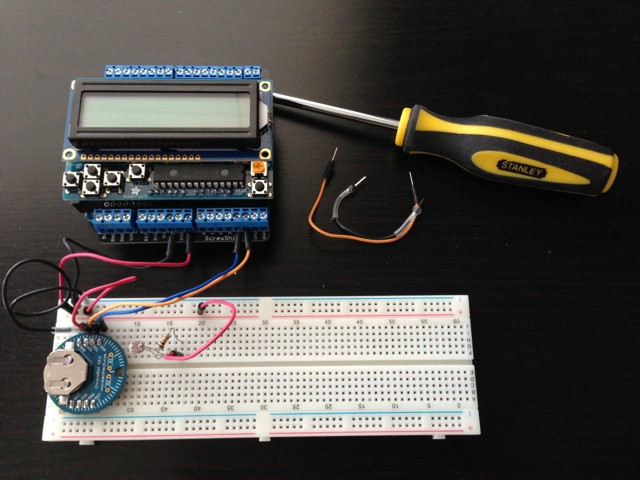
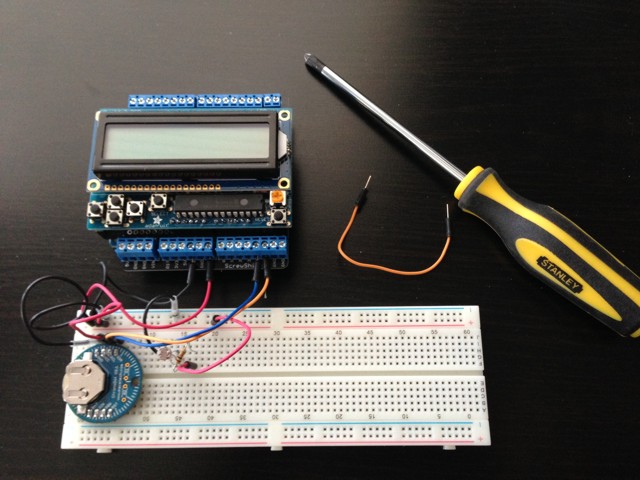
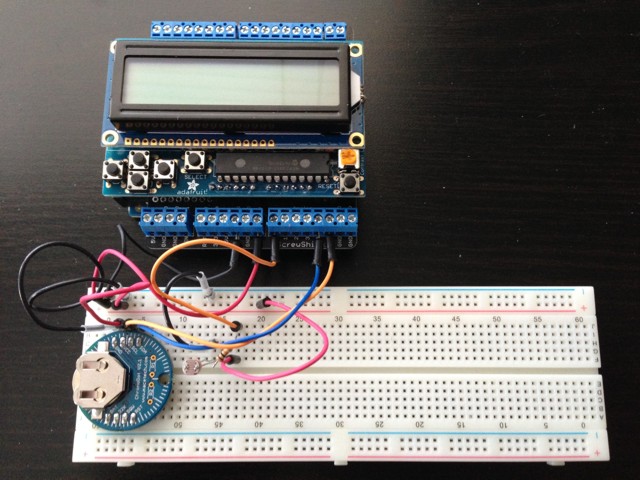
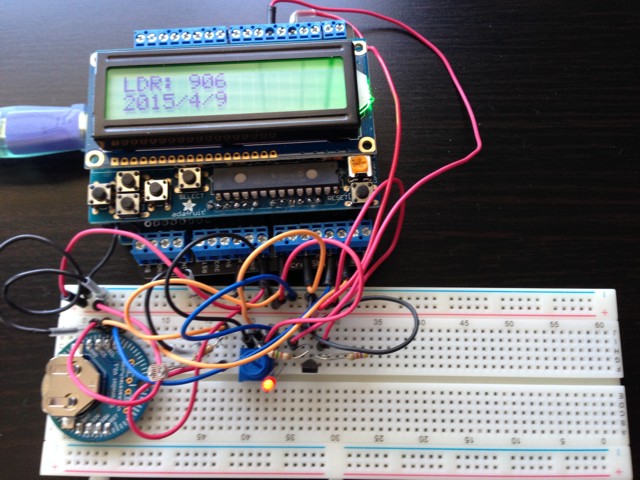
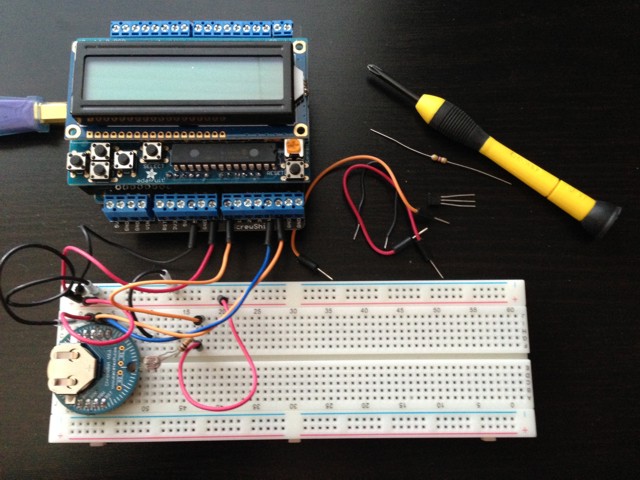
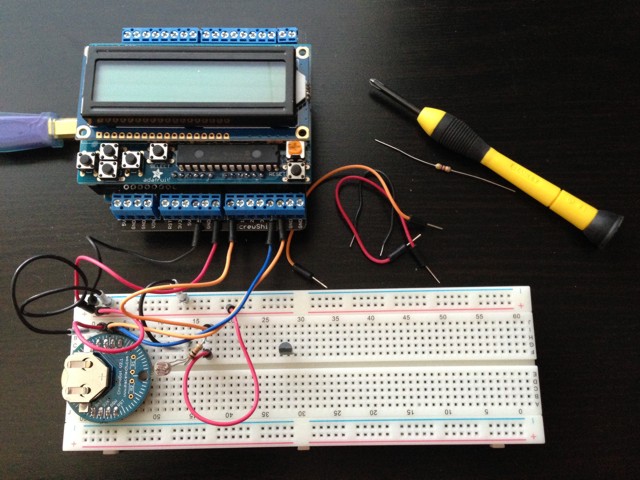
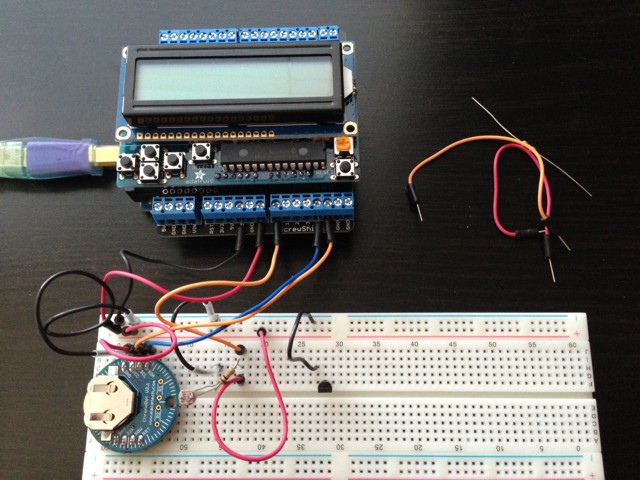
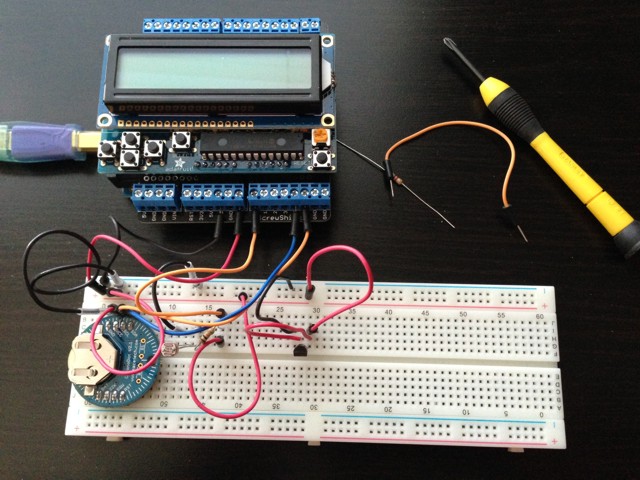
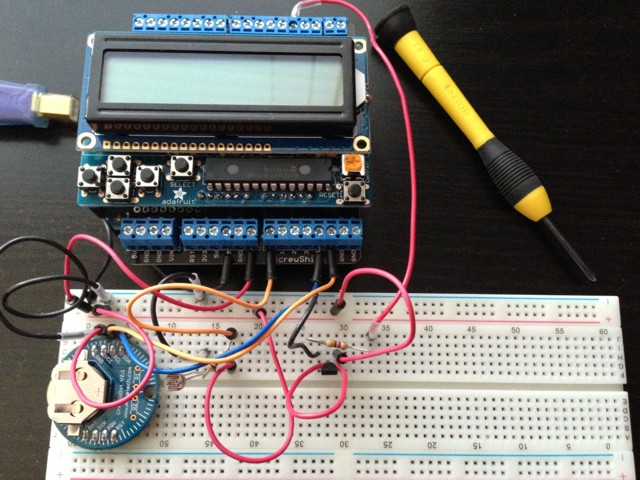
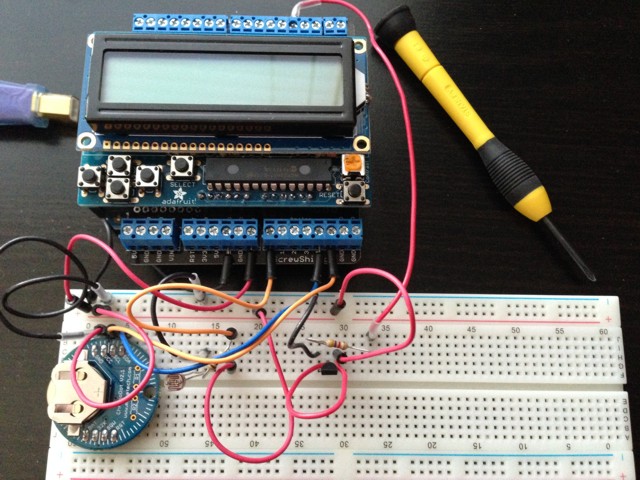
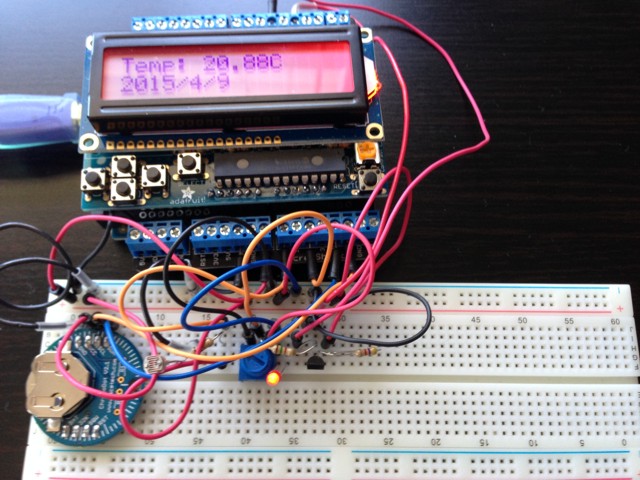
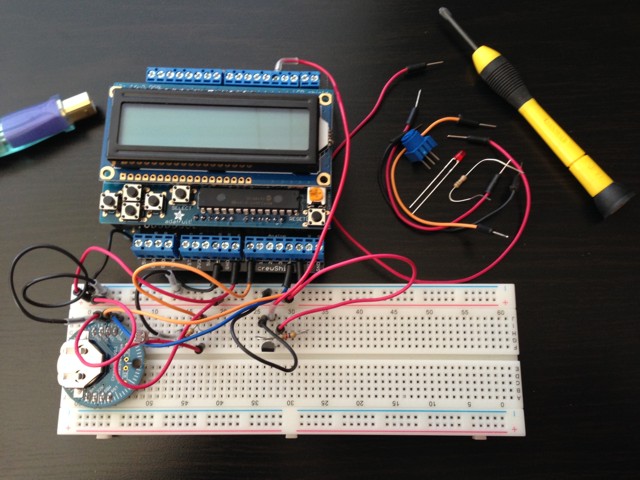
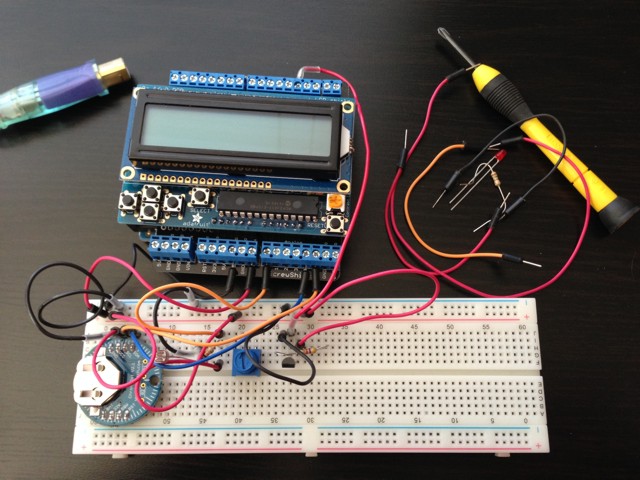
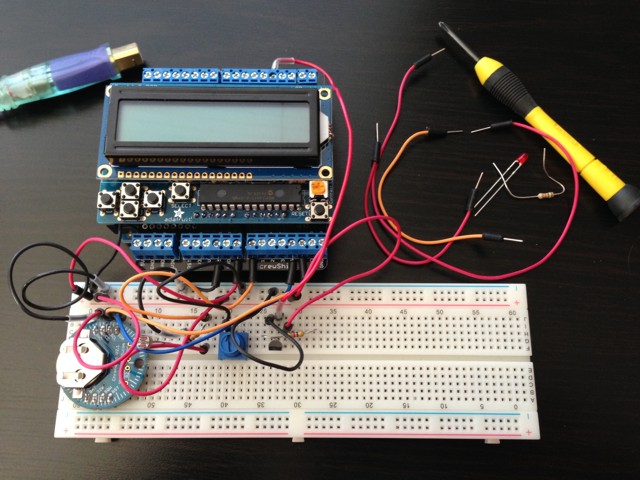
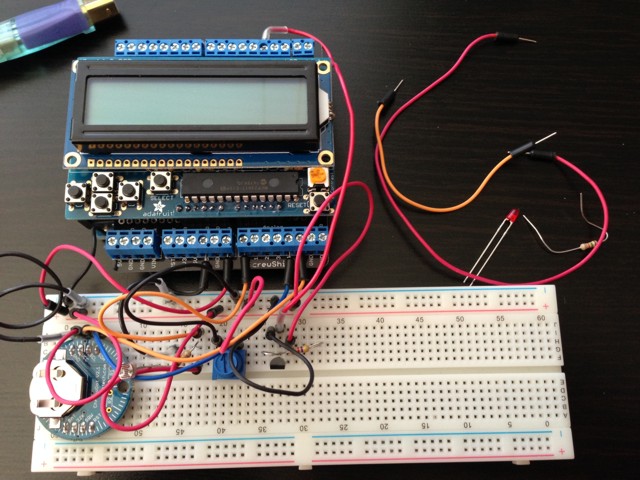
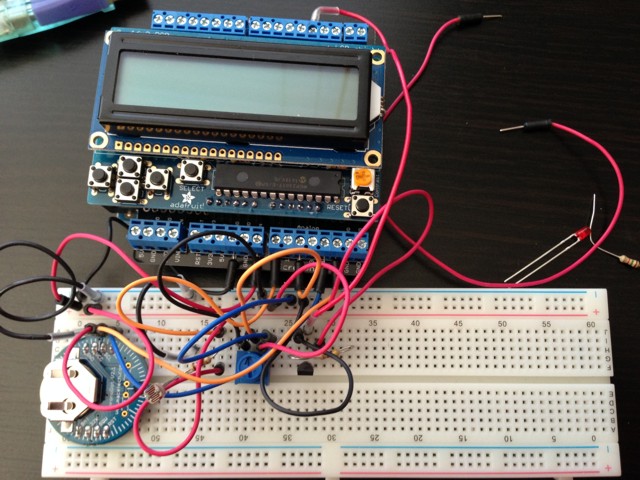
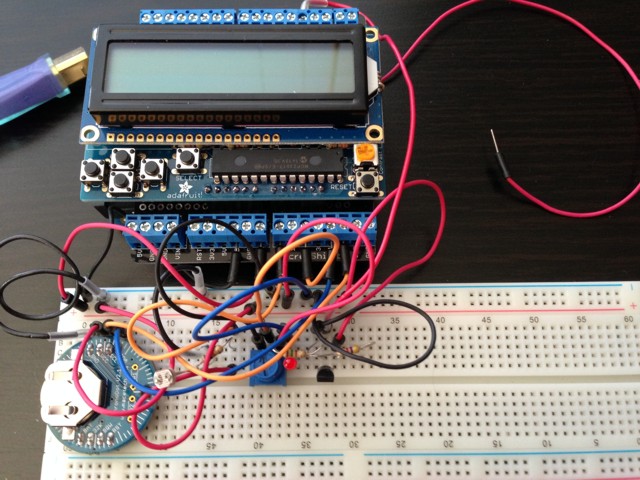
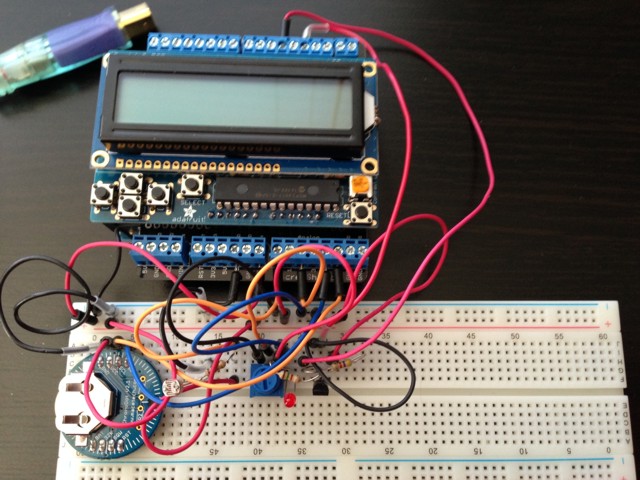
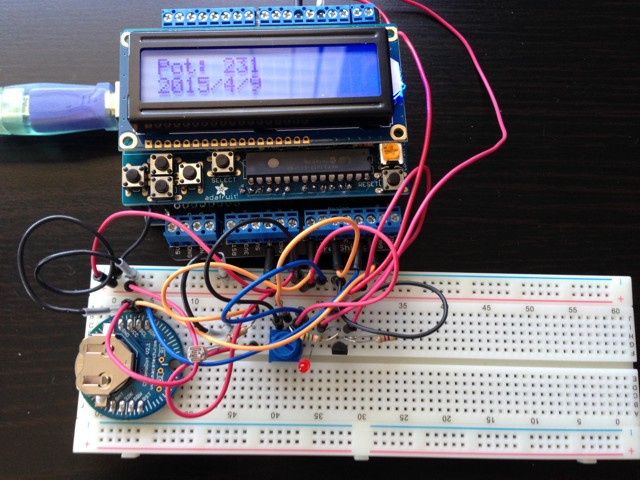
1 X Mini Photocell
1 X Resistor 10k Ohm
1 X One Wire Digital Temperature Sensor – DS18B20
1 X Resistor 4.7k Ohm
1 X Trimpot 10K with Knob
1 X Resistor 1.65k Ohm
1 X 3MM Low Current Red LED
14 X Jumper Wires Premium 3″ M/M
1 X Project #3 – LED Shield – Mk3
LCDShieldMk4.3.ino
// ***** Don Luc *****
// Software Version Information
// 4.3

// include the library code:
#include <Wire.h>
#include <Adafruit_MCP23017.h>
#include <Adafruit_RGBLCDShield.h>
#include <SPI.h>
#include <RTClib.h>
#include <RTC_DS3231.h>
#include <OneWire.h>

RTC_DS3231 RTC;

#define SQW_FREQ DS3231_SQW_FREQ_1024     //0b00001000   1024Hz

Adafruit_RGBLCDShield RGBLCDShield = Adafruit_RGBLCDShield();

// These #defines make it easy to set the backlight color
#define OFF 0x0
#define RED 0x1
#define YELLOW 0x3
#define GREEN 0x2
#define TEAL 0x6
#define BLUE 0x4
#define VIOLET 0x5
#define WHITE 0x7

// Chorno
boolean isChorno = false;
char datastr[100];
// LDR (light dependent resistor)
int LDR_Pin = A0;
String LDR = "";
// Temperature chip i/o
int DS18S20_Pin = 2; //DS18S20 Signal pin on digital 2
OneWire ds(DS18S20_Pin);  // on digital pin 2
String tempZ = "";
// Potentiometer
int potPin = A2;    // select the input pin for the potentiometer
int ledPin = 4;   // select the pin for the LED
boolean isVal = false;
int potPot = 0;
String cap = "";

void loop() {

  // timeChrono();
  timeChrono();

  uint8_t momentaryButton = RGBLCDShield.readButtons();

  if ( momentaryButton ) {

    RGBLCDShield.clear();

    RGBLCDShield.setCursor(0,0);

    if ( momentaryButton & BUTTON_UP ) {
      timeLDR();
      RGBLCDShield.print( LDR );
      RGBLCDShield.setBacklight(GREEN);
    }

    if ( momentaryButton & BUTTON_DOWN ) {
      temperatu();
      RGBLCDShield.print( tempZ );
      RGBLCDShield.setBacklight(RED);
    }

    if ( momentaryButton & BUTTON_LEFT ) {
      getPotentio();
      RGBLCDShield.print( cap );
      RGBLCDShield.setBacklight(BLUE);
    }

    if ( momentaryButton & BUTTON_RIGHT ) {
      RGBLCDShield.print("YELLOW - RIGHT");
      RGBLCDShield.setBacklight(YELLOW);
    }

    if ( momentaryButton & BUTTON_SELECT ) {
      RGBLCDShield.print("OFF");
      RGBLCDShield.setBacklight(OFF);
    }

  }

  delay(3000);

}
setup.ino
void setup() {

  // set up the LCD's number of columns and rows:
  RGBLCDShield.begin(16, 2);
  RGBLCDShield.print("Don Luc!!!");
  RGBLCDShield.setBacklight(VIOLET);

  // ChronoDot
  setupChrono();

  // Pot
  pinMode(ledPin, OUTPUT);

}
ChronoDot.ino
void setupChrono() {

  RTC.begin();

  DateTime now = RTC.now();
  DateTime compiled = DateTime(__DATE__, __TIME__);
  RTC.getControlRegisterData( datastr[0] );

}

void timeChrono() {

    DateTime now = RTC.now();
    DateTime isNow (now.unixtime() + 5572 * 86400L + 26980);

    // set the cursor to column 0, line 1
    RGBLCDShield.setCursor(0, 1);

    if ( isChorno == false )
    {
      isChorno = true;
      RGBLCDShield.print(isNow.year(), DEC);
      RGBLCDShield.print('/');
      RGBLCDShield.print(isNow.month(), DEC);
      RGBLCDShield.print('/');
      RGBLCDShield.print(isNow.day(), DEC);
      RGBLCDShield.print(' ');
      RGBLCDShield.print(' ');
    }
    else if ( isChorno == true )
    {
      isChorno = false;
      RGBLCDShield.print(isNow.hour(), DEC);
      RGBLCDShield.print(':');
      RGBLCDShield.print(isNow.minute(), DEC);
      RGBLCDShield.print(':');
      RGBLCDShield.print(isNow.second(), DEC);
      RGBLCDShield.print(' ');
      RGBLCDShield.print(' ');
    }

}
getLDR.ino
void timeLDR() {

  // LDR
  int LDRReading = analogRead(LDR_Pin);
  LDR = "LDR: ";
  LDR.concat(LDRReading);

}
getPot.ino
void getPotentio() {

    if ( isVal == false )
    {
       isVal = true;
       digitalWrite(ledPin, HIGH);  // turn the ledPin on
    }
    else if ( isVal == true )
    {
       isVal = false;
       digitalWrite(ledPin, LOW);  // turn the ledPin off
    }
    potPot = analogRead(potPin);    // read the value from the sensor
    cap = "Pot: ";
    cap.concat(potPot);

}
getTemperature.ino
float getTemp() {

  //returns the temperature from one DS18S20 in DEG Celsius
  byte data[12];
  byte addr[8];

  if ( !ds.search(addr)) {
      //no more sensors on chain, reset search
      ds.reset_search();
      return -1001;
  }

  if ( OneWire::crc8( addr, 7) != addr[7]) {
      return -1002;
  }

  if ( addr[0] != 0x10 && addr[0] != 0x28) {
      return -1003;
  }

  ds.reset();
  ds.select(addr);
  ds.write(0x44,1); // start conversion, with parasite power on at the end

  byte present = ds.reset();
  ds.select(addr);
  ds.write(0xBE); // Read Scratchpad


  for (int i = 0; i < 9; i++) { // we need 9 bytes
    data[i] = ds.read();
  }

  ds.reset_search();

  byte MSB = data[1];
  byte LSB = data[0];

  float tempRead = ((MSB << 8) | LSB); //using two's compliment
  float TemperatureSum = tempRead / 16;

  return TemperatureSum;

}

void temperatu(){

  float temperature = getTemp();
  tempZ = "Temp: ";
  tempZ.concat(temperature);
  tempZ.concat("C");

}
Don Luc