The Alpha Geek – Geeking Out

#02 – Glasses LED

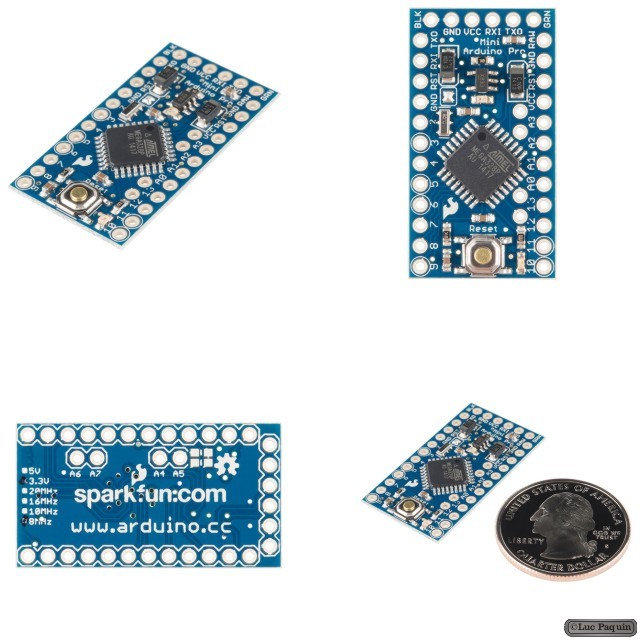
SparkFun – Arduino Pro Mini 328 – 3.3V/8MHz

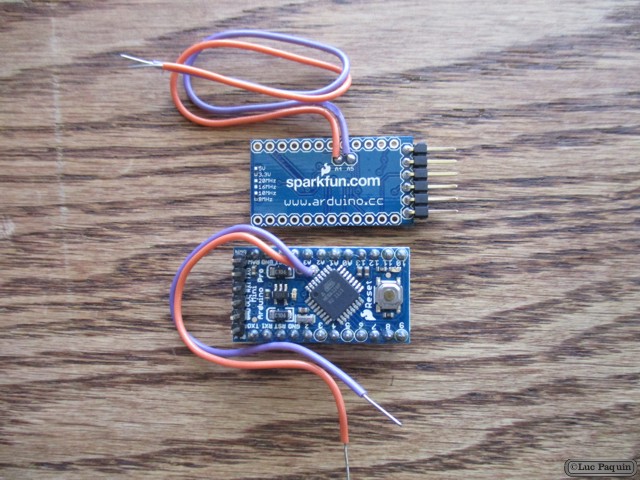
SparkFun DEV-11114 Mk01

SparkFun DEV-11114 Mk02

SparkFun: DEV-11114

Description: It’s blue! It’s thin! It’s the Arduino Pro Mini! SparkFun’s minimal design approach to Arduino. This is a 3.3V Arduino running the 8MHz bootloader. Arduino Pro Mini does not come with connectors populated so that you can solder in any connector or wire with any orientation you need. We recommend first time Arduino users start with the Uno R3. It’s a great board that will get you up and running quickly. The Arduino Pro series is meant for users that understand the limitations of system voltage (3.3V), lack of connectors, and USB off board.

We really wanted to minimize the cost of an Arduino. In order to accomplish this we used all SMD components, made it two layer, etc. This board connects directly to the FTDI Basic Breakout board and supports auto-reset. The Arduino Pro Mini also works with the FTDI cable but the FTDI cable does not bring out the DTR pin so the auto-reset feature will not work. There is a voltage regulator on board so it can accept voltage up to 12VDC. If you’re supplying unregulated power to the board, be sure to connect to the “RAW” pin on not VCC.

The latest and greatest version of this board breaks out the ADC6 and ADC7 pins as well as adds footprints for optional I2C pull-up resistors! We also took the opportunity to slap it with the OSHW logo.

Dimensions: 0.7×1.3″ (18x33mm)

Features:

  • ATmega328 running at 8MHz with external resonator (0.5% tolerance)
  • Low-voltage board needs no interfacing circuitry to popular 3.3V devices and modules (GPS, accelerometers, sensors, etc)
  • 0.8mm Thin PCB
  • USB connection off board
  • Weighs less than 2 grams!
  • Supports auto-reset
  • 3.3V regulator
  • Max 150mA output
  • Over current protected
  • DC input 3.3V up to 12V
  • On board Power and Status LEDs
  • Analog Pins: 8
  • Digital I/Os: 14

Don Luc

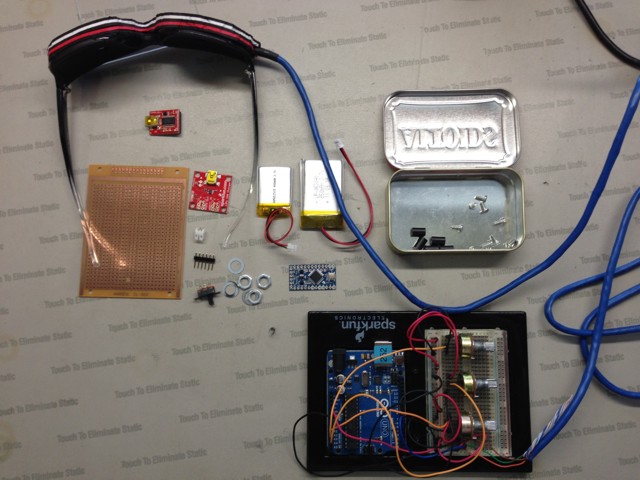
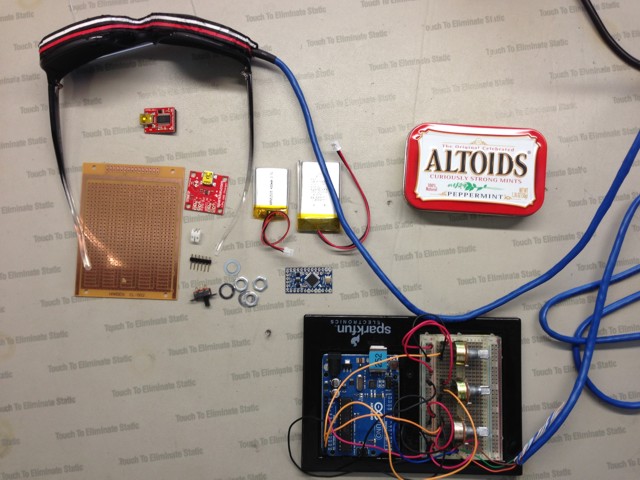
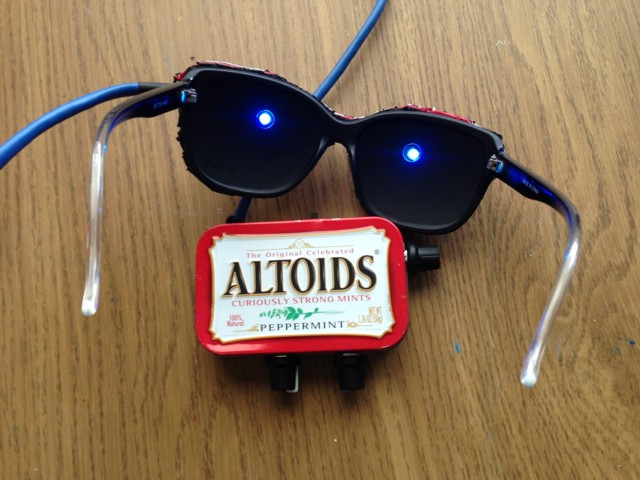
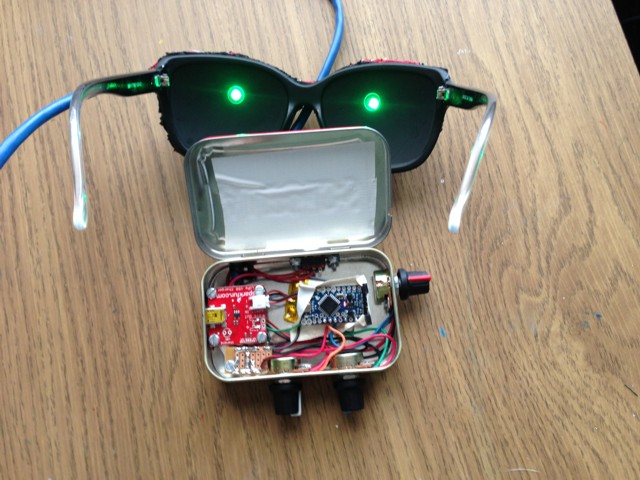
Project #2 – Lens – LED – Mk6

LensLED6a

LensLED6b

LensLED6c

LensLED6d

1 X Arduino Pro Mini 328 – 5V/16MHz

5 X Break Away Headers – Straight

1 X FTDI Basic Breakout – 5V

1 X USB LiPoly Charger – Single Cell

1 X Polymer Lithium Ion Battery – 400mAh

5 X Standoff – Nylon (3/8″, #4-40)

12 X Pan Head, Slotted Drive, #4-40 Thread Size, 1/4″ Length

2 X Nut – Nylon Locknut – #4-40

1 X SPDT Mini Power Switch

3 X Panel Mount 10K potentiometer (Breadboard Friendly) – 10K Linear

1 X Potentiometer Knob – Soft Touch T18 – Red

1 X Potentiometer Knob – Soft Touch T18 – Blue

1 X Potentiometer Knob – Soft Touch T18 – White

22 X Hook-Up Wire – Assortment (Solid Core, 22 AWG)

1 X Prototyping Board

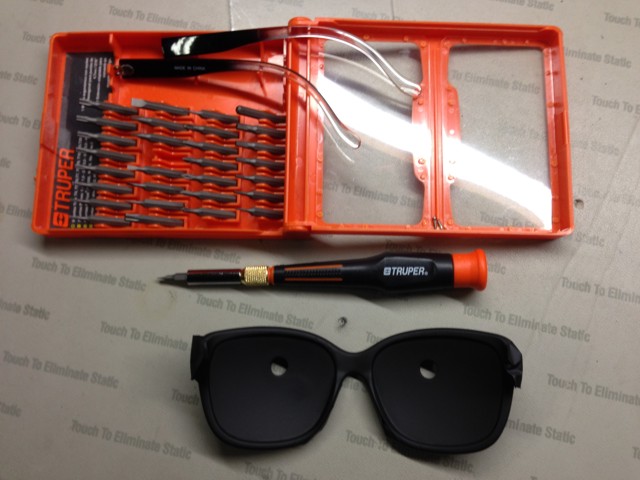
1 X Project #2 – Lens – LED – Mk1

Don Luc

Project #2 – Lens – LED – Mk4

LensLEDMk4

1 X Panel Mount 10K potentiometer (Breadboard Friendly) – 10K Linear

3 X Jumper Wires Premium 6″ M/M

1 X Project #2 – Lens – LED – Mk3

LensLEDMk4.3.ino

// ***** Don Luc *****
// Software Version Information
// 4.1 - 4.2 - 4.3
// sensorNumber

#include 
// Which pin on the Arduino is connected to the NeoPixels?
#define PIN 6
// How many NeoPixels are attached to the Arduino?
#define NUMPIXELS 2
Adafruit_NeoPixel pixels = Adafruit_NeoPixel(NUMPIXELS, PIN, NEO_GRB + NEO_KHZ800);
// Panel Mount 1K potentiometer Brightneed
const int sensorPin = A0;
// Panel Mount 1K potentiometer
const int sensorDelay = A1;
// Panel Mount 1K potentiometer
const int sensorNumber = A2;
// variables:
int sensorValue = 0;         // the sensor value
int sensorMin = 1023;        // minimum sensor value
int sensorMax = 0;           // maximum sensor value
int red = 0;
int green = 0;
int blue = 0;
int x = 0;
long delayVal = 0;
long xp = 0;
int y = 0;
int z = 0;

void loop() {
 
  z = analogRead(sensorNumber);
  y = (z / 127);
  
  // range value:
  switch (y) {
    case  0:
      // Blue
      red = 0;
      green = 102;
      blue = 204;        
      neopix();
      break;
    case 1:
      // Yellow
      red = 255;
      green = 255;
      blue = 0;        
      neopix();
      break;
    case 2:
      // Pink
      red = 255;
      green = 153;
      blue = 203;        
      neopix();
      break;
    case 3:
      // White
      red = 255;
      green = 255;
      blue = 255;        
      neopix();
      break;  
    case 4:
      // Green
      red = 0;
      green = 255;
      blue = 0;        
      neopix();
      break;
    case 5:
      // Orange
      red = 255;
      green = 102;
      blue = 0;        
      neopix();
      break;
    case 6:
      // Violet
      red = 204;
      green = 102;
      blue = 204;        
      neopix();
      break;     
    case 7:
        xp = analogRead(sensorDelay);
        delayVal = (1000 * xp);
        // range value:
        switch (x) {
          case 0:
            // Blue
            red = 0;
            green = 102;
            blue = 204;        
            neopix();
            delay(delayVal); // Delay for a period of time (in milliseconds).
            x = 1;
            break;
          case 1:
            // Yellow
            red = 255;
            green = 255;
            blue = 0;        
            neopix();
            delay(delayVal); // Delay for a period of time (in milliseconds).
            x = 2;
            break;
          case 2:
            // Pink
            red = 255;
            green = 153;
            blue = 203;        
            neopix();
            delay(delayVal); // Delay for a period of time (in milliseconds).
            x = 3;
            break;
          case 3:
            // White
            red = 255;
            green = 255;
            blue = 255;        
            neopix();
            delay(delayVal); // Delay for a period of time (in milliseconds).
            x = 4;
            break;  
          case 4:
            // Green
            red = 0;
            green = 255;
            blue = 0;        
            neopix();
            delay(delayVal); // Delay for a period of time (in milliseconds).
            x = 5;
            break;
          case 5:
            // Orange
            red = 255;
            green = 102;
            blue = 0;        
            neopix();
            delay(delayVal); // Delay for a period of time (in milliseconds).
            x = 6;
            break;
          case 6:
            // Violet
            red = 204;
            green = 102;
            blue = 204;        
            neopix();
            delay(delayVal); // Delay for a period of time (in milliseconds).
            x = 0;
            break;      
          }
          break; 
  }

}

neopin.ino

void neopix() {
  
  for(int i=0; i<NUMPIXELS; i++){
 
     // read the sensor:
    sensorValue = analogRead(sensorPin);

    // apply the calibration to the sensor reading
    sensorValue = map(sensorValue, sensorMin, sensorMax, 0, 255);

    // in case the sensor value is outside the range seen during calibration
    sensorValue = constrain(sensorValue, 0, 255); 
    
    // pixels.Color takes RGB values, from 0,0,0 up to 255,255,255
    pixels.setBrightness( sensorValue );
    pixels.setPixelColor(i, pixels.Color(red,green,blue)); 
    pixels.show(); // This sends the updated pixel color to the hardware.

    delay(50); // Delay for a period of time (in milliseconds).
    
  }
  
}

setup.ino

void setup() {
  pixels.begin(); // This initializes the NeoPixel library.
}

Don Luc

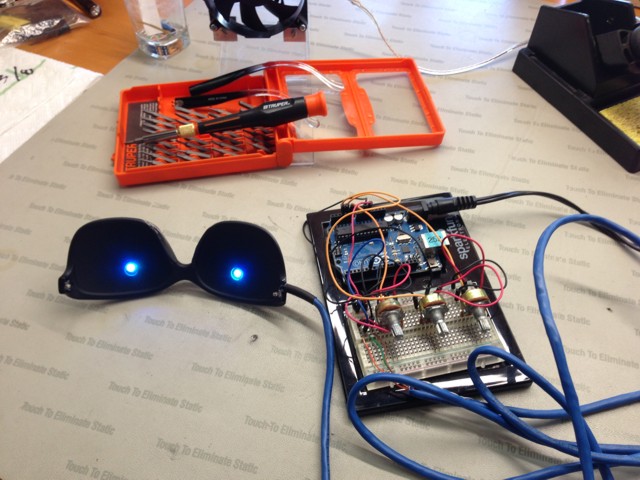
Project #2 – Lens – LED – Mk3

neopixMk3

1 X Arduino and Breadboard Holder

1 X Breadboard – Translucent Self-Adhesive (Clear)

1 X Arduino UNO Rev3

2 X Panel Mount 10K potentiometer (Breadboard Friendly) – 10K Linear

13 X Jumper Wires Premium 6″ M/M

1 X Cable

1 X Project #2 – Lens – LED – Mk1

LensLEDMk3.3.ino

// ***** Don Luc *****
// Software Version Information
// 3.0
// Real
// 3.1
// sensorValue
// 3.2
// red, green, blue
// 3.3
// delayVal

#include <Adafruit_NeoPixel.h>
// Which pin on the Arduino is connected to the NeoPixels?
#define PIN 6
// How many NeoPixels are attached to the Arduino?
#define NUMPIXELS 2
Adafruit_NeoPixel pixels = Adafruit_NeoPixel(NUMPIXELS, PIN, NEO_GRB + NEO_KHZ800);
// Panel Mount 1K potentiometer Brightneed
const int sensorPin = A0;
// Panel Mount 1K potentiometer
const int sensorDelay = A1;
// variables:
int sensorValue = 0;         // the sensor value
int sensorMin = 1023;        // minimum sensor value
int sensorMax = 0;           // maximum sensor value
int red = 0;
int green = 0;
int blue = 0;
int x = 0;
long delayVal = 0;
long xp = 0;

void loop() {
 
  xp = analogRead(sensorDelay);
  delayVal = (20000 + xp);
  // range value:
  switch (x) {
    case 0:
      // Blue
      red = 0;
      green = 102;
      blue = 204;        
      neopix();
      delay(delayVal); // Delay for a period of time (in milliseconds).
      x = 1;
      break;
    case 1:
      // Yellow
      red = 255;
      green = 255;
      blue = 0;        
      neopix();
      delay(delayVal); // Delay for a period of time (in milliseconds).
      x = 2;
      break;
    case 2:
      // Pink
      red = 255;
      green = 153;
      blue = 203;        
      neopix();
      delay(delayVal); // Delay for a period of time (in milliseconds).
      x = 3;
      break;
    case 3:
      // White
      red = 255;
      green = 255;
      blue = 255;        
      neopix();
      delay(delayVal); // Delay for a period of time (in milliseconds).
      x = 4;
      break;  
    case 4:
      // Green
      red = 0;
      green = 255;
      blue = 0;        
      neopix();
      delay(delayVal); // Delay for a period of time (in milliseconds).
      x = 5;
      break;
    case 5:
      // Orange
      red = 255;
      green = 102;
      blue = 0;        
      neopix();
      delay(delayVal); // Delay for a period of time (in milliseconds).
      x = 6;
      break;
    case 6:
      // Violet
      red = 204;
      green = 102;
      blue = 204;        
      neopix();
      delay(delayVal); // Delay for a period of time (in milliseconds).
      x = 0;
      break;      
  }

}

neopin.ino

void neopix() {
  
  for(int i=0; i

setup.ino

void setup() {
  pixels.begin(); // This initializes the NeoPixel library.
}

Don Luc

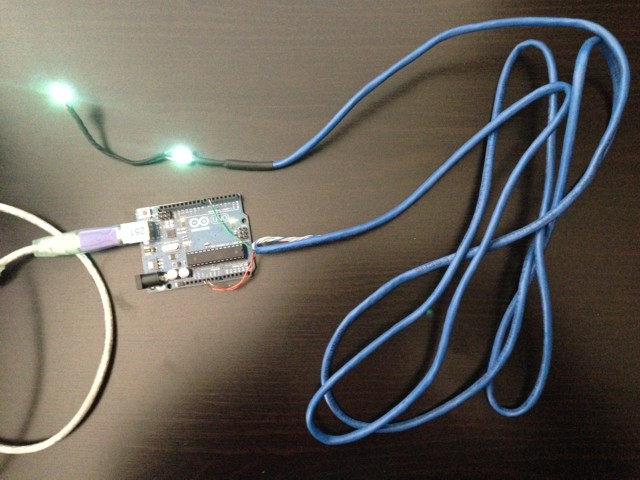
Project #2 – Lens – LED – Mk2

LensLEDMk2

1 X Arduino UNO Rev3

1 X Cable

1 X Project #2 – Lens – LED – Mk1

LensLEDMk2.1.ino

// ***** Don Luc *****
// Software Version Information
// 2.1

#include <Adafruit_NeoPixel.h>

// Which pin on the Arduino is connected to the NeoPixels?
#define PIN            6

// How many NeoPixels are attached to the Arduino?
#define NUMPIXELS      2

Adafruit_NeoPixel pixels = Adafruit_NeoPixel(NUMPIXELS, PIN, NEO_GRB + NEO_KHZ800);

int delayval = 500; // delay for half a second

void loop() {

  for(int i=0;i<NUMPIXELS;i++){
    // pixels.Color takes RGB values, from 0,0,0 up to 255,255,255
    pixels.setBrightness(125);
    pixels.setPixelColor(i, pixels.Color(50,150,50)); // Moderately bright green color.
    pixels.show(); // This sends the updated pixel color to the hardware.
    delay(delayval); // Delay for a period of time (in milliseconds).
    
  }
}

setup.ino

void setup() {
  pixels.begin(); // This initializes the NeoPixel library.
}

Don Luc

Categories
Archives